Introduction
Using iSpring Presenter 7
Pricing and Support
Conclusion
Introduction
iSpring Presenter 7 is a PowerPoint add-in which enables you to create media-rich courses and presentations with quizzes
in HTML5 andFlash. This add-in helps you create course content within PowerPoint, enhance it with video narrations,
create branching scenarios and quizzes, thereafter publish it to mobile-ready formats, e-learning platforms, and as
distributable standalones.
iSpring Presenter 7 is from iSpring Solutions, an Alexandria, VA, USA based entity. You can learn more
about the iSpring Presenter and download it as a trial version
from their site. My contact
at iSpring Solutions for this review was Polina Khizhnyak - thank you, Polina.
Back
Using iSpring Presenter 7
Download the installer from the link given above. You can also download their trial version -- this works the same way as
the full version of the add-in, but is limited to 30 days. Once installed, you will see a new
iSpring Presenter 7 tab on the
Ribbon within
PowerPoint 2013, as shown highlighted in
red within Figure 1. Although this tutorial is done in PowerPoint 2013,
iSpring Presenter 7 works within PowerPoint 2010 and 2007 too.
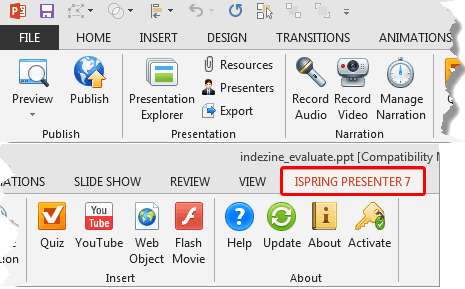
Figure 1: iSpring Presenter 7 tab of the Ribbon
All the options within the iSpring Presenter 7 tab are explained below:
1. Preview
- Before publishing the presentation to Flash or HTML5, you can preview your entire presentation or
several particular slides to test their look and functionality. Click the down-arrow on the Preview
button to bring up the menu you can see in Figure 2, below. Then choose one of the available options:
Preview All Slides, Preview Selected Slides, and
Preview from Current Slide.
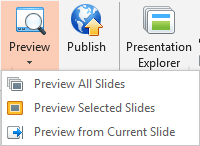
Figure 2: The Preview menu2. Publish
- Click the Publish button to open the Publish Presentation
dialog box, as shown in Figure 3, below. Here you can publish presentations to Flash and HTML5 format
in just a couple of clicks. Publishing to SCORM, AICC, and xAPI is also supported. There are options available to
fine-tune appearance settings, compression and playback options for the output presentation.
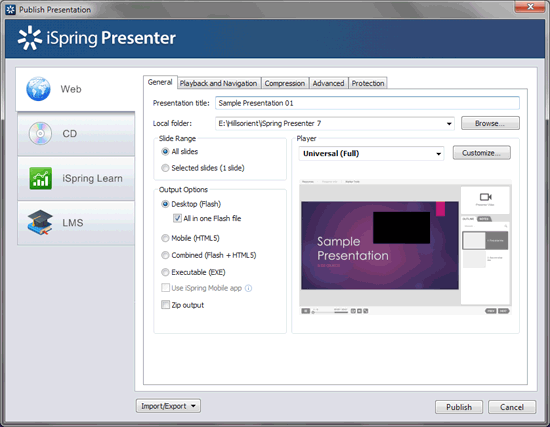
Figure 3: The Publish Presentation dialog box
Tip: Learn more about the publish options in our previous
iSpring Converter (product now discontinued) review page.
This new iSpring Presenter 7 product though has many more options, including exporting to a folder (or a CD, an EXE file,
etc.). Additionally, it also supports
iSpring Learn, a one-stop deployment option
that’s integrated with all iSpring authoring tools.
3. Presentation Explorer
- Brings up the Presentation Explorer window, as shown in Figure 4,
below. The Presentation Explorer window shows an overview of your presentation and gives access
to features such as editing slide titles, hiding slides, adjusting slide durations, adding quizzes, etc. All options
except adding quizzes influence the original PowerPoint presentations as well.
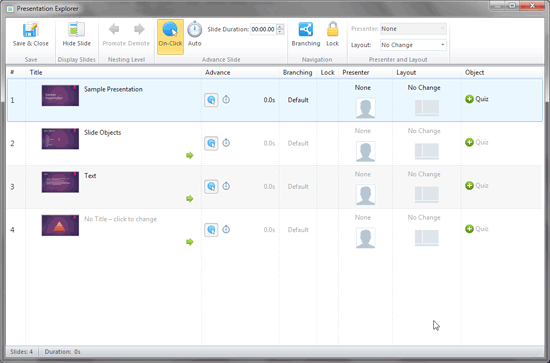
Figure 4: Presentation Explorer window4. Resources
- This brings up the Presentation Resources window
(see Figure 5), which allows you to add, edit and delete references, file attachments and web links.
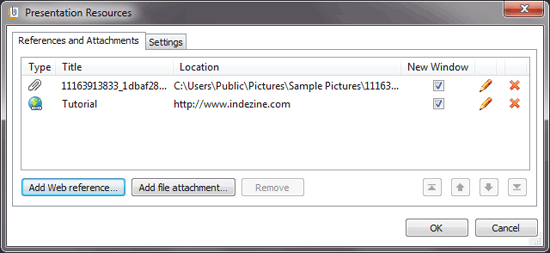
Figure 5: Presentation Resources window5. Presenters
- Opens the Presenters window, as shown in Figure 6. Here you
can add, edit, and delete presenters and specify company info. Information about presenters can be displayed as a
block over the outline or in the top bar as a drop-down menu. iSpring Presenter allows you to add a custom company logo
for each presenter. You can also set a common logo that is applied to all presenters.
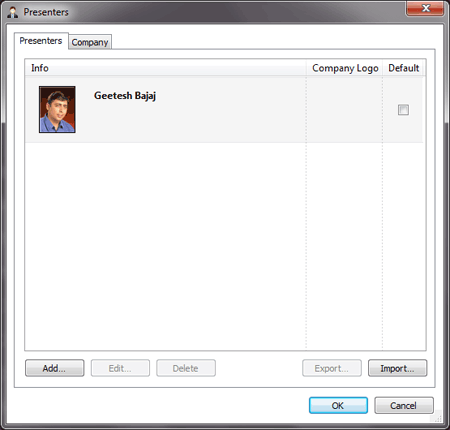
Figure 6: Presenters window- Once you export your presentation, you will see this Presenter info within the output, as shown in
Figure 7, below.

Figure 7: Presenter info within the output from iSpring Presenter6. Export
- All the resources that you add to your presentation are normally placed into a folder in the
directory where your presentation is saved. The project’s files will be grouped into specific subfolders according to
the file type. You can save a copy of the iSpring’s project files to any location and share it with other users.
7. Record Audio
- Click the Record Audio button to launch the
Record Audio Narration window, as shown in Figure 8. Here you can record audio
narrations by reading aloud your text notices or any other verbal announcements and synchronizing them with your
Slide Show. You will need an attached microphone for
this option to work.
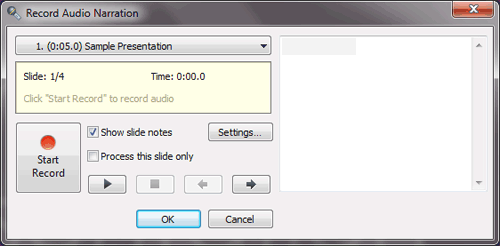
Figure 8: Record Audio Narration window
Tip: Looking for a good microphone suitable for recording narrations within iSpring tools and PowerPoint?
Explore our
PowerPoint Microphones page.
8. Record Video
- This will bring up the Record Video Narration window, as shown in
Figure 9. To use this feature, you must have an attached webcam.
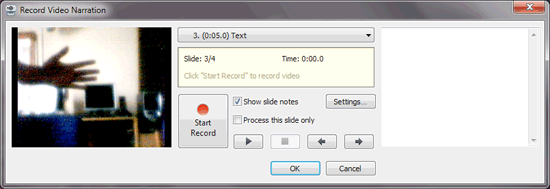
Figure 9: Record Video Narration window9. Manage Narration
- Opens the Narration Editor window (see Figure 10). With
this option you can conveniently synchronize your presentation with imported or recorded video and audio. It's also
possible to sync audio/video and narration with animations and transitions.
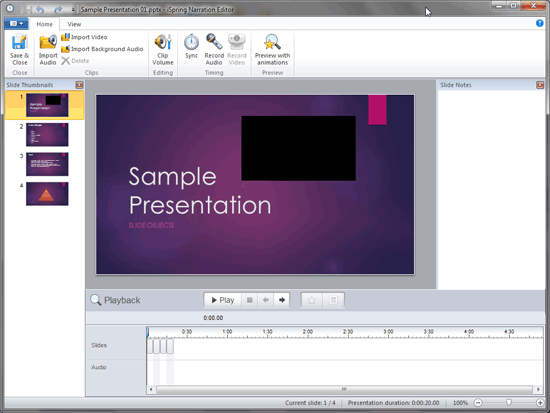
Figure 10: Narration editor window10. Quiz
- Use the Quiz button to create a quiz or survey in the integrated
iSpring QuizMaker tool (see Figure 11, below).
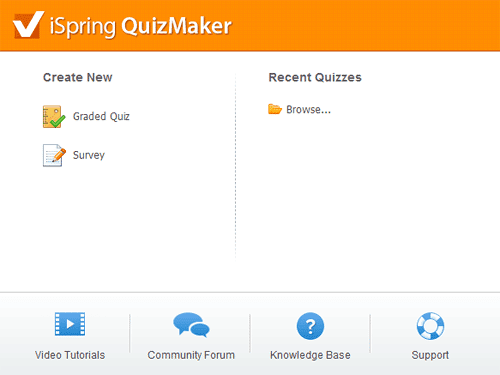
Figure 11: iSpring QuizMaker11. YouTube
- Allows to insert YouTube videos into your presentation, as shown in Figure 12.
Note that an online connection is essential to insert YouTube videos into your presentation. Embedded YouTube videos must
be available for public access.
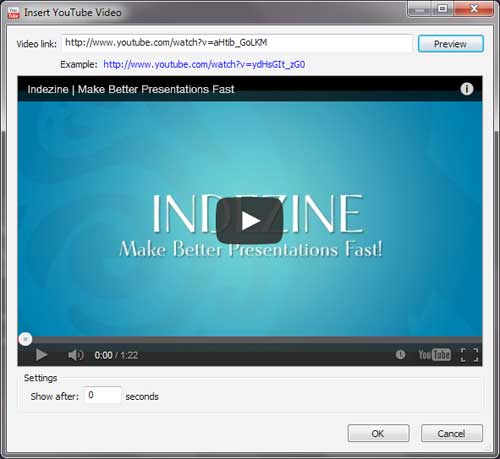
Figure 12: Insert YouTube Video12. Web Object
- With this option you can insert web pages or online documents using their web addresses
(e.g. PDF document), local files stored on your computer, and web pages or online video using embed code. In
Figure 13, below you can see the Insert Web Object window with a web page.
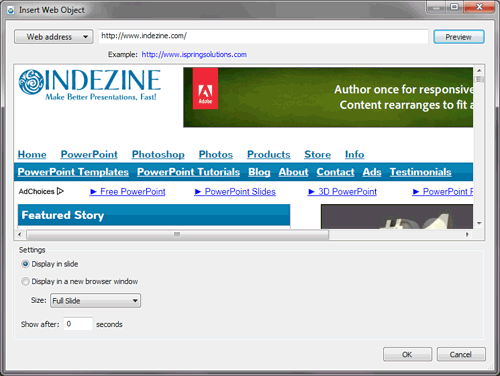
Figure 13: Insert Web Object window13. Flash Movie
- This option allows you to insert local flash movie stored on your computer into your PowerPoint
slides.
HTML5 output from iSpring Presenter can also be viewed on the free
iSpring Viewer for
mobile devices (iOS and Android).
Back
Pricing and Support
iSpring Presenter 7 costs US$697, and multiple user license are available.
Support is through e-mail, telephone, and online FAQ.
Back
Conclusion
iSpring Presenter 7 is probably the best product in its class that allows you to use your new or existing PowerPoint
content to create learning content suitable for deploying across a wide spectrum of options. Earlier versions of this
product were extensively featured -- and this new version is in a class by itself.
Back


