Adding equations in your PowerPoint slide is a powerful way to present and communicate mathematical, scientific, and technical information to your audiences. Most people don’t add equations because it may appear like a complicated process or even unnecessary. However, putting in the effort to add an equation can make a big difference. And although some users may find this process cumbersome, it’s quite easy once you do so a few times.
In fact, there are two ways to add equations in PowerPoint. The first is to use one of the ready-to-use equations and then make small changes to them as needed. The second option is to create the entire equation from scratch. Whichever option you choose, you first need to access the equation options. We cover how to do so in the following sections.
- Access Equation Options
- Use the Equations gallery
- Create Equations from Scratch
1. Access Equation Options
Follow these steps to access equation options:
- Within PowerPoint, navigate to the slide where you want to insert the equation. Click on the text placeholder where you want the equation inserted. If you do not have a text placeholder, you can easily insert a new text box. Either way, click in this text placeholder or box to establish an insertion point, as shown highlighted in red within Figure 1, below.
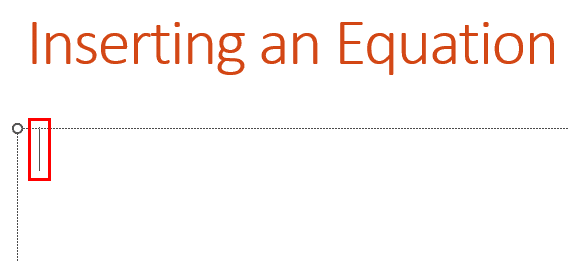
Figure 1: Establish an insertion point- Next, you can access the Insert tab of the Ribbon and locate the Equation button. You will notice that the Equation option is not one but two buttons. The upper part of the button is highlighted in red within Figure 2, below, and the lower part is highlighted in green.
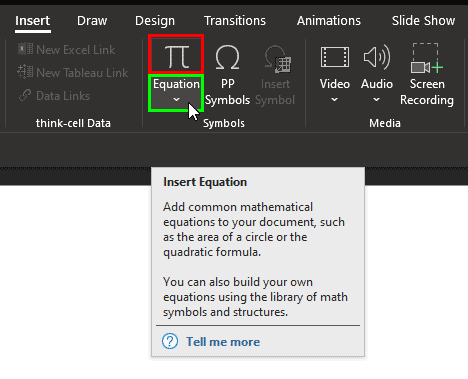
Figure 2: Access the Equation button- If you click the upper part of the button, you will see the contextual Equation tab of the Ribbon, as shown highlighted in red within Figure 3, below. Do note that since this tab has so many options, we had to break the tab down into two parts within Figure 3.
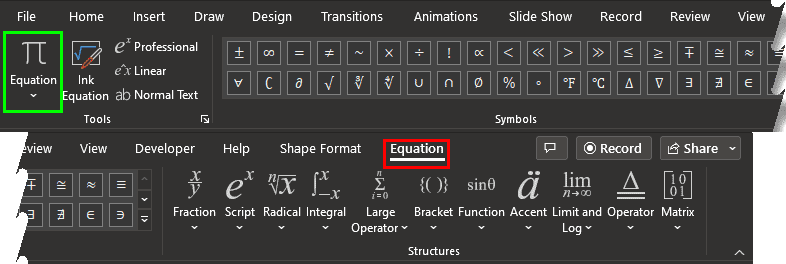
Figure 3: Equation tab of the Ribbon- If you click on the lower part of the button, shown highlighted in green within Figure 2, you will see a drop-down list of ready-to-use equations, as shown in Figure 4, below. These same options can be accessed if you click the Equation button within the Equation tab of the Ribbon, highlighted in green within Figure 3, above.
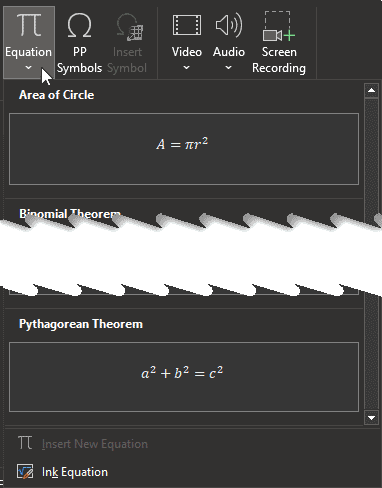
Figure 4: Equation gallery
Back
2. Use the Equations Gallery
Follow these steps to use ready-to-use content from the Equations gallery:
- Make sure that you have established an insertion point, as explained in the preceding section. Next, bring up the Equations gallery, as shown in Figure 4, above.
- Now, choose any of the equations within this gallery. If this gallery does not contain an equation like what you need, choose something that looks similar. Alternatively, you can also follow the steps detailed in the next Create Equations from Scratch section.
- We chose the Pythagoras Theorem option within the Equations gallery, as shown highlighted in red within Figure 5, below.
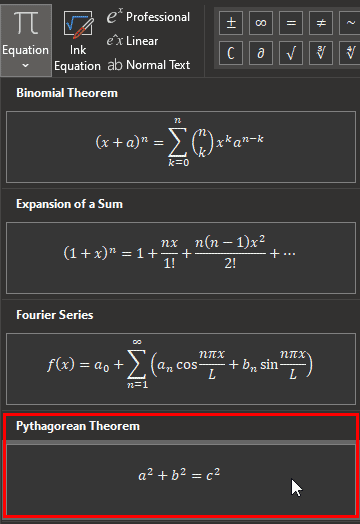
Figure 5: Using the Equations gallery- Doing so places an equation in your slide, as shown in Figure 6, below.
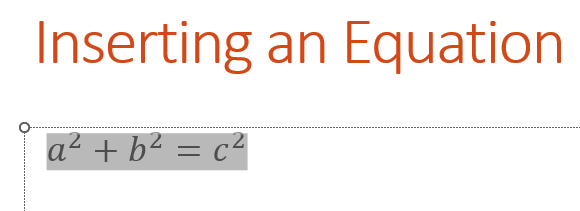
Figure 6: Equation inserted on slide- All numbers and operators in the equation are editable. Select any of them and overtype to make changes.
Back
3. Create Equations from Scratch
- Make sure that you have established an insertion point, as explained in the Access Equation Options section. Next, access the Insert tab of the Ribbon, and click the top part of the Equation button to bring up the contextual Equation tab, as shown in Figure 3, previously on this page. Your prompt text will now change to Type equation here, as shown in Figure 7, below. Alternatively, press the Alt + = keyboard shortcut key to achieve the same results.
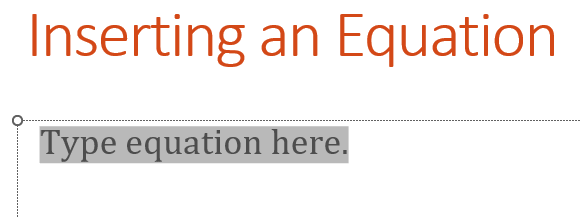
Figure 7: Type equation here- Within the Structures group, there are several equation structures available, as shown in Figure 8, below. We clicked on the Radical button highlighted in red within Figure 8 to open the Radicals gallery. Click any of the options in this gallery to insert this equation snippet.
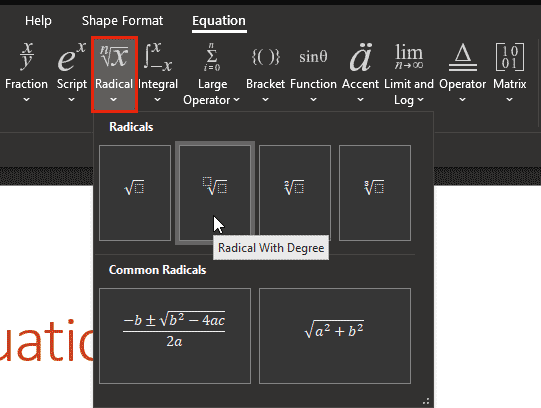
Figure 8: Structures group- This snippet will now be inserted on your insertion point, as shown in Figure 9, below.

Figure 9: Radical equation snippet- Again, all numbers and operators in the equation are editable. Select any of them and overtype to make changes, as shown in Figure 10, below.

Figure 10: Radical equation edited- To add an operator or another symbol, click after the existing equation to establish your insertion point. Next, access the Equation tab of the Ribbon as explained previously on this page. You will find the Symbols group. Locate the operator you want to add. In our case, we clicked on the Less Than or Equal To option, as shown highlighted in red within Figure 11, below. Doing so inserts this operator on the slide, as shown highlighted in blue within Figure 11.
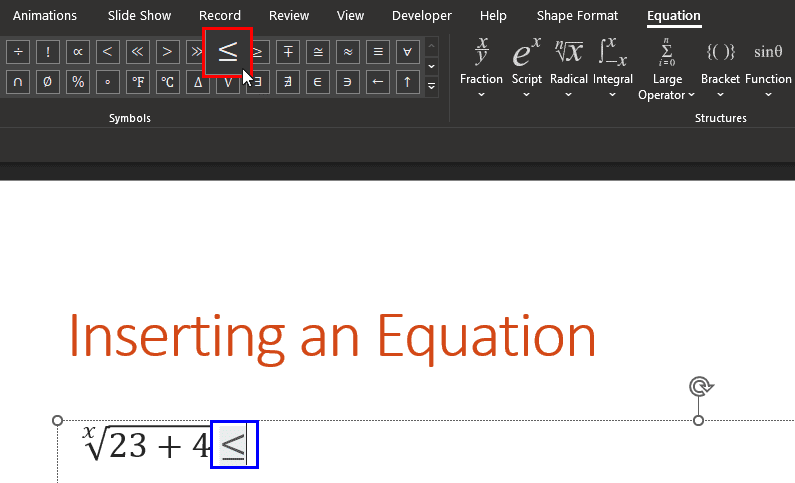
Figure 11: Add operators and other symbols- You can also directly type within the equation, as we did to add an ‘x,’ as shown in Figure 12, below.

Figure 12: Equation typed in
Back
Whichever option you choose, you will realize that it is easy to add equations in PowerPoint.


