A PPTX file or any of the new file formats that Office 2007 and later use such as POTX or THMX are different than the older binary file formats such as PPT. That's because these new file formats that end with an “X” are essentially XML based file formats.
Even more interesting is the fact that the actual file is not an XML based file but only a wrapper that contain many disparate and related XML based elements. The wrapper technology used is just simple ZIP technology. If you want to edit Office XML files, you will therefore need to unzip, edit, and finally zip the file. Alternatively, you can perform XML Editing within Visual Studio 2010. While the former process is time consuming and error prone, the latter process requires that you buy a copy of Visual Studio 2010 – a product that is expensive and no longer available! Unfortunately, the process of editing Office XML files does not work as well in later versions of Visual Studio.
There is a third, more effective way of achieving the same results using 7-Zip and Visual Studio Express -- both of these products are free!
Before you start, you must have these two programs installed:
- Download 7-Zip and install.
- Download Visual Studio 2010 Express. You just need Visual Basic 2010 Express rather than the entire Visual Studio 2010 Express package. You will be required to sign with your Microsoft Account. Do sign up for a free visual Studiodev Essentials account to access the download. Even if you downloaded the entire Visual Studio 2010 Express package, you can opt to install just the Visual Basic part, as shown highlighted in red within Figure 1, below.
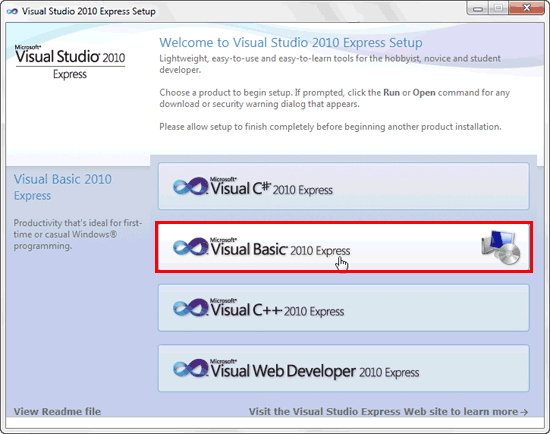
Figure 1: Visual Basic 2010 Express is all you need
Once both the programs are installed on your computer, follow these steps:
- Launch 7-Zip File Manager from the Start menu. This opens the 7-Zip File Manager window, as shown in Figure 2. Within this window, click the Tools option, as shown highlighted in red within Figure 1, above. From the resultant drop-down menu, select Options.
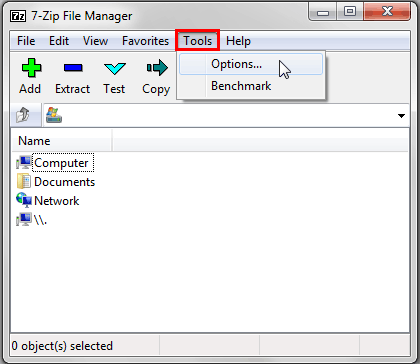
Figure 2: 7-Zip File Manager window- This opens the Options dialog box as shown in Figure 3 -- within this dialog box, select the Editor tab, as shwon highlighted in red within Figure 3, below. Then click the Browse button, highlighted in blue within Figure 3.
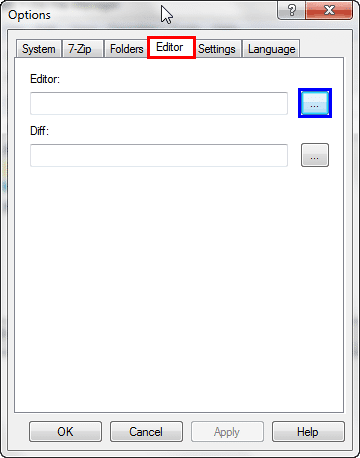
Figure 3: Editor tab- Navigate to, and select the vbexpress.exe file, as shown highlighted in red within Figure 4, below. This file will be typically located within the C:\Program Files\Microsoft Visual Studio 10.0\Common7\IDE folder. Thereafter, click the Open button.
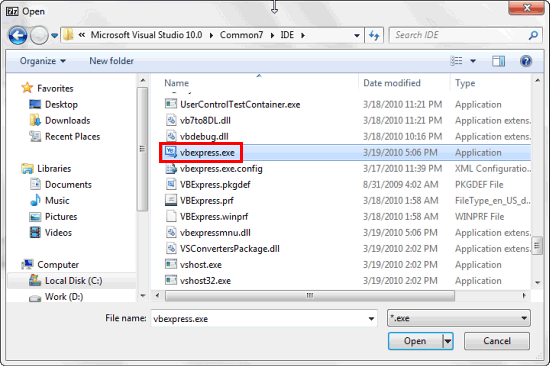
Figure 4: vbexpress.exe file selected- If you are using Visual Studio 2013, you can select the devenv.exe file, typically located within the C:\Program Files (x86)\Microsoft Visual Studio 12.0\Common7\IDE folder.
- This will take you back to Options window. Click the OK button here to proceed.
- Then, using the navigation bar, as shown highlighted in red within Figure 5, below, access the folder where your PPTX / POTX / THMX file is located. Select the file which you want to edit -- make sure you just click once to select the file (don't double click).
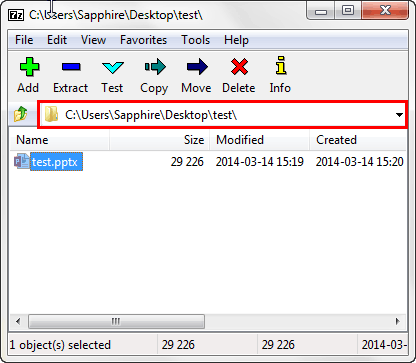
Figure 5: PPTX file to be edited is selected- With the PPTX / POTX / THMX file selected, choose the File | Open Inside menu option, as shown in Figure 6, below.
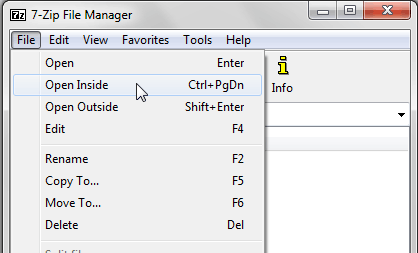
Figure 6: File | Open Inside menu option- This opens the selected PPTX / POTX / THMX file within the 7-Zip File Manager with all of its content, as shown in Figure 7, below. Here select the ppt folder (refer to Figure 7 again).
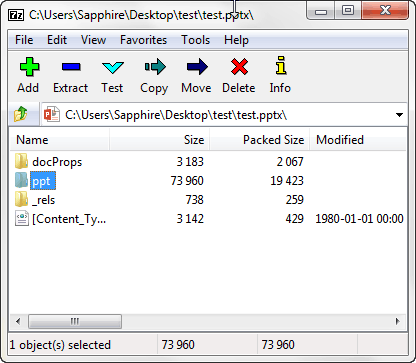
Figure 7: PPTX file opened within the 7-Zip File Manager- Now, navigate to and select the XML file you want to edit. For example, we selected the ppt\theme\theme1.xml file, as shown in Figure 8, below.
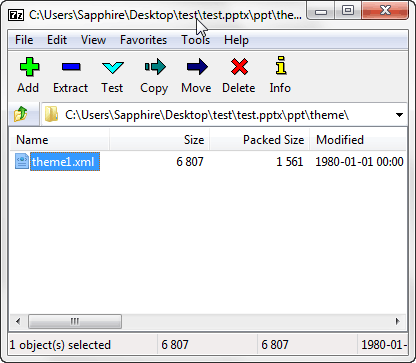
Figure 8: XML file to be edited is selected- With the XML file selected, make sure you do not double-click! Instead, choose the File | Edit menu option as shown in Figure 9, below.
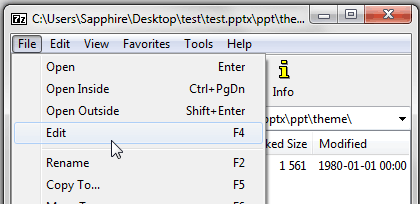
Figure 9: File | Edit menu option- This will open the selected XML file within Visual Basic Express, as shown in Figure 10, below.
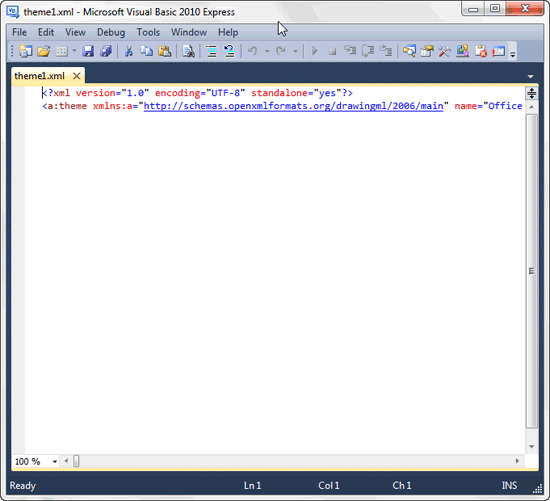
Figure 10: Selected XML file opened within Visual Basic Express- To view the entire document for easier editing, select the Edit | Format Document menu option, as shown in Figure 11, below. You can also use the keyboard sequence Ctrl + K, Ctrl + D in quick succession.
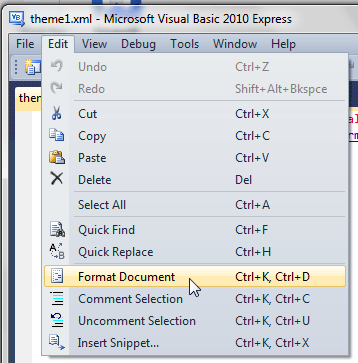
Figure 11: Edit | Format Document menu option- This displays the document code hierarchically, as shown in Figure 12. Make edits as required. For example, we wanted to change the Theme name (text highlighted in orange within Figure 12) and Theme Color name (text highlighted in pink within Figure 12).
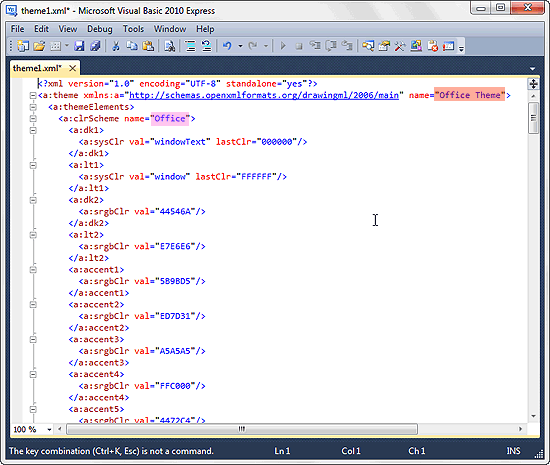
Figure 12: Entire document's code view- Change the text just by selecting the old text and typing the new one. We changed both the Theme name and the Theme Color name to 'Test 1', as shown in Figure 13, below.
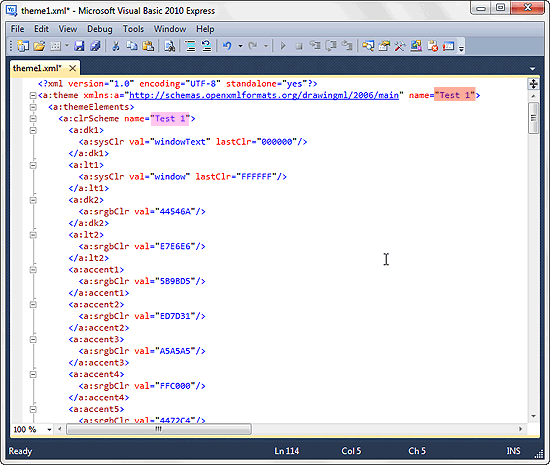
Figure 13: Theme name and Theme Color name changed- Once done, save the XML file using the Ctrl + S keyboard shortcut and close the Visual Basic Express interface. This opens a 7-Zip message window as shown in Figure 14, below.
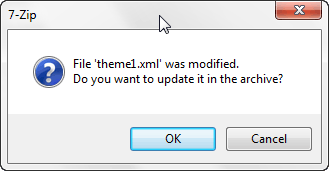
Figure 14: 7-Zip message window- Click OK and your editing work is completed.
- Now if you open your edited PPTX / POTX / THMX file within PowerPoint, you can see the changes. Figure 15, below, shows our sample PPTX file in PowerPoint 2010. Notice the Theme name (highlighted in red within Figure 15) and Theme Colors name (highlighted in blue within Figure 15) changed to 'Test 1'.
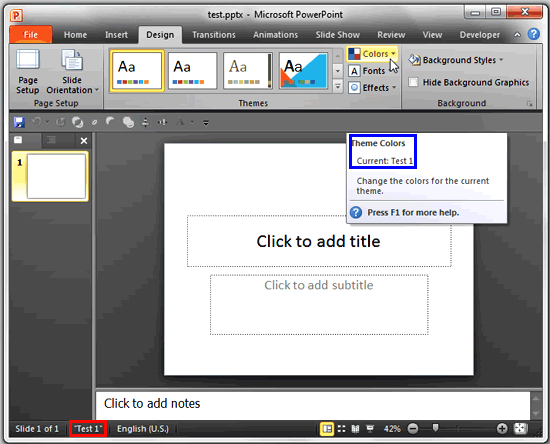
Figure 15: PowerPoint presentation reflecting the changed Theme name and Theme Color name
 This technique of using 7-Zip and Visual Studio Express was discovered by Echo Swinford -- thank you so much, Echo. Here's a link to her original article.


