Slide Layouts are a very useful feature
because they let you use a boilerplate arrangement of placeholders repeatedly, resulting in slides that are laid out consistently.
And yes, you can also create your own custom Slide
Layouts. While very few users create their own custom Slide Layouts, even fewer will create a custom Slide Layout with
pictures! That's regrettable since Picture Slide Layouts can make your slides look so unique. In this tutorial, we will show you
how easy it is to create your own Picture Slide Layout
in PowerPoint 2013:
- Launch PowerPoint. You will see the
Presentation Gallery. Here, select
the Blank Presentation to open a blank presentation with a new single slide.
- Now, access the Design tab of the
Ribbon, and from the Themes drop-down
gallery choose any Theme. For this tutorial we choose Basis
Theme, as shown highlighted in red within Figure 1. You can choose any other Theme
as required.
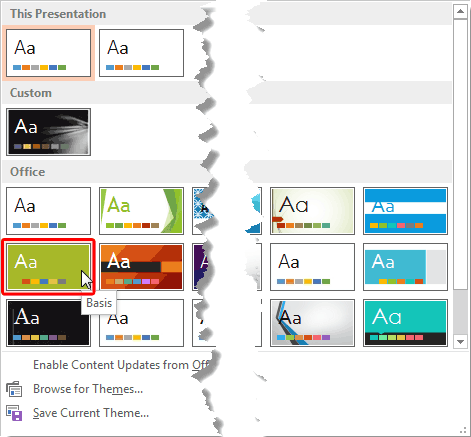
Figure 1: Themes drop-down gallery- Within the Home tab of the Ribbon, click the Layout
button (highlighted in red within Figure 2) to access the Layout
drop-down gallery, as shown in Figure 2. Now
change the layout of the active slide
to Picture with Caption, as shown highlighted in blue within
Figure 2.
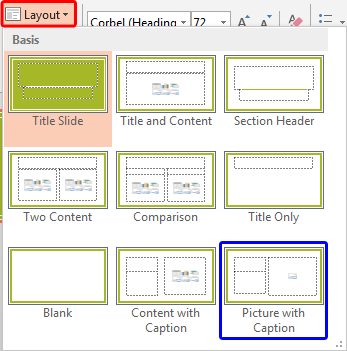
Figure 2: Layout drop-down gallery- This changes the layout of your active slide to Picture with Caption, as shown in
Figure 3. Click the Pictures icon (highlighted in red
within Figure 3) within the Picture placeholder.
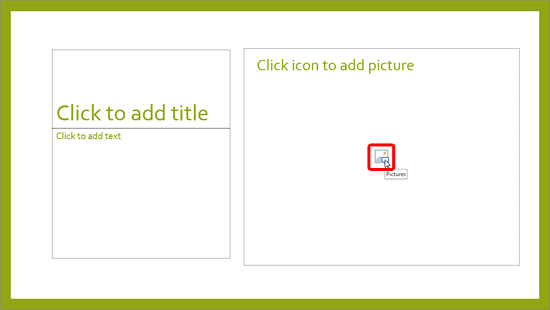
Figure 3: Pictures icon- This brings up the Insert
Picture dialog box, as shown in Figure 4. Navigate to the folder where your pictures are located and select
any picture you need, and click the Insert button, as shown highlighted in red
within Figure 4.
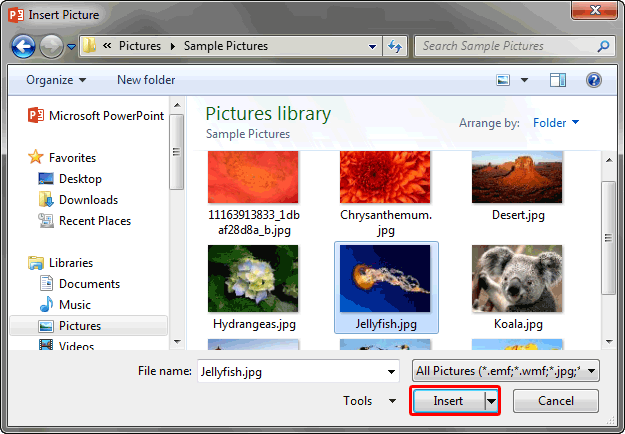
Figure 4: Insert Picture dialog box- This adds the selected picture to your active slide, as shown in Figure 5, below. Note that the
appearance of your slide depends on the Theme you chose earlier in Step 2. You however are not limited to the
default Picture with Caption layout. We will next create our own customized Picture Slide Layout.
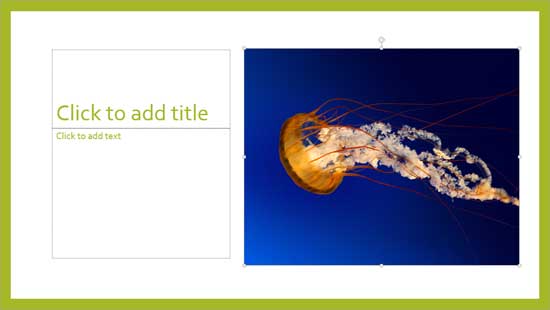
Figure 5: Picture inserted within the Picture placeholder- To create your own Picture Slide Layout, access the View tab of the
Ribbon and click the Slide Master
button, as shown highlighted in red within Figure 6.

Figure 6: Slide Master button- This opens Slide Master View.
In Figure 7, below you can see the Picture with Caption layout selected within the left
pane (indicated by the orange highlight) and the same Picture with Caption layout can be seen within the
Slide Area (highlighted in
blue).
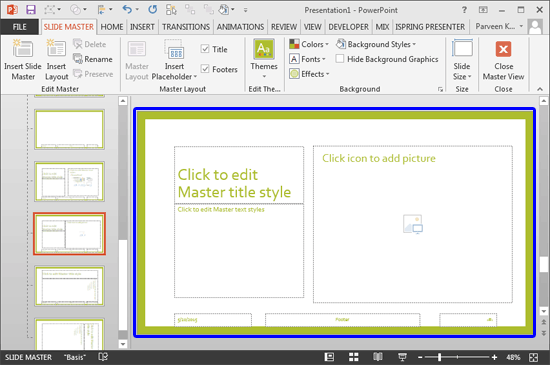
Figure 7: Slide Master view- Now, right-click the layout thumbnail that represents the Picture with Caption layout within the
left pane to bring up a contextual menu, as shown in Figure 8. From the contextual menu choose the
Duplicate Layout option (refer to Figure 8, again).

Figure 8: Duplicate Layout option- This will create a copy of the Picture with Caption layout. Then, right-click the duplicated
Picture with Caption layout, and from the contextual menu that appears choose the Rename Layout
option, as shown in Figure 9.
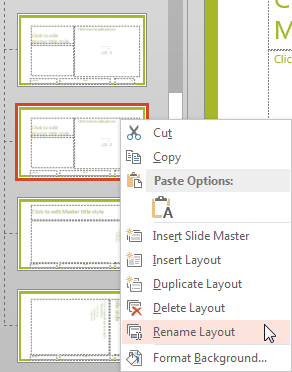
Figure 9: Rename Layout option- This brings up the Rename Layout dialog box, provide a descriptive name, and click the
Rename button.
- Now, modify as required. You can
resize and
move the existing Picture placeholder,
or even add more Picture placeholders by using the options in the
Insert Placeholder button to end
up with your own Picture Slide Layout, as shown in Figure 10, below (compare with Figure 7,
shown earlier on the page).
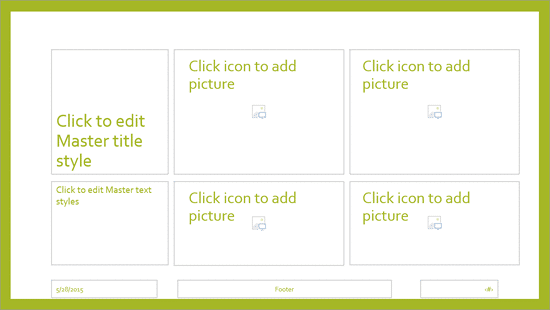
Figure 10: Customized Picture Slide Layout
Tip: You can also add more Picture placeholders by duplicating an existing Picture placeholder. To do so,
select an existing Picture placeholder, press both the Ctrl and Shift keys and
drag!
- When done, click the Close Master View button (highlighted in red
within Figure 11) within the Slide Master tab of the Ribbon to get back to
Normal View.
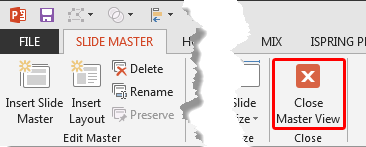
Figure 11: Close Master View button- Do note that your active slide already uses the original Picture with Caption layout, as shown in
Figure 5, previously on this page. This needs to be now changed to the new layout we just created. To do so,
access the Home tab of the Ribbon and click the Layout button to bring up the
Layout drop-down gallery you see in Figure 12, below. Notice that your new layout shows up, as
shown highlighted in red within Figure 12. Click on this thumbnail to change the
layout of the active slide.
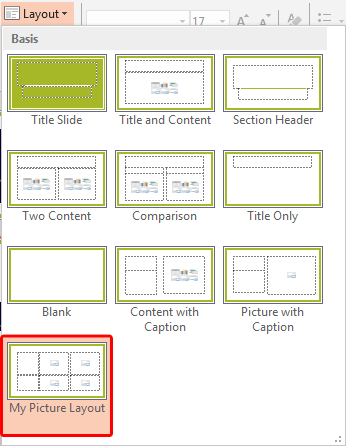
Figure 12: New Slide Layout within the Layout drop-down gallery- You will now see extra Picture placeholders that are devoid of any pictures, as shown in Figure 13,
below.
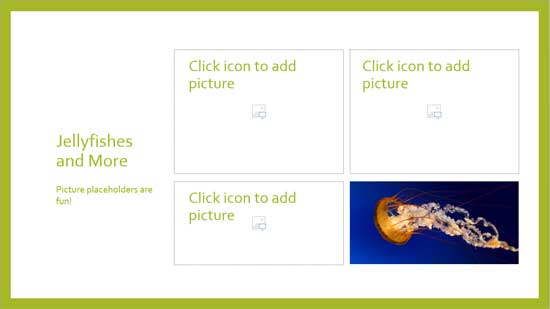
Figure 13: Extra Picture placeholders without pictures- Add pictures to all extra Picture placeholders so that you end up with something similar to
Figure 14, below (compare with Figure 5, shown earlier on this page).

Figure 14: New Picture Slide Layout added with pictures- Save your presentation often.


