We’ve already explored quite a bit within our Microsoft Sway tutorials, but we will
reiterate that you cannot just add any content to your Sways without first adding a Card that will hold
that content. So these Cards are essentially containers for your content. To place your video content in Sway, you will first therefore need to insert
a Video Card, and that’s precisely what we will learn within this tutorial.
Let us now explore how you can work with Video Cards in Sway:
- Add a new Video Card to your Storyline, shown highlighted in red
within Figure 1, below.
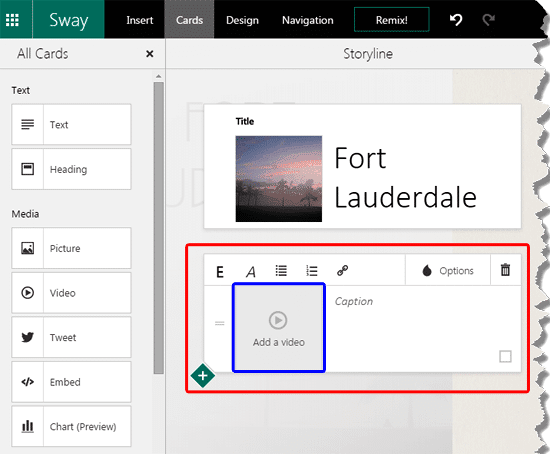
Figure 1: Video card added
Note: Video Cards are part of the Media Cards category in Sway. Learn more in our
Media Cards in Sway tutorial.
- To add a video, click the Add a video box, as shown highlighted in blue within
Figure 1, above. This brings up the Insert pane that provides many
sources to acquire a video clip. Note that we added a video and also typed a caption, as you can see in Figure 2, below.
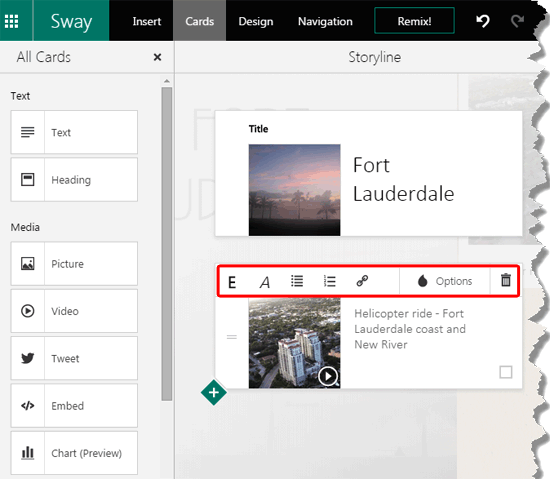
Figure 2: Video shows within the Add a video box- There are some options within the Video card, shown highlighted in red within Figure 2,
above. These options relate to the caption text rather than the video clip, and are explained below:
- Emphasize makes your selected text bold.
- Accent applies italics to your selected text.
- Bullets applies a bulleted list to your selected text.
- Numbers, similar to the bulleted list option, applies a numbered list to the select text.
- Link allows to add a hyperlink to your selected text. First select the part of text that you want to link from.
Then click on the Link option. This brings up the Link window, as shown in Figure 3.
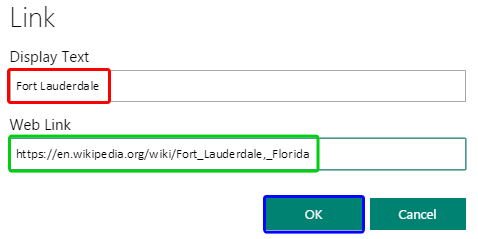
Figure 3: Link window- The Link window shows the selected text within the Display Text box, as shown highlighted in
red within Figure 3, above. Type or paste the hyperlink you want to apply in the Web Link
box, shown highlighted in green within Figure 3. Once done, click the OK button, highlighted
in blue within Figure 3 to apply the link.
- In Figure 4 below, you can see that the hyperlink is applied to the selected text. Remember that the
hyperlink will work only in Preview and in the final output.
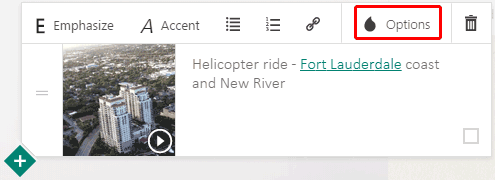
Figure 4: Hyperlink applied- Click Options (highlighted in red within Figure 4, above) to bring up the
Options overlaid pane, as shown in Figure 5, below. Here you can select from three video size variations:
Subtle, Moderate, and Intense. The results can be seen both within the
Preview Pane and also within the final output.
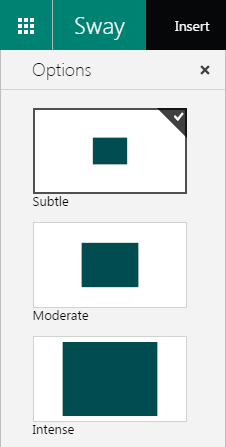
Figure 5: Options overlaid pane- Click the Delete option (icon next to Options within Figure 4,
shown earlier on this page) to delete the entire Video Card.


