Inserting a video clip on your PowerPoint slide is just a beginning, and you can do so much more to enhance how the video looks. You may want to apply corrections or recolor your videos. Additionally, you can apply preset Video Styles, a quick and easy way to add some character to your video without spending too much time. Further, there are small niceties that PowerPoint 2016 provides, such as adding a border to your video clip. In this tutorial, we'll explore how to add a frame-like effect to your video by using the Border option.
Follow these steps to add and edit borders for video clips in PowerPoint 2016 for Windows:
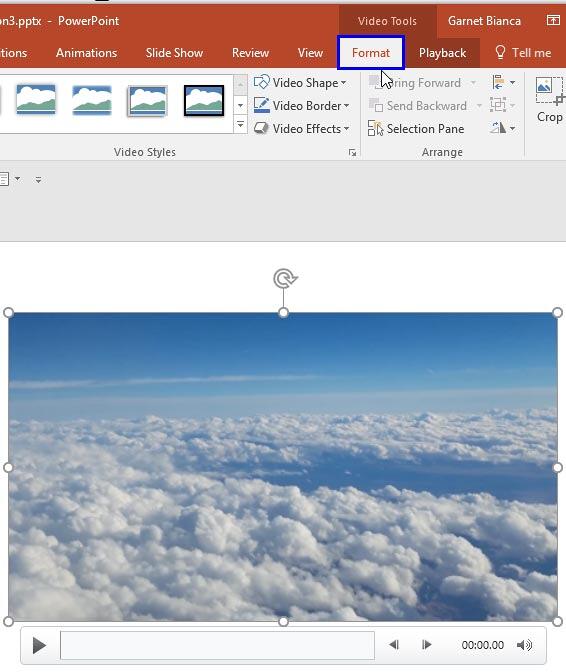
- Open your presentation, and navigate to the required slide where you have already inserted a video clip. Select or double-click the video clip to bring up the two Video Tools tabs in the Ribbon. These two tabs are Format and Playback. Click the Format tab to activate it, as shown highlighted in blue within Figure 1, below.

Figure 1: Video Tools Format tab of the Ribbon
Contextual Tab
- The Video Tools Format tab is a Contextual tab. These tabs are special tabs in the Ribbon that are not visible all the time. They only make an appearance when you are working with a particular slide object which can be edited using special options.
Poster Frame
- When you insert the video clip, if you see just a black rectangle on your slide, a Poster Frame can be applied to your video clip. Because, when you are choosing different Video Borders, it is good to see a Live Preview of the actual video clip being applied with those Video Borders, rather than seeing a black rectangle. Anyhow, applying a Poster Frame is entirely optional, and has no relation to your being able to follow the rest of this tutorial.
- Now, you can add a border to your selected video using any of the two ways mentioned below:
- Apply a Video Style that includes a border, and edit it later, as required.
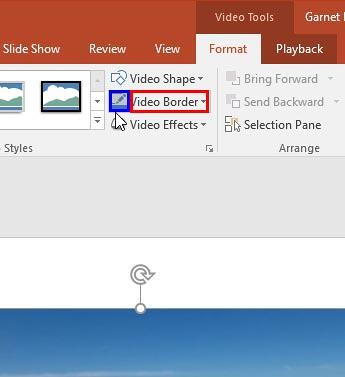
- Click the Border button, and not the down-arrow, as shown highlighted in blue within Figure 2, below. This adds the default border that you can edit later.

Figure 2: Video Border button - Once you have added a border to your selected video, you can edit this border. To do so, click the down-arrow next to Video Border button, as shown highlighted in red within Figure 2, above.
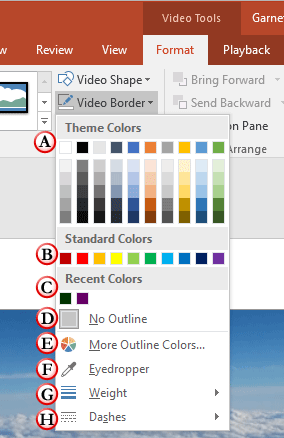
- Doing so opens the Video Border drop-down gallery that you can see in Figure 3, below.

Figure 3: Video Border drop-down gallery - Let us explore all options within the Video Border drop-down gallery, as marked in Figure 3, above:
A. Theme Colors
- Here you can select any of the colors which are from the active Theme of the presentation. You can also select any of the 5 tints or shades for any Theme color. Learn more about Themes here.
B. Standard Colors
- Here you can choose from any of the ten standard colors. These ten standard colors are just choices of colors that PowerPoint believes to be widely used. You don't have to limit yourself to either the Theme colors or Standard colors, as you'll learn in the next options—although it's a good design idea to use Theme colors as far as possible.
C. Recent Colors
- Here you can find the colors most recently used. If you have just launched PowerPoint and created a new presentation, the Recent Colors option may be entirely absent since you haven't selected any color recently!
D. No Outline
- Choose this option to remove the border altogether from your selected video clip.
E. More Outline Colors
- This option summons the Colors dialog box, which helps you to create new colors to use as a background fill. To learn more about how to work with the More Colors option, read our Formatting Lines (and Shape Outlines) in PowerPoint 2016 for Windows tutorial, explore step 4E in that tutorial.
F. Eyedropper
- This option enables you to pick an exact color from anywhere, sometimes even from somewhere outside PowerPoint. Explore our Eyedropper Option in PowerPoint 2016 tutorial to learn more.
G. Weight
- Change the thickness of the border from hairline to a chunky, thick line. Learn more about line thickness in our Formatting Outlines for Shapes in PowerPoint 2016 - Weight tutorial. Although the linked tutorial is about shape borders, the procedure explained in the tutorial applies to video borders as well.
H. Dashes
- These are different dash types for the video border. Learn more about these options in our Formatting Outlines for Shapes in PowerPoint 2016 - Dash tutorial. Again, although the linked tutorial is about shape borders, the procedure explained in the tutorial applies to video borders as well.
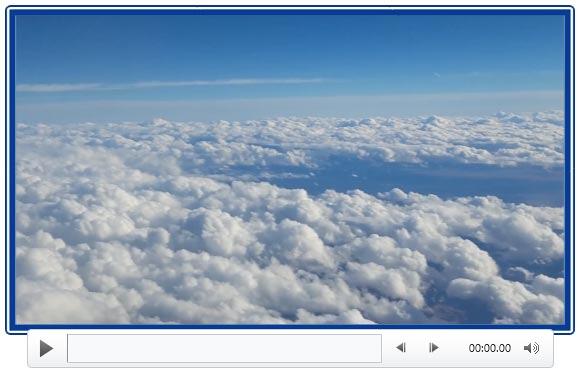
- Once you have edited the video border, remember to save your presentation. In Figure 6, below, you can see a border added to the selected video. Compare Figures 1 and 6.

Figure 6: Video border added and enhanced - Save your presentation often.


