A Video Action in PowerPoint is something that causes an event for any inserted movie clip. These are simple events such as Play, Pause, Resume, and Stop. Although PowerPoint classifies Video Actions as an animation type, these are not strictly animations. However, since Video Actions can be accessed through the Add Animation gallery, we have included this tutorial in our Animations section. Once you add these Media Actions to your video clips, PowerPoint will allow you to make these Actions interact with other animations, including Triggers.
Video or Audio Actions
Video Actions work very similarly to Audio Actions.
To access Video Actions, you must insert a video (movie) clip within a slide. When a video is inserted within the PowerPoint, by default it is set to play On Click, and also, a Pause video action is added. Thus you click the video clip itself once in Slide Show mode to play it—and then click again to pause it. How do these play and pause actions happen? And how can you apply more Media Actions to the video clip?
Follow these steps to learn more about Video Actions in PowerPoint 2010 for Windows:
- Make sure you select the video clip on your slide, as shown in Figure 1. Note that we have used a blank slide with a white background for this tutorial, as shown in Figure 1, below. Your slide may look different, if you have more slide objects or placeholders.
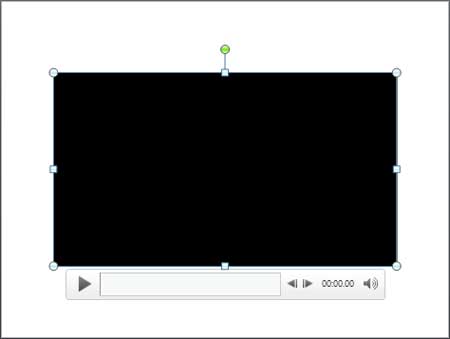
Figure 1: Selected video clip on the slide - Now, access the Animations tab of the Ribbon, and click the Animation Pane button, as shown highlighted in red within Figure 2, below. This button is a toggle button. So, if your Animation Pane is already visible, then clicking this button will make the pane disappear.
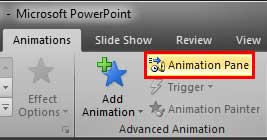
Figure 2: Animation Pane button within the Animations tab - You can see the Animation Pane in Figure 3, below. Note the Pause symbol, as shown highlighted in red within Figure 3, placed in front of the name of the video within the animations list. PowerPoint added this Trigger for the Pause action automatically when you inserted the video clip on your slide. When the video is inserted on your slide, it's in a Pause state. You need to click on the video to play it or use the Play button on the Player Controls below the video clip, as shown in Figure 1, previously on this page. Once the video clip is playing in Slide Show view, clicking on it will pause the video. Go ahead and test if your video clip plays and pauses.
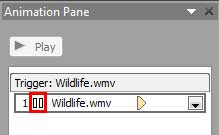
Figure 3: Animation Pane displaying animation event of the selected video clip - Back in Normal view, with the video clip on the slide still selected, click the Add Animation button, as shown highlighted in red within Figure 4, below, within the Animations tab of the Ribbon.
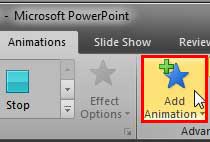
Figure 4: Add Animation button within the Animations tab - Doing so brings up the Add Animation gallery that you can see in Figure 5, below. Note that the typical Add Animation gallery shows the Entrance animation effects on the top area (refer to our Adding an Animation tutorial to learn more). However, in this case, you have an extra section on the top area of the gallery called Media, as shown in Figure 5. This section shows up only if you have a video or audio clip selected on your slide.
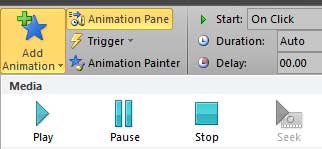
Figure 5: Media section within the Add Animation gallery - Options within the Media section are explained below:
- Play: This is the default media action. It is used to play the video.
- Pause: This action is to pause the playing video.
- Stop: This action is to stop the playing video.
- Seek: This action may be grayed out, as shown in Figure 5, above. This action is only available if you have added a Bookmark to your video clip. We cover Bookmarks in a subsequent tutorial of this series.
- Since we already have a Pause Media Action in our Animations list, highlighted in red within Figure 3, shown previously on this page, let us go ahead and add Play and Stop Media Actions. With your video clip still selected, click the Play option within the Add Animation gallery's Media section (refer to Figure 5, above). Doing so will add a Play Media Action in your animations list, as shown in Figure 6, below. Also, note the Play symbol placed infront of the name of the video in the animations list, as shown highlighted in red within Figure 6.
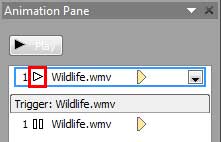
Figure 6: Animation Pane displaying Play media action added to the movie clip - Again, with your video clip still selected, go ahead and add a Stop Media Action as well. This Action will also show in your Animations list, as shown in Figure 7, below. Also, note the Stop symbol placed infront of the name of the video in the animations list, as shown highlighted in red within Figure 7.
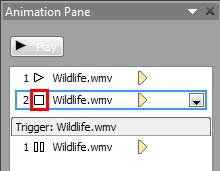
Figure 7: Animation Pane displaying Stop media action added to the video clip - Save your presentation. In our Add Trigger Animations for Media Actions in PowerPoint 2010 tutorial, we explore how you create Bookmarks, and set Trigger animations that result in Media Actions such as Play, Pause, Stop, etc. occurring for your video clip.


