While you can create flowcharts of all types in Microsoft Office applications quite easily using techniques explained in our Basic Flowcharts in Microsoft Office tutorial, there are ways in which you can create linear, non-branched flowcharts even more easily with just one click! These one-click flowcharts let you convert a bulleted list to a flowchart in an instant using the SmartArt diagramming feature. Before we proceed further, let us tell you that these SmartArt flowcharts are only useful for very simple concepts. They also have several limitations:
- The techniques explained on this page only work within PowerPoint. However, once you create a flowchart using the steps explained, it's easy to copy it and paste it within Word or Excel.
- There's no option to create one-to-multiple or multiple-to-one branches within these flowcharts.
- You also cannot connect the last shape on your flowchart to the first shape and create a loop.
Before we proceed, a few words about SmartArt. SmartArt is a diagramming component that's included in Microsoft Office applications such as Word, Excel, and PowerPoint. Using SmartArt, you can create logical diagrams such as organization charts, process flows, list and cycle diagrams, matrixes, and more. On the Insert tab of the Ribbon, you will find the SmartArt button, as shown highlighted in red within Figure 1.

Figure 1: SmartArt button
However, for this tutorial, we will not use this button since that adds an extra step to the whole flowchart creation process. Our process which works only within PowerPoint is even easier:
- Make sure that the text meant for your entire flowchart is populated as a bulleted list. Figure 2 shows a bulleted list with 10 steps.
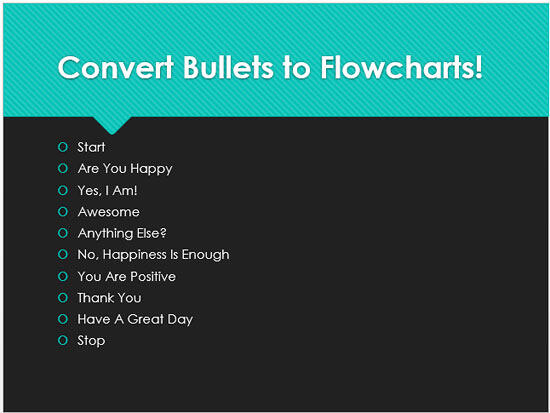
Figure 2: Bulleted list with 10 steps - Select the entire bulleted list and right-click to bring up the contextual menu shown in Figure 3, below. From this menu, select the Convert to SmartArt option as shown highlighted in red within Figure 3.
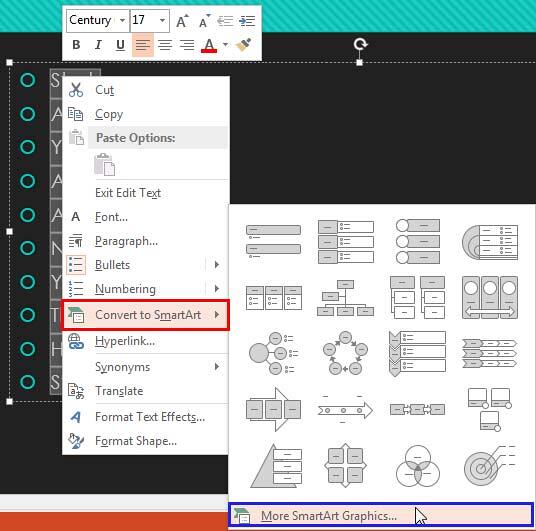
Figure 3: Convert to SmartArt option selected - This opens a flyout gallery populated with SmartArt thumbnail previews. Since none of the options shown look similar to a flowchart, select the More SmartArt Graphics option (highlighted in blue within Figure 3, above) to explore more SmartArt types. This opens the Choose a SmartArt Graphic dialog box, as shown in Figure 4.
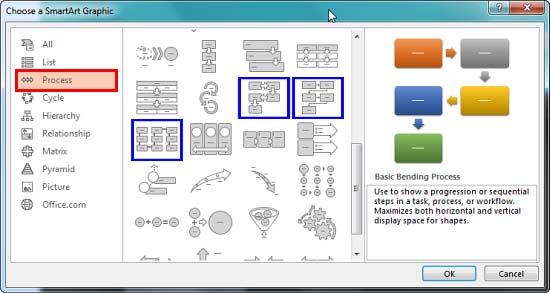
Figure 4: Choose a SmartArt Graphic dialog box- Within the Choose a SmartArt Graphic dialog box, select the Process category in the sidebar (highlighted in red within Figure 4, above). From the SmartArt graphic variants available within Process category, you can choose from one of the three Bending Process graphics
(highlighted in blue within Figure 4, above). These are the only ones suitable for
flowcharts.
- Select any one of these three Bending Process graphics, and your bulleted list will convert to a SmartArt graphic. Figures 5, 6, and 7 below show you the flowcharts created using the three Bending Process graphic variants.
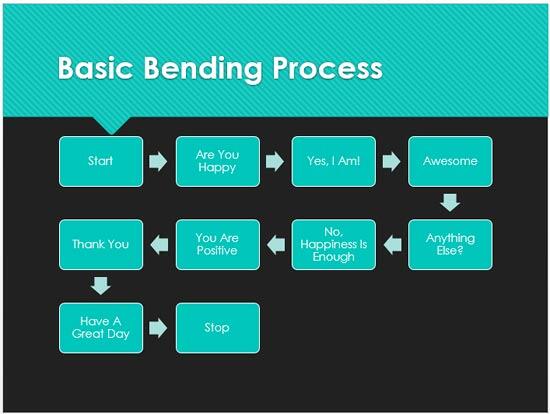
Figure 5: Bulleted list converted into Basic Bending Process SmartArt 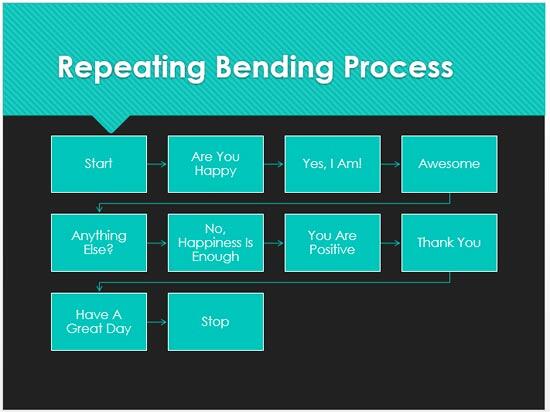
Figure 6: Repeating Bending Process SmartArt 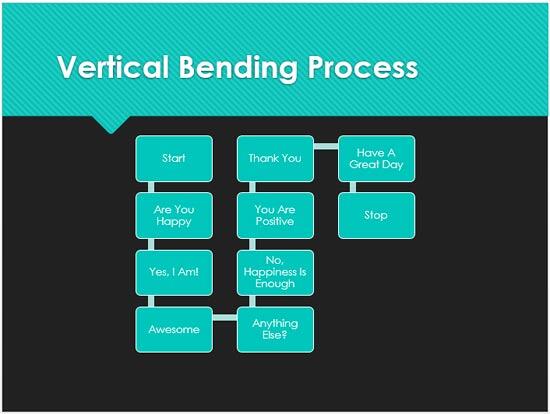
Figure 7: Vertical Bending Process SmartArt - As you can see in Figures 5, 6 and 7 above, all shapes use a single color. If you want, you can change colors of the individual flowchart shapes. To do so, select your entire SmartArt graphic. Then access the SmartArt Tools Design tab of the Ribbon as shown highlighted in red within Figure 8. Click the Change Colors button (highlighted in blue within Figure 8). This opens the Change Colors drop-down gallery, as shown in Figure 8.
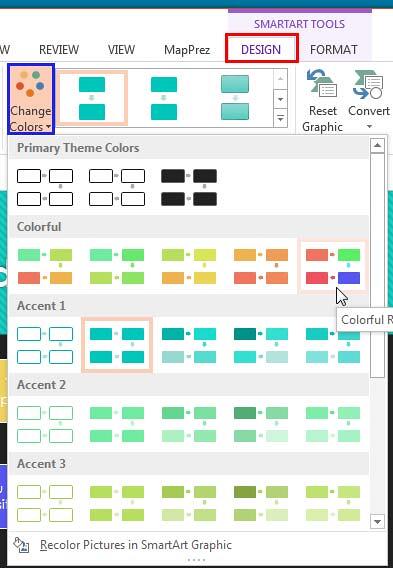
Figure 8: Change Colors drop-down gallery - Within the Change Colors drop-down gallery, choose the color thumbnail preview of your choice and click on it to apply to the SmartArt. This will change the colors of individual shapes within your SmartArt graphic, as shown in Figure 9.
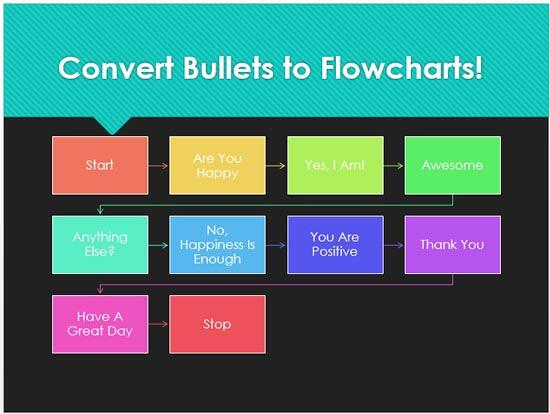
Figure 9: SmartArt with changed colors Note: Your SmartArt may look different based upon the type and color thumbnail preview you have chosen. Also note that colors available within the
Change Colors drop-down gallery may differ depending upon the
Theme or template applied to your presentation.
- You can also change the actual shapes within a SmartArt graphic. For instance you may want to change the first and the last shapes to a Terminator flowchart shape with a mere click or two! Follow the process in our Change Shapes within a SmartArt Graphic in PowerPoint 2010 tutorial. Although the linked tutorial pertains to PowerPoint 2010, the techniques are identical in PowerPoint 2013.
- The finished SmartArt graphic can be used within your PowerPoint slide. Or, can be easily copied and then pasted into another Microsoft Office application such as Word or Excel.
- Save your document often.


