PowerPoint 2010 provides you with umpteen options to change
the appearance of your bullet points. You can
change the bullet styles, format
the bullet size and its color,
and use pictures as bullets. In addition, you
can use a character from any font, including dingbats as a bullet. Dingbats are fonts which contain decorative symbols rather than
alphabets and numbers. Wingdings is a good example of a dingbats font since it is installed by default on all computers.
To use dingbats or other font characters as bullets, follow these steps:
- Open any presentation or create a new one. Then navigate to the slide where you want to add picture bullets. Select the
bulleted text:
- a. If you want to make changes to just one bullet in
the text placeholder (or text box), select
that individual line.
- b. If you want to make these changes to all the bullets in the
text placeholder (or text box), you can
select the entire placeholder by clicking on the edge of the placeholder (see Figure 1).
-
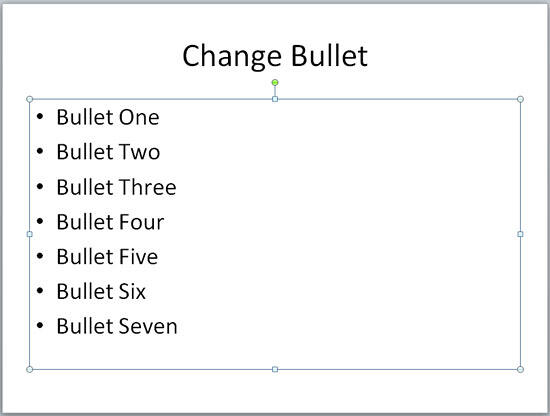
Figure 1: Slide with bulleted text
- Access the Home tab of the
Ribbon. Within the Paragraph group,
click the arrow beside the Bullets button (highlighted in blue in
Figure 3). This brings up the Bullets gallery, as shown in Figure 3. Within this gallery,
choose the Bullets and Numbering option (highlighted in red in
Figure 3).
-
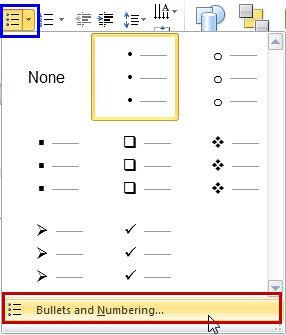
Figure 3: Bullets gallery
- This will open the Bullets and Numbering dialog box, as shown in Figure 4. Make sure that
the Bulleted tab of this dialog box is selected. Click the Customize button (highlighted
in red in Figure 4 below).
-
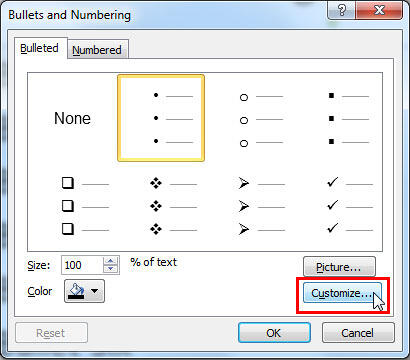
Figure 4: Bullet options within the Bullets and Numbering dialog box
- This brings up the Symbol dialog box, as shown in Figure 5.
-
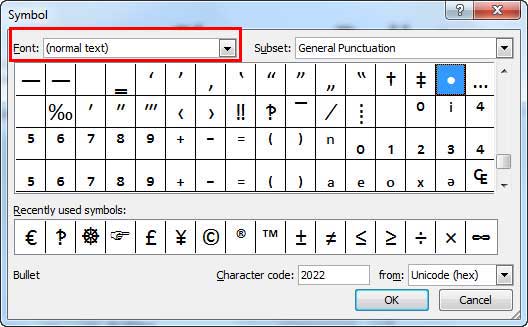
Figure 5: Symbol dialog box
- Locate the Font list (highlighted in red in Figure 5
above). Click the downward arrow to bring up the font list, scroll down till you get the Wingdings font, as
you can see highlighted in red in Figure 6. Select the font.
-
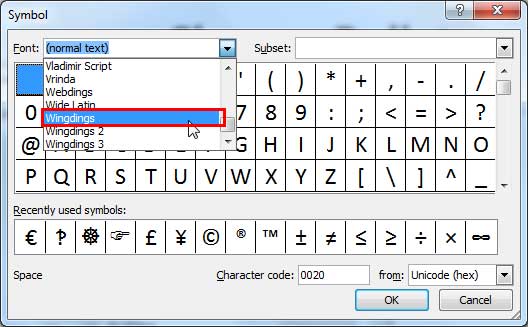
Figure 6: Wingdings
- This opens all the content symbols of the selected Wingdings font. You can preview each and every
symbol of this font, as displayed in a small thumbnail view (see Figure 7). Use the scroll bar to the right
of the symbols to preview more symbols.
-
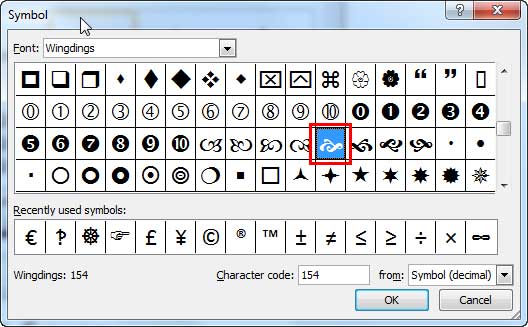
Figure 7: Symbols preview
- Click the desired symbol to select it. A selected symbol can be seen highlighted in
red in Figure 7 above. Click OK to get back to the
Bullets and Numbering dialog box.
- Here you see a preview of the selected symbol, highlighted in red in
Figure 8.
-
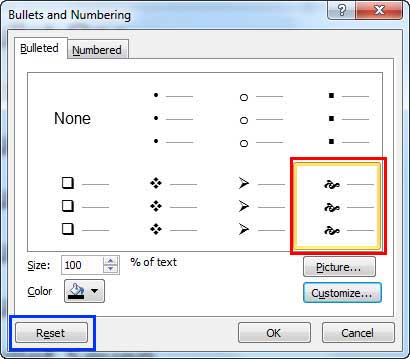
Figure 8: Selected symbols preview
- Notice that the Reset button is now active (highlighted in blue
in Figure 8 above) because the last bullet preset is now changed (compare the last bullet thumbnail preview
in Figures 4 and 8). Click the Reset button only to restore the default
bullet presets again (this is to cancel any changes you made so far).
- Click the OK button to apply the symbol as a bullet to your selected text placeholder.
Figure 9 shows the customized bullet symbol changed (compare Figures 1 and
9).
-
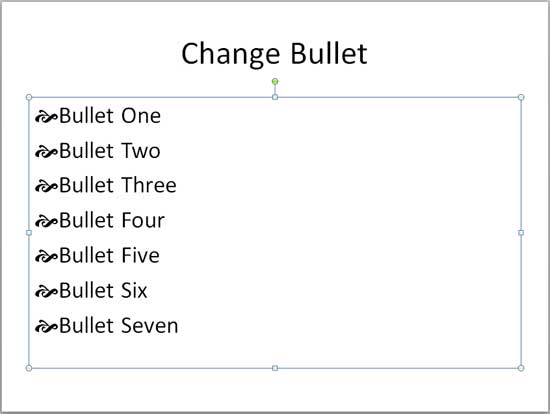
Figure 9: Bullets changed to a customized symbol
Tip: Do you want the picture bullet to change in all slides? You can quickly make that customization by
working within
Slide Master view.


