There are several options in PowerPoint to change the appearance of your bullet points. You can
change the bullet styles, format the
bullet size and its color,
and use pictures as bullets. In addition,
you can use a character from any font, including dingbats as a bullet. Dingbats are fonts which contain decorative symbols
rather than alphabets and numbers. Wingdings is a good example of a dingbats font. It is installed by default on all Mac OS
computers that have Microsoft Office applications such as PowerPoint installed.
To use dingbats or other font characters as bullets in
PowerPoint 2011 for Mac, follow these steps:
- Open your presentation and navigate to the slide where you want to add character bullets. Select the bulleted paragraph
following one of these two ways:
- a. If you want to make changes to just one bullet in the
text placeholder (or text box),
select that individual line.
- b. If you want to make these changes to all the bullets in the text placeholder (or text box), you can
select the entire placeholder
by clicking on the edge of the placeholder (see Figure 1).
-
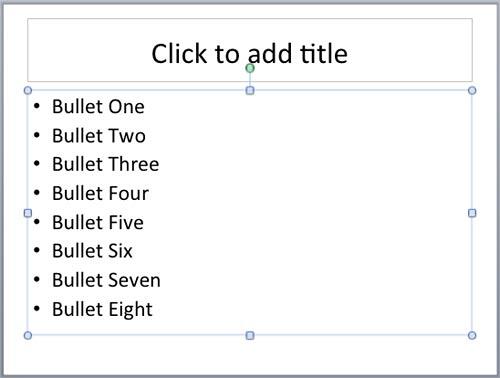
Figure 1: Slide with bulleted paragraph selected
- Access the Home tab of the
Ribbon. Within the Paragraph group,
click the arrow beside the Bulleted List button (highlighted in blue within
Figure 2). This brings up the Bulleted List gallery, as shown in Figure 2.
Within this gallery, choose the Define New Bullet option (highlighted in red within
Figure 2).
-
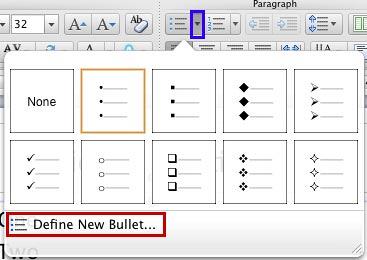
Figure 2: Bulleted List gallery
- This will open the Format Text dialog box with Bullets and Numbering option
selected within the sidebar, as shown in Figure 3. Make sure that the Bullets tab of this dialog
box is selected. In this tab, you can find a box within the Custom bullet section (highlighted in
blue within Figure 3). Type any character in this box and you can see on the slide
that the selected text bullets get changed to match the typed character. Look at Figure 3. You can see that we
have typed the character 'X' in the box. You can also see the bullets within the selected bulleted paragraph (highlighted
in green within Figure 3) on the slide changed to 'X'.
-
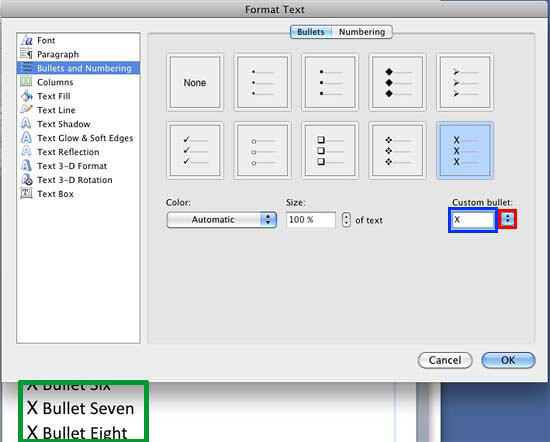
Figure 3: Bullet editing options within the Format Text dialog box
- If you want to change the bullets to some other special character, click the button displaying up and down
arrows (highlighted in red within Figure 3) within the Custom bullet
section. This opens the Custom bullet list as show in Figure 4. Select the
Character option in this list.
-
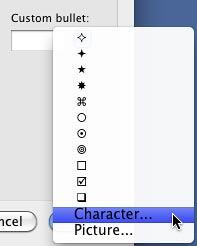
Figure 4: Character option within the Custom bullet list
- This brings up the Characters dialog box, as shown in Figure 5.
-
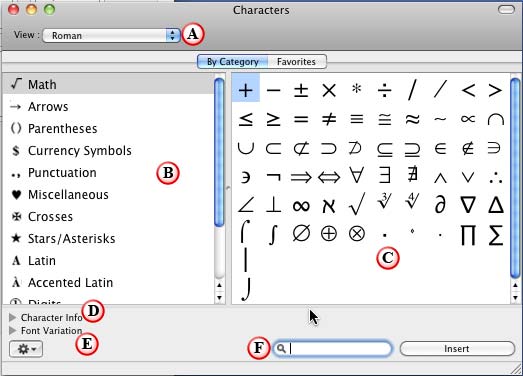
Figure 5: Characters dialog box
- Let us explore what Characters dialog box includes (as marked in
Figure 5):
A. View
- View drop-down list includes different views for the character. Figure 6 shows various
views available.
-
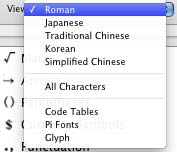
Figure 6: View list
B. Categories
- You can choose from different categories available. Use the scroll bar to view more categories. In
Figure 5 above, you can see the Math category selected.
C. Characters
- Displays the characters included in the selected category. You have to select a character here.
In Figure 5 above, you can see the Characters of the Math category.
D. Character info
- This section provides you with more info on the selected character. Click the arrow to open the info in
drop-down mode.
E. Font Variation
- Provides you with variations of the selected character in various fonts. Again, click the arrow to view
the variations in drop-down mode.
F. Search box
- In this box you can type in the name of the special character you are looking for, like arrows, hearts,
etc. to instantly open the related category.
- In Figure 7 you can see White Right Pointing Index character selected, which is
included in the Miscellaneous category. Notice the Character Info and
Font Variations for the selected character.
-
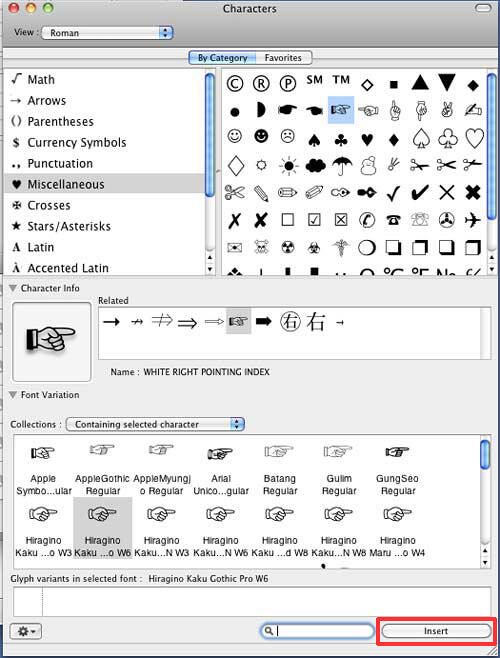
Figure 7: Character selected within the Characters dialog box
- After selecting the required character, click the Insert button (highlighted in
red within Figure 7) in the Characters dialog box. Then, you can
see a preview of the selected character in the Format Text dialog box, as shown highlighted
in red within Figure 8.
-
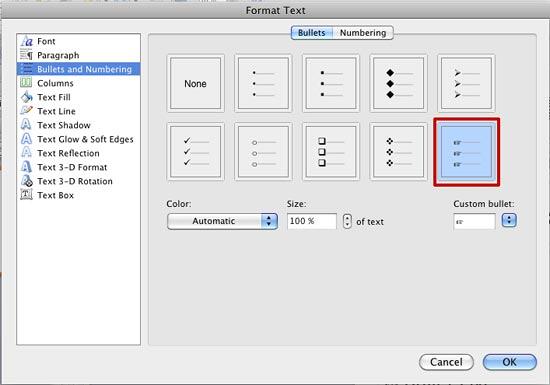
Figure 8: Symbols preview
- Click the OK button to apply the character as a bullet to your selected bulleted paragraph.
Figure 9 shows the bullets of the selected place holder changed to White Right Pointing Index (compare
Figures 1 and 9).
-
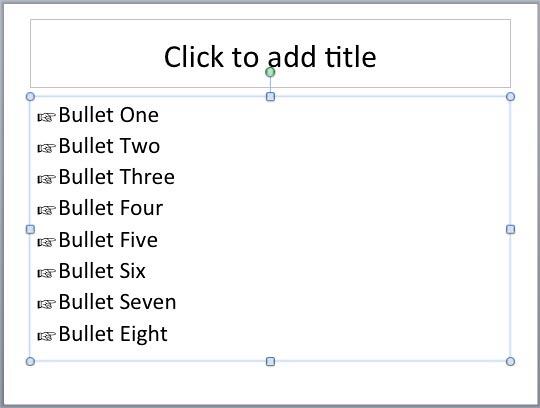
Figure 9: Bullets changed to White Right Pointing Index
Tip: Do you want the special character bullets to appear in all slides? You can quickly make that customization
by working within
Slide Master.


