Explore the Clip Art search results in PowerPoint 2010 for Windows. You'll find so much meta data such as name, dimensions, size, format, and more.
Author: Geetesh Bajaj
Product/Version: PowerPoint 2010 for Windows
OS: Microsoft Windows XP and higher
In our previous tutorial we showed you how you can insert pictures from the Clip Art Task Pane. In this tutorial we'll explore Clip Art search results. Below are the guidelines which will help you understand what Clip Art search results are:
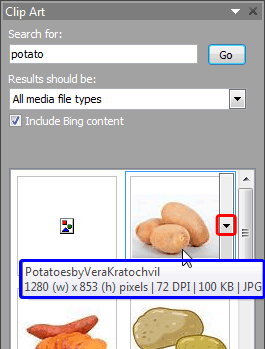
When you choose a picture within the Clip Art Task Pane and hover your cursor over your chosen picture, you bring up a Down Arrow button (shown highlighted in red within Figure 1). Along with this Down Arrow button, you also see a tool tip (shown highlighted in blue within Figure 1). The details shown in this tool tip give you basic info about the chosen picture.

Figure 1: Tool Tip appears for the chosen picture
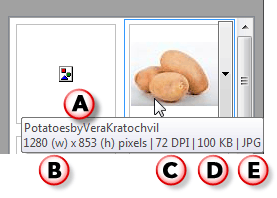
Look closely at the content of the Tool Tip. All information provided for the chosen picture are explained below, as marked in Figure 2.

Figure 2: Information within the Tool Tip
Here you can see the name of the picture. Since most search results for Clip Art are now from Bing, the name you see is either the Alt tags for the picture shown within its original web page, or even the filename.
This displays the dimensions of the chosen picture. In the Figure 2 shown above, the dimensions are 1280 for width and 853 for height (all values in pixels).
Displays the resolution of the chosen picture.
Here you can see the picture file size.
Displays the format of the picture. For the picture we have chosen, the format is JPG. Do note that most search results now only show bitmap graphic formats such as JPG, PNG, and GIF. You will rarely see WMF and EMF vector files, unless you are searching in your local Clip Organizer library.
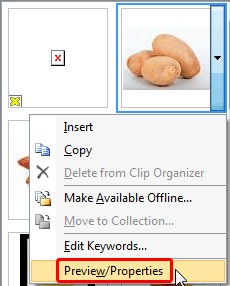
There is also another way to see information pertaining to the selected picture. You need to right-click the picture and from the contextual menu that appears, choose the Preview/Properties option, as shown highlighted in red within Figure 3.

Figure 3: Preview/Properties option
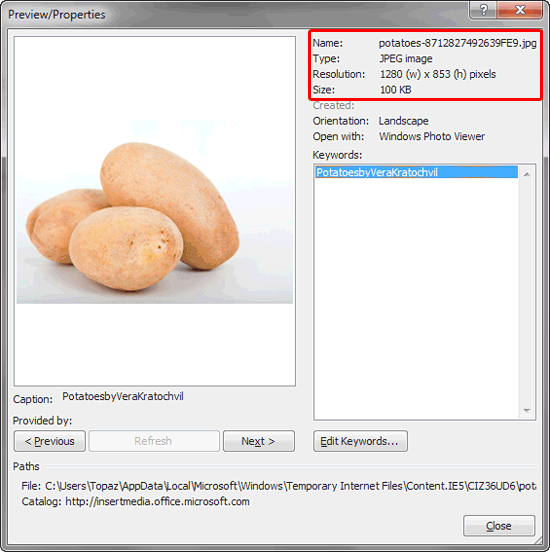
This brings up the Preview/Properties dialog box, as shown in Figure 4.

Figure 4: Preview/Properties dialog box
See the area highlighted in red within Figure 4, above that shows the properties of the selected picture.
Pictures Basics and Adjustments: Understanding Clip Art Search Results (Glossary Page)
You May Also Like: Present a PowerPoint Without Laughing? | Mauritania Flags and Maps PowerPoint Templates


Microsoft and the Office logo are trademarks or registered trademarks of Microsoft Corporation in the United States and/or other countries.