Learn about different types of points (vertexes) in PowerPoint 2016 for Windows. Did you know that there are three vertex types in PowerPoint?
Author: Geetesh Bajaj
Product/Version: PowerPoint 2016 for Windows
OS: Microsoft Windows 7 and higher
Every shape in PowerPoint is created using both points and segments. Points, also known as vertexes are pronounced areas of the shape, and segments are straight or curved lines that connect these points. It is easy to understand the relationship between points and segments using a connect-the-dots analogy. The points represent the dots whereas the segments represent the lines you draw between the dots. Both segments and points are only visible within Edit Points mode. We discuss segments in a subsequent tutorial; for now, let us explore different types of vertexes (points) in PowerPoint 2016 for Windows. Essentially, there are three types of points:
Follow these guidelines to see different types of points (vertexes) in PowerPoint 2016 for Windows:
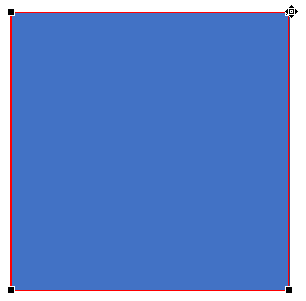
As you have already learned, when any of the corner points in the Rectangle is selected, it shows up with two blue handles as shown in the example on the left side in Figure 3. Now if you move any one of these blue handles outwards, the opposite handle will not move (see on the right side of the Figure 3). To make changes to the opposite side, you will have to manipulate the opposite handle separately, or change the point from a Corner Point to either a Smooth Point or a Straight Point; we discuss these other Point types next.

Figure 3: Corner Point
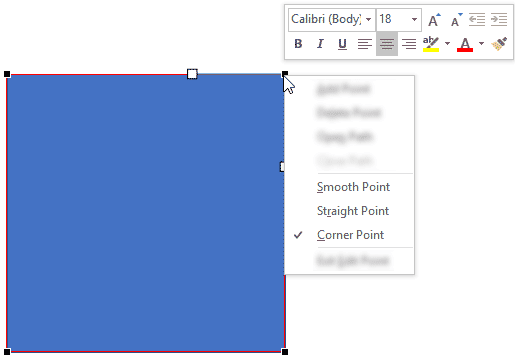
Make sure you are in Edit Points mode (right-click and choose the Edit Points option from the contextual menu). Place the cursor over the point and right-click to summon the contextual menu. From this menu, choose Smooth Point option, as shown in Figure 4.
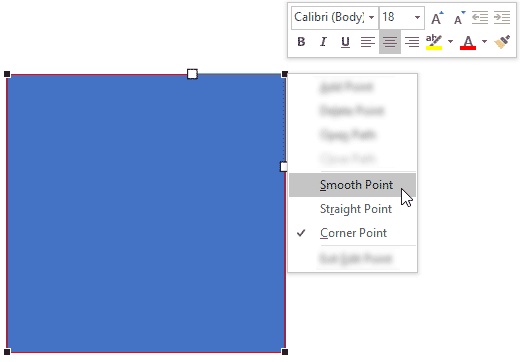
Figure 4: Choose Smooth Point type
This changes the Corner Point to a Smooth Point (shown on the left side in Figure 5). Now if you drag a handle of any one side outwards (drag further, closer, or even sidewards), the opposite side handle also moves symmetrically (see on the right side of the Figure 5).
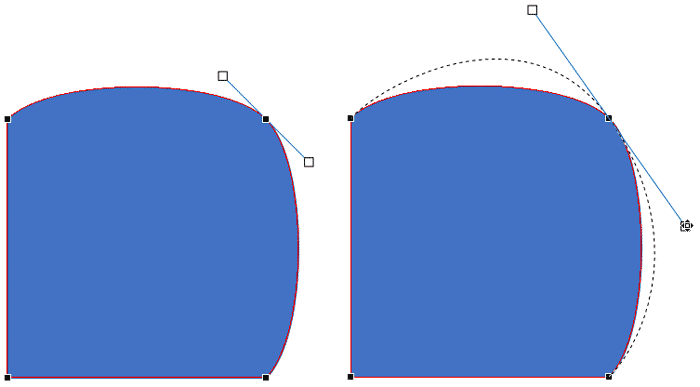
Figure 5: Corner Point changed to Smooth Point
Now we'll see how to change the Corner Point type to a Straight Point type. Select the shape and switch to Edit Points mode (right-click and choose the Edit Points option from the contextual menu). Place the cursor over the point and right-click to bring up the contextual menu. From this menu, choose the Straight Point option, as shown in Figure 6.

Figure 6: Choose Straight Point type
This changes the Corner Point to a Straight Point (shown on the left side on Figure 7). Now if you drag a handle of any one side outwards (drag further or closer), then the opposite handle won't move (see on the right side of the Figure 7). However if you drag it sidewards, then the opposite handle will also move proportionately.
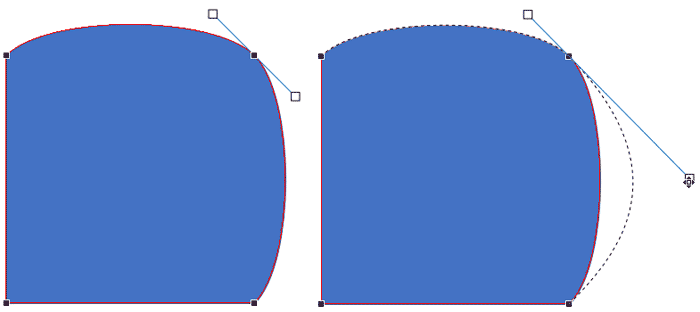
Figure 7: Corner Point changed to Straight Point
See Also:
Types of Points (Vertexes) for Shapes in PowerPoint 2013 for Windows
Types of Points (Vertexes) for Shapes in PowerPoint 2011 for Mac
Types of Points (Vertexes) for Shapes in PowerPoint 2010 for Windows
Types of Points (Vertexes) for Shapes in PowerPoint 2003 for Windows
You May Also Like: How to Prevent Your Online Audience from Getting Distracted | Conservation PowerPoint Templates


Microsoft and the Office logo are trademarks or registered trademarks of Microsoft Corporation in the United States and/or other countries.