You have already explored how you can use the
First Line Indent Marker and the
Hanging Indent Marker to tweak bulleted paragraphs
in PowerPoint 2013. By tweaking, we mean adjusting the spacing before and after the bullet
character. The next and last of these indent markers on the Ruler is the Left
Indent Marker, shown highlighted in red within Figure 1, below. This acts like a lock on the First
Line Indent Marker and the Hanging Indent Marker. Funnily enough, it is called the Left Indent Marker even though it is placed at right-most of the
three markers! Follow these steps to learn more:
-
Select the bulleted paragraph(s) for which you want to tweak the positions. In Figure 1, you can see that all of the 3rd level
bulleted paragraphs are selected. We have used 3rd level bullets in this example because they provide enough space towards both the left and right
sides of the selected paragraphs.
-
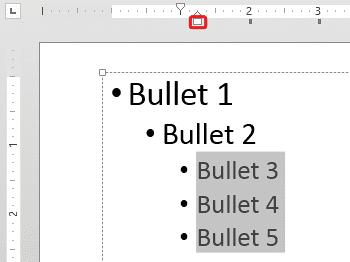
Figure 1: Bulleted paragraphs selected
-
Note: If you want to change the position of a particular bulleted paragraph, select only that individual bulleted paragraph. If you
want the change to effect all bulleted paragraphs in the placeholder (or text box), select all the paragraphs.
-
With your selection still active, you can reposition the bulleted paragraphs in any of the following ways:
Way 1
-
With your selection active, if you want to increase the indent of the bullets, click on the Left Indent Marker and drag it
rightwards along the Horizontal Ruler as shown in Figure 2. It is quite possible that you select the
Hanging Indent Marker by mistake that sits above
the Left Indent Marker. Make sure that you click and drag the latter. As you can see, the
First Line Indent Marker (Top Caret) also moves as
you move the Left Indent Marker.
-
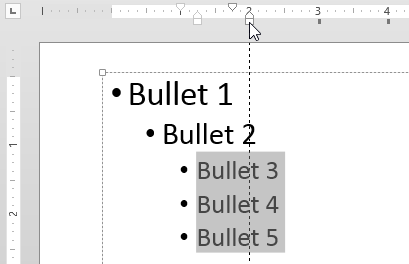
Figure 2: Left Indent Marker being dragged towards right
-
Note: Pressing the Ctrl key while you drag the Indent Markers give you more control over the placement.
-
Stop dragging when you are in the new position where you want to place the selected paragraphs. In Figure 3 you can see the selected
bullet paragraphs moved rightwards. Compare Figures 2 and 3 to see the increased indented space.
-
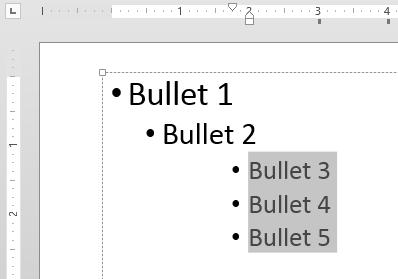
Figure 3: Selected bulleted paragraphs repositioned rightwards
Way 2
-
You can also drag the Left Indent Marker leftwards, as shown in Figure 4.
-
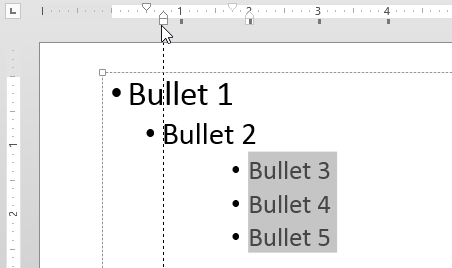
Figure 4: Left Indent Marker being dragged beyond The First Line Indent Marker
-
In Figure 5 you can see that the selected bulleted paragraphs have been moved leftwards beyond their initial position (compare
Figures 1 and 5). Note that wherever you move the Left Indent Marker, the space between the first-line indent
marker and the Hanging Indent Marker will be constant.
-
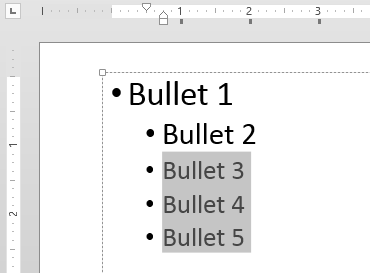
Figure 5: Selected bulleted paragraphs repositioned to new indent leftwards
- Drag and position to achieve the results desired. Make sure you save your presentation when done.
Note: Instead of changing position of bullet paragraphs on each and every slide in the presentation, you can access the
Slide Master view and make changes there. This way you will be
making changes just once and every slide will be effected.


