Learn to troubleshoot video issues in all versions of PowerPoint for Windows. These problems can happen for many reasons.
Author: Geetesh Bajaj
Product/Version: PowerPoint for Windows
OS: Microsoft Windows
There can be any number of reasons to troubleshoot video playback in PowerPoint. You may end up with choppy video, or you may not be able to play video clips of some types on all versions of PowerPoint. We will look at such video issues in PowerPoint on this page, along with suggested solutions.
First of all, look at our PowerPoint-Friendly Video Formats page to understand the file formats (file types) that work with different PowerPoint versions.
Thereafter, follow these steps. Always, perform the initial troubleshooting steps before doing the later ones.
It's possible that you received the PowerPoint presentation from someone else, and may want to extract the video clip from the PowerPoint file. To do so, right-click the video clip on your slide, so as to bring up the contextual menu that you see in Figure 1, below. Choose the Save Media as option, as shown highlighted in red within Figure 1.
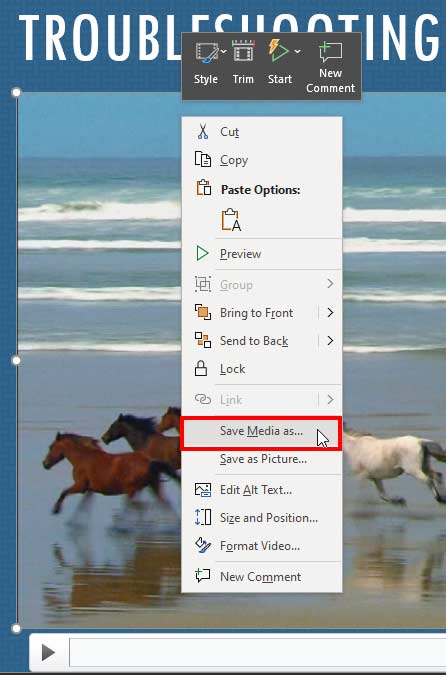
Figure 1: Save Media as
Some very old versions of PowerPoint may not have the Save Media as option in the right-click contextual menu. Newer versions such as PowerPoint 365 do include this option, and most perpetual versions from PowerPoint 2013 onwards also include this option.
Doing so brings up the Save Media As dialog box, shown in Figure 2, below. Navigate to, and give a name to the video clip you are saving. Do note that you cannot save it to a new file type. In our case, as seen in Figure 2, our original clip was a WMV file, so we can only save the clip as a WMV file.
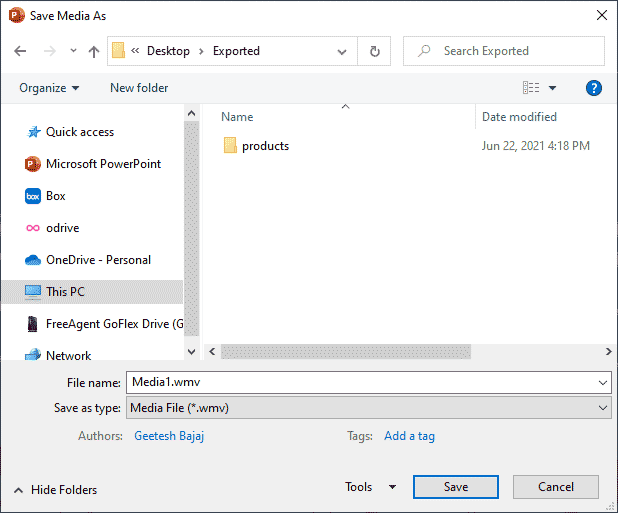
Figure 2: Save Media As dialog box
Now, try playing the same video in another program such as Movies & TV, or even Windows Media Player. Try to use media programs that are part of the Microsoft Windows installation. If the same video that was choppy within PowerPoint plays perfectly well in these programs, then at least we have identified that there's no problem with the video file and we need to look for solutions elsewhere.
If you received a PowerPoint presentation using PowerPoint 2007 or earlier versions, or if some presentations had linked rather than embedded videos, it is possible that you received just the PowerPoint presentation without the linked video file. In that case, no videos will play because the video does not exist! Try and reach out to the concerned person to see if they can send you the video file separately.
Do you know that you can use some simple VBA code to change linked video files to become embedded, as part of the presentation? Look at our VBA Code: Change Linked Videos to Embedded? page to learn more.
If you saved the video file or were able to get the video file separately, it's now time to reinsert the video clip in PowerPoint, by following these steps.
If your video is still not playing smoothly, you may try optimizing the video clip. Fortunately, this process can be done within PowerPoint:
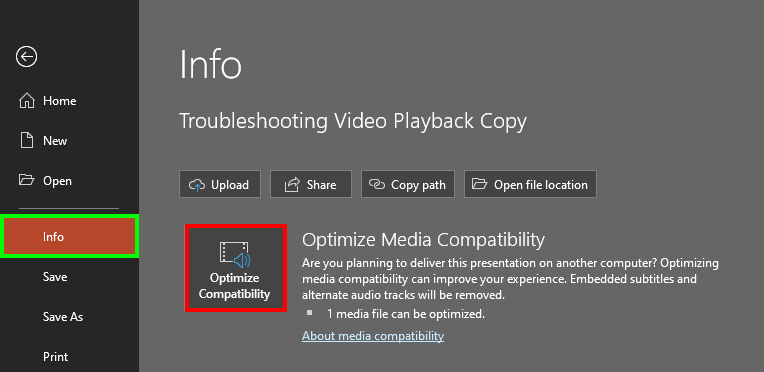
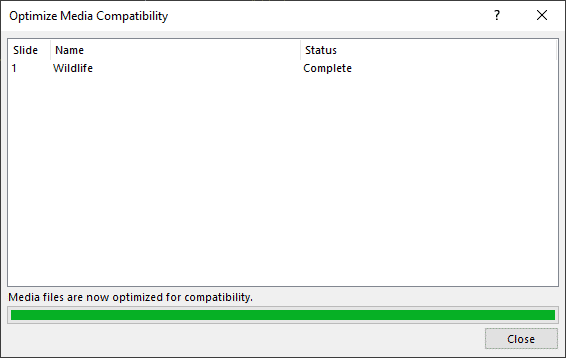
While the Optimize option we explored in the preceding section is helpful to ensure that the video file is compatible with most devices and platforms, there's also a Compress option that can make your video files smaller in size, and thereby make them snappier to play because less system resources would be used. Follow these steps to learn more:
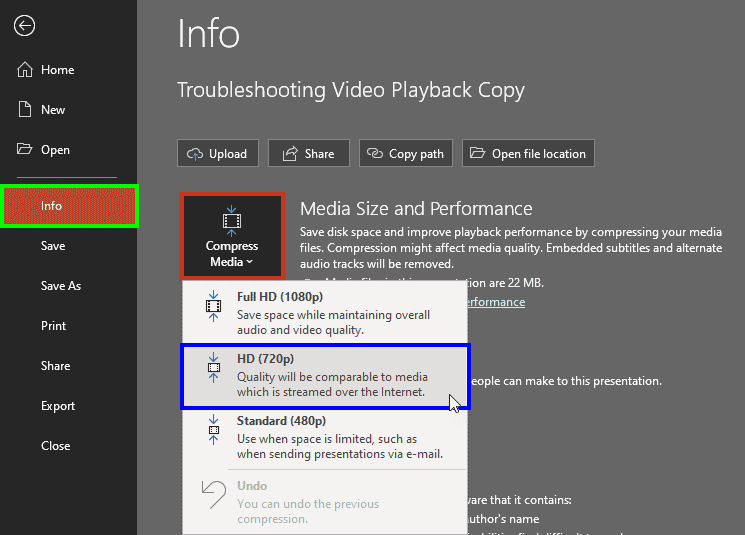
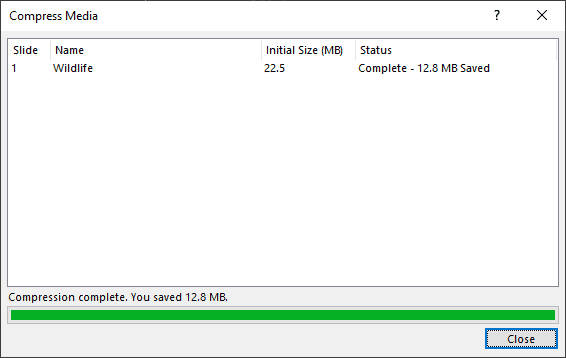
As you can see in Figure 5, shown previously on this page, there are three compression levels. These are:
Full HD (1080p): This is a great option if you need to present using a high-end projection system.
HD (720p): This is the best option for normal usage.
Standard (480p): Unless you have a compelling reason to use this option, stay away.
If you are unhappy with the video quality after compressing, you can bring up the same drop-down menu, and you will find an Undo option, highlighted in red within Figure 7, below. You can click on this option to restore your original video.
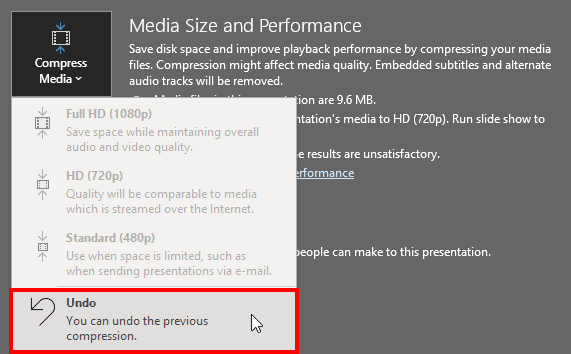
Figure 7: Undo to restore your original video
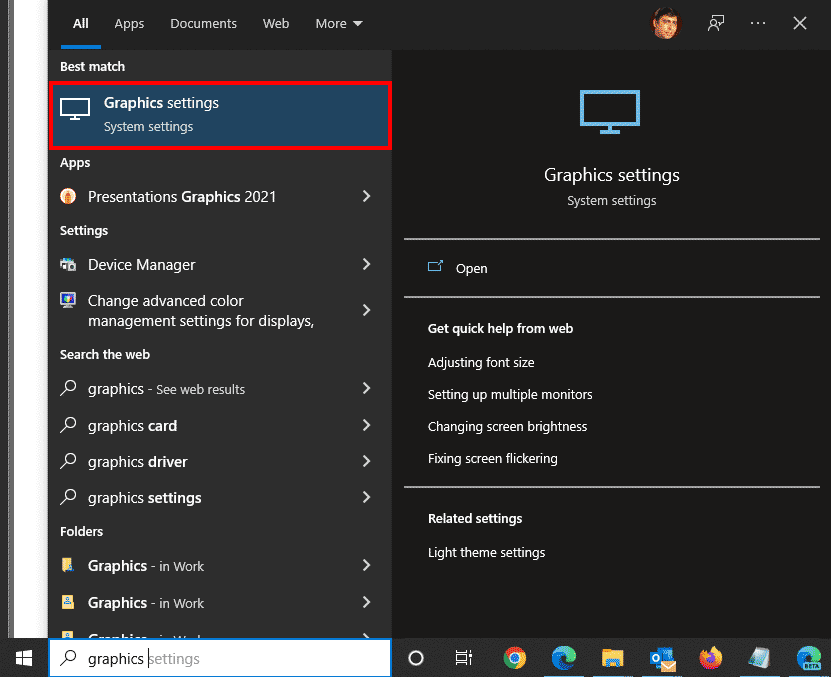
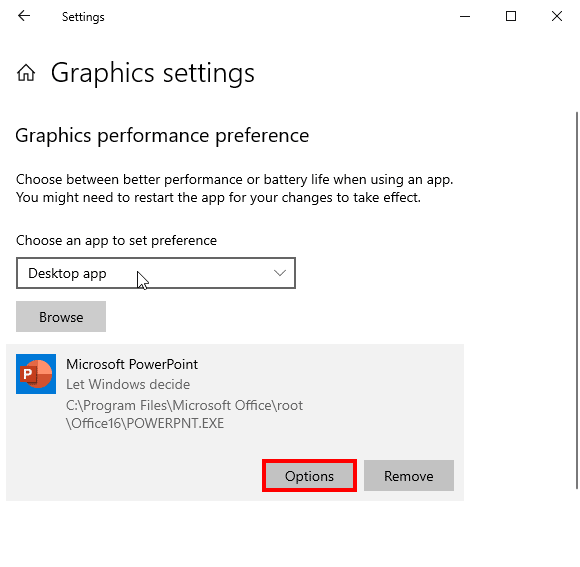
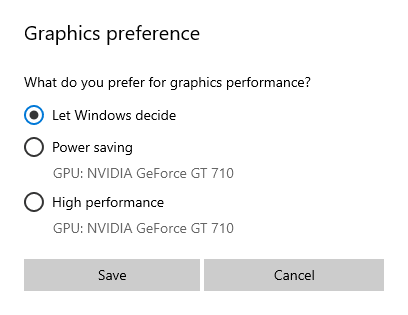
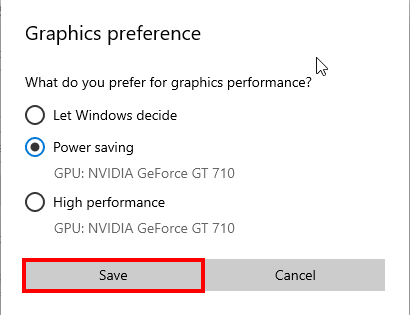
There used to be an option that you could turn on within PowerPoint and other Microsoft Office applications, but Microsoft has now removed this option altogether from the PowerPoint Options dialog box. You can turn this on via a Group policy, or achieve something similar by following these steps outside of PowerPoint using Windows 10 or 11:
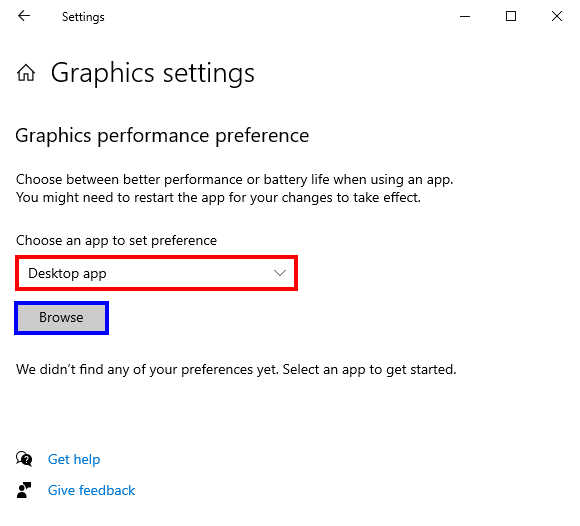
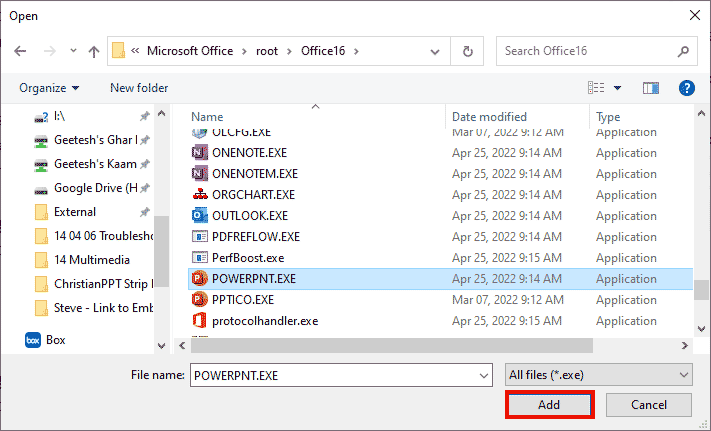
To find the path to the PowerPoint executable file, PowerPnt.exe, you can access the Start menu by pressing the Windows key on your keyboard, and then typing powerpnt. You'll see the shortcut to PowerPoint, as highlighted in red within Figure 11, below. Right-click on this option, and choose the Open file location option, shown highlighted in blue within Figure 11.
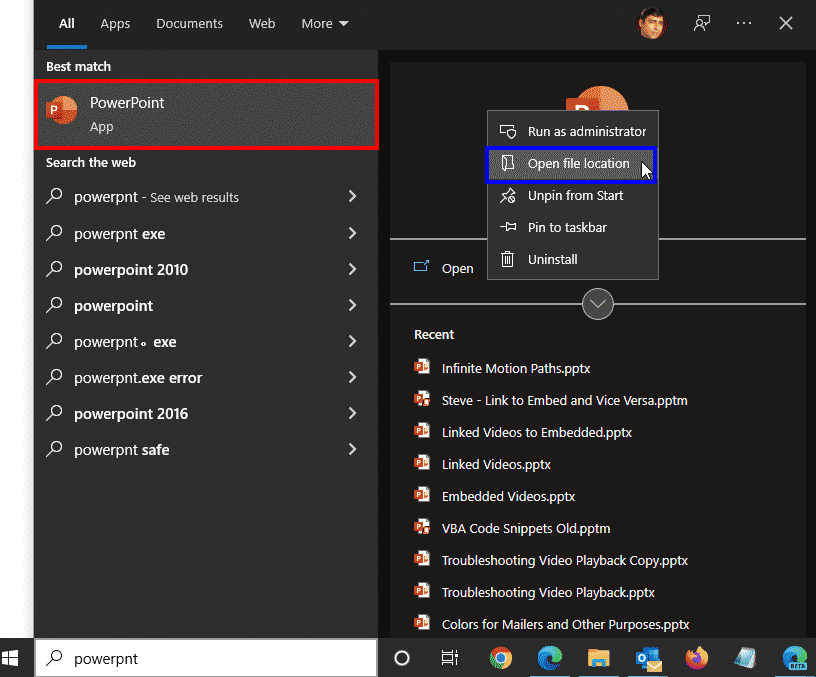
Figure 11: PowerPoint in the Start menu
Doing so will open an Explorer window that contains the PowerPoint executable file. Only, in this case, that's not true because we ended up with another shortcut, as shown highlighted in red within Figure 12, below. Now, right-click this shortcut, and choose the Properties option in the resultant contextual menu, as shown highlighted in blue within Figure 12.
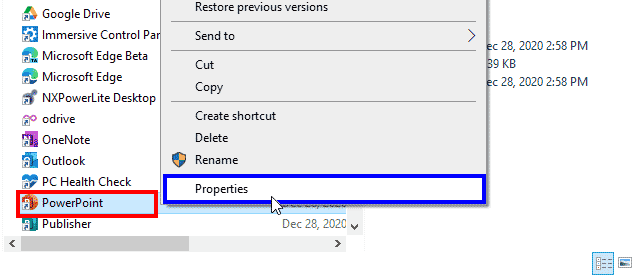
Figure 12: Properties for the PowerPoint shortcut
This action will summon the Properties dialog box, shown in Figure 13, below. Within the Shortcut tab of this dialog box, you'll see the Target box that contains the path to the PowerPoint executable, as shown highlighted in red within Figure 13.
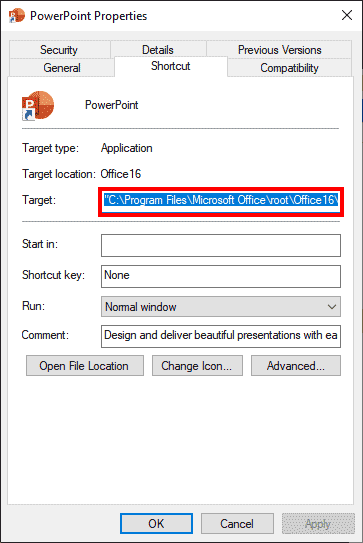
Figure 13: Path to the PowerPoint executable
14 07 01 - Video in PowerPoint - Advanced: Troubleshooting Video Playback in PowerPoint (Glossary Page)
You May Also Like: To Empower Others: Use the Four Cornerstones of Effective Feedback | Orchid PowerPoint Templates


Microsoft and the Office logo are trademarks or registered trademarks of Microsoft Corporation in the United States and/or other countries.