Do you quickly need to translate your slides from English to French or some words from English to Hindi? The best option available to you is to
get a professional translator but did you know that PowerPoint includes rudimentary translation skills? This translation is not something that you
could use without checking the results, but this is still a great start.
There are two ways to translate content in PowerPoint. The first option, which we call Type and Translate works best for small
phrases or even words that are not on your slide yet. The second option, which we call Select and Translate works for all sorts of
textual content already on your slides.
Type and Translate in PowerPoint
Follow these steps to explore the Type and Translate option in
PowerPoint 2010 for Windows:
- Launch PowerPoint, and open an existing presentation or even create a new one. Access the Review tab of the
Ribbon (shown highlighted in red in
Figure 1). Click the Research button, as shown highlighted in blue in
Figure 1.

Figure 1: Research button within the Review tab of the Ribbon
-
This action opens the Research Task Pane as shown in
Figure 2. Type the word which you want to translate within the area shown highlighted in red within
Figure 2.
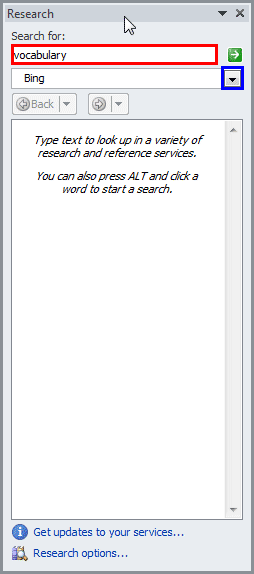
Figure 2: Research Task Pane
-
Then click the down-arrow within the Tools section (highlighted in blue within
Figure 2, above) to open a list shown in Figure 3. Within this list, select the
Translation option as shown in Figure 3.
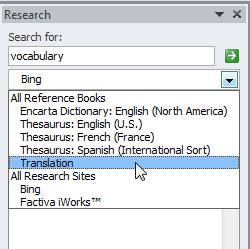
Figure 3: Translation option
-
Now you need to select a language to which you want to translate the word. To do that locate the Translation section and click the
down-arrow next to the To box, as shown highlighted in red within Figure 4. This opens
a list of languages. Select the language of your choice. In Figure 4, you can see that we choose Greek.
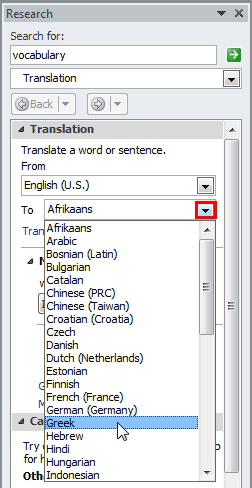
Figure 4: Select a language to translate to- You will see the translated word in Greek, as shown highlighted in red
within Figure 5. You can insert this translated word into the active slide at the cursor position, by clicking the
Insert button, highlighted in blue within Figure 5.
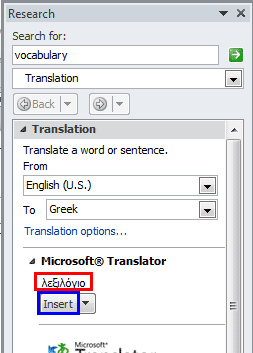
Figure 5: Insert the translated word into the active slide
Translation Services and More
You will notice that the service to translate from English to Greek, in this case, is
Microsoft Translator. Microsoft Translator is an online service and will only work if you are connected online.
Also, Microsoft Translator is only available for a limited subset of language pairs. Other services may be available for different language
pairs.
Sometimes, translation services may not be available, or they might be turned off. This can be the case when you do not see the translated words or
even the
Insert button, as shown in
Figure 5, above. Explore our
Translation Options in PowerPoint 2010 for Windows tutorial to
understand what's happening.
- To use the translated word, you can either insert or copy:
Insert
- First, click inside a text container on your slide. Then click the Insert button to place the translated
word on your slide.
Copy
- Click the down-arrow next to the Insert button, as shown highlighted in red
within Figure 6. Within the resultant drop-down menu, choose the Copy option, as shown highlighted in
blue within Figure 6.
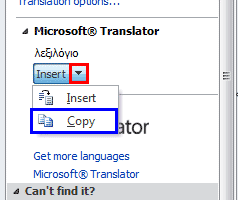
Figure 6: Copy the translated word
Select and Translate in PowerPoint
Follow these steps to explore the Select and Translate option:
- Select and then carefully right-click the word, phrase, or paragraph you want to translate. This action brings up a contextual
menu as shown in Figure 7. Within this contextual menu, select the Translate option, as shown in
Figure 7.
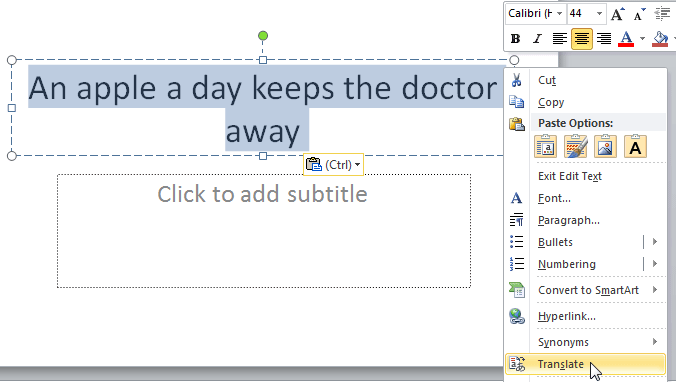
Figure 7: Translate option within the right-click contextual menu- This brings up the Research Task Pane along with the translated content as shown in Figure 8.
Do note that the Microsoft Translator uses the language selected within the Research Task Pane.
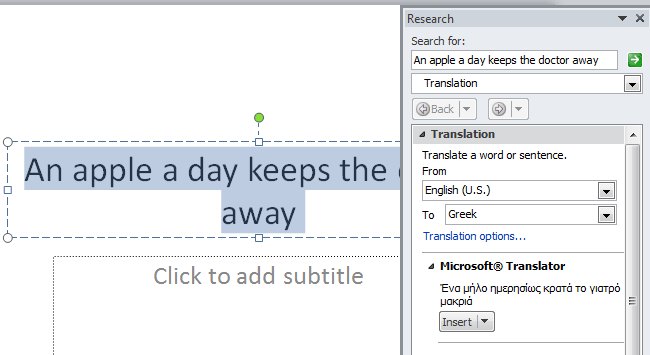
Figure 8: Translation using Microsoft Translator- If needed, change to the language of your choice as explained in Step 4 of the preceding section, earlier on
this page. In Figure 9, you can see that we have changed the language to Hindi (highlighted in
red). You can also see the translated text highlighted in blue within
Figure 9.
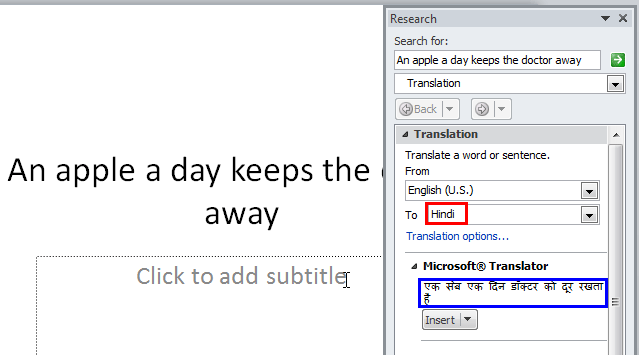
Figure 9: Change the language- Now click on the Insert button to replace selected text on the slide (see Figure 10).

Figure 10: Text translated to Hindi on the active slide- Save your presentation often.
Translating Entire Presentations?
You can similarly translate entire presentations. But do remember these machine translations are not perfect. Be sure to check them
manually for any imperfections.
Also, if you want to work on an entire presentation, it is a good idea to save your existing presentation with a new name and then
translate text content. This will ensure that you do not overwrite the presentation in the original language!


