Although you can fill your text so that it appears textured within PowerPoint, the final result depends upon the
texture you use for the fill, and how well it contrasts with the slide background. For reasons of readability, make sure
that the texture used is not too crowded or even multicolored. And as already stated, choose a texture that contrasts
with your slide background. Look at the slide shown below in Figure 1. Notice that the text on the top
part of the slide has a texture fill that almost merges with the background. The texture used as a fill for the text on
the bottom part of the slide looks so much better than the earlier example, at least on the readability front.
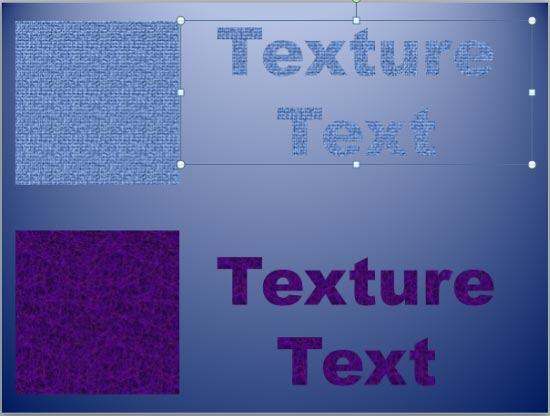
Figure 1: Two examples of Texture fills for text
Another concern with texture-filled text pertains to the text size and the font you use. Typically textured text
looks best for text that's sporting a larger text size. Also, use a font that has thicker, more pronounced line shapes.
Follow these steps to learn how to apply a texture fill to your text
PowerPoint 2013 for Windows:
- Select the text to which you want
to apply a texture fill. Alternatively, if you just want to follow this tutorial step-by-step,
insert a text box on a blank slide and type
some text in it. Also, change the text font
to something blockier, such as Arial Black (see Figure 2).
Select the text, or the entire text box
to bring up the Drawing Tools Format tab on the
Ribbon as shown highlighted
in red within Figure 2.
-
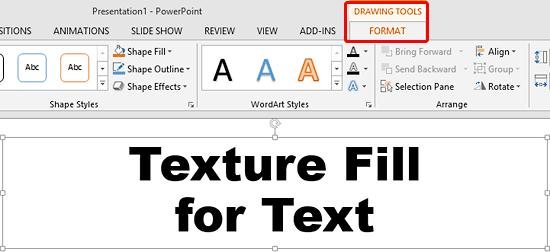
Figure 2: Drawing Tools Format tab of the Ribbon
Note: The
Drawing Tools Format tab is a
Contextual tab. These tabs are
special tabs in the
Ribbon that are not visible all
the time. They only make an appearance when you are working with a particular slide object which can be edited using
special options within these tabs.
- Within the Drawing Tools Format tab, locate the Text Fill button and click
the downward pointing arrow, as shown highlighted in red within Figure 3.
-
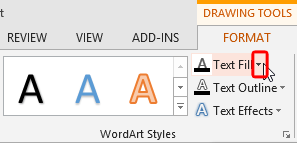
Figure 3: Text Fill button
- This opens the Text Fill drop-down gallery. In this drop-down gallery, select the
Texture option (highlighted in red within Figure 4) to open
Texture sub-gallery as shown in Figure 4 (highlighted in blue).
-
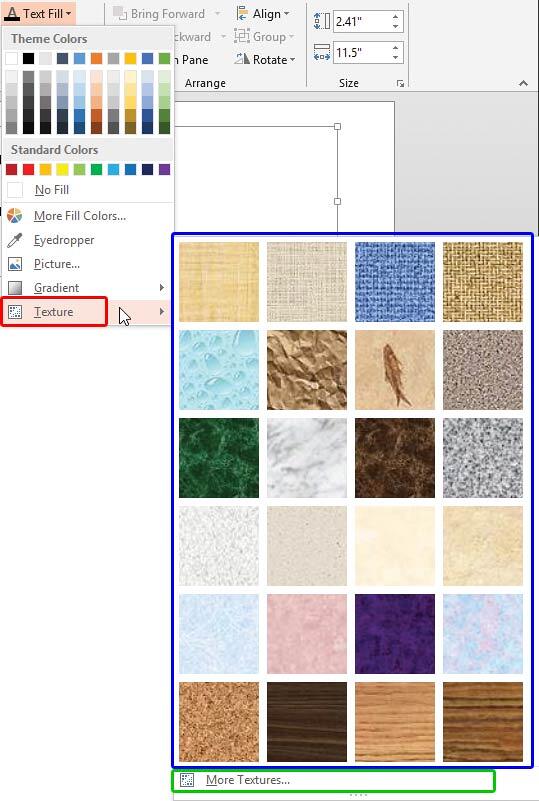
Figure 4: Texture sub-gallery
- You can choose any of the textures from this Texture sub-gallery by clicking on the preview
thumbnail of your choice. If you want to make some adjustments to the selected texture, or if you want to select any Custom
Texture for your text, then click the More Textures option (highlighted in green
within Figure 4, above).
- This opens the Format Shape task pane, as shown in Figure 5. Make sure that
the Text Options tab is selected, and then click the Text Fill & Outline button as shown
highlighted in green within Figure 5. Now, select the Picture or texture
fill radio button as shown highlighted in red within Figure 5.
-
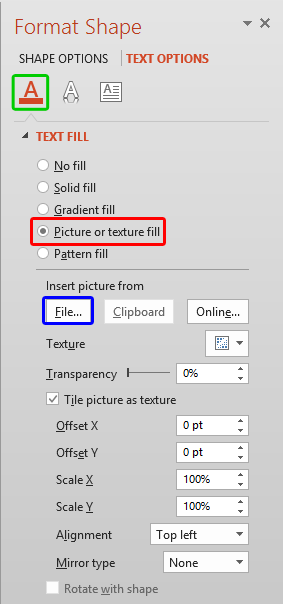
Figure 5: Picture or texture fill radio button
- Click the downward arrow next to the Texture option to open a Texture gallery
that's similar to what you saw in Figure 4, earlier on this page. If you are using a Custom Texture of your
own, or a third-party texture collection, such as the one from Ppted.com,
click the File button (highlighted in blue within Figure 5). To
learn more about using other textures, refer to our
Using Custom Textures as Fill
for Text in PowerPoint 2013 tutorial.
- Within the same task pane (see Figure 5), you'll find several Tiling options.
These are explained on the Tiling
Options page. Although the linked tutorial pertains to shapes, the concepts are similar enough.
- Finally, set the transparency value for the texture fill using the Transparency slider, or
by entering the transparency value in digits within the box next to the slider.
- Select the texture of your choice and edit the selected texture further using More Textures
option. Figure 6 shows the selected text with a texture fill applied.
-
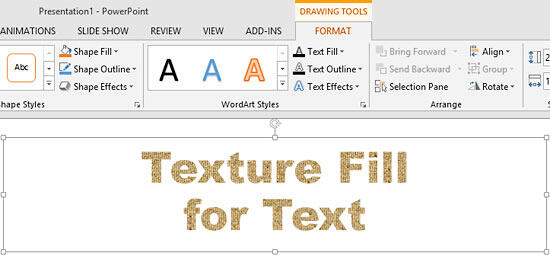
Figure 6: Text with texture fill applied
- Remember to save your presentation often.


