PowerPoint 2013's Format Painter option does an absolutely
amazing job of copying all the formatting attributes from one slide object to another. For instance, you can copy all attributes of a
shape (and even the text that the shape contains) to another shape, text box, or even a text placeholder. However, this is an all-or-nothing
option. Sometimes, you may want to just copy the text formatting attributes, without copying the shape fill or any of the other shape
attributes. This can be even more confusing when the text itself is formatted in more than one style. See Figure 1, below
where text within a text box is formatted in two different styles. While the word "Text" uses a texture fill with a glow, the
word "Box" uses a picture fill. Selecting the entire text box, and then copying its attributes to another text box using the
Format Painter will never replicate two text styles. So, clearly there has to be a better way! We explain the better way in
this tutorial.
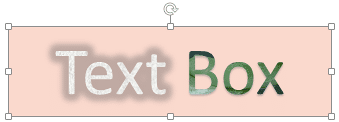
Figure 1: Text with two different styles within a text box
Let us imagine we want to copy only the text formatting of word "Box", and ignore the pink fill of the container text box, and
also the way the word "Text" is formatted. To learn how to do that in
PowerPoint 2013, follow these steps:
- Carefully select only the word from which you want to
copy the text attributes. We selected the word "Box" since we have to copy its formatting, as shown in Figure 2.
But you can even get the same results by selecting just one alphabet of the word from which you need to copy the attributes.
-
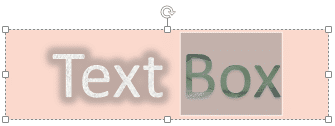
Figure 2: Word selected within the text box
Want ready-made text effects to use in your PowerPoint slides? Visit our
PowerPoint Text Effects page, and
download hundreds of pre-created text styles!
- Now, access the Home tab of the Ribbon,
and click the Format Painter button, as shown highlighted in red, within Figure 3.
-
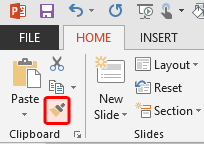
Figure 3: Format Painter button
- This changes the cursor into a Paintbrush icon (highlighted in red within Figure 4).
Hover this changed cursor over the text to which you want to apply the copied text attributes, as shown in Figure 4.
-

Figure 4: Copied text attributes being replicated for new text
- Now, click on this text to paste the copied text attributes, as shown in Figure 5.
-
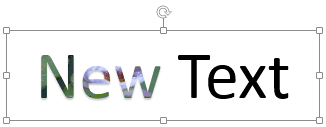
Figure 5: Text attributes pasted on to the new text
- Note that the copied text attributes are pasted to only one word "New", and not to the
word "Text". This is because
there is a space separating those two words. If you want to paste the copied text attributes to the entire text in the target text container,
then you have to double-click the Format Painter button instead of just clicking it once, so that it remains selected. Then,
go on clicking on each and every word in the target text container with the cursor that has been changed to a Paintbrush. When you are done,
click the Format Painter button again, or just press the Esc key on the keyboard to deselect it.
- Alternatively, you can delete all spaces and apply the formatting with the Format Painter, and then,
recreate the spaces.
- If you have plenty of text and don't want to painstakingly click with the Format Painter on each word,
or even delete spaces, then follow this approach:
- i. Format the text within a text container as required. Just one word formatted in the text container should suffice,
as shown in our previous example in Figure 5, above.
- ii. Then, copy the text from another source. This source can be text in another slide, or even a Word document, or
any text from any application that you can copy to the clipboard. Then paste this copied text next to the formatted text. Doing so will paste
the content but also show the Paste Options icon, as shown in Figure 6, below (highlighted
in red).
-
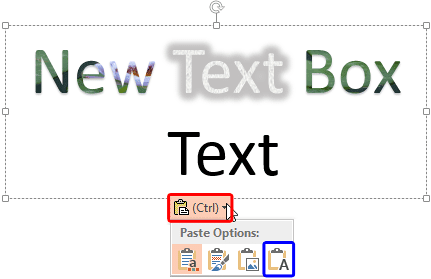
Figure 6: New text copied and pasted next to the formatted text
- iii. Click this Paste Options icon or just press the Ctrl key to bring up
a small menu, also visible in Figure 6, above.
- iv. In this menu, select the Keep Text Only option, represented by the icon with capital letter 'A',
as shown highlighted in blue within Figure 6, above. This will result in the pasted text being
formatted as the existing text within the text container, as shown in Figure 7, below.
-

Figure 7: New text gets formatted as existing text
- Save your presentation often.


