Most of the time, text in PowerPoint is filled with either a black or a white solid fill, or any color that contrasts with the color of the slide background.
This color info is contained within the Theme applied to the presentation. There may be times when you want to
change this default text fill to some other particular color. Or, perhaps you applied a
WordArt Style to your text and you are happy with everything else
within that WordArt Style except the text fill. PowerPoint's Text Fill option provides you with plenty of fill options for your text.
Fill options include solid colors, gradients, textures, and also pictures. Follow these steps to explore text fills in
PowerPoint 2016 for Mac:
- Select text that you want to change the fill for.
You can also select the entire text box or place holder as shown in
Figure 1, below.
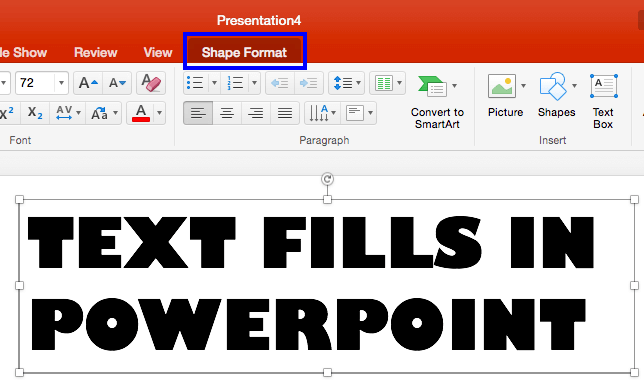
Figure 1: Shape Format tab of the Ribbon- Alternatively, if you just want to follow this tutorial step-by-step, launch PowerPoint. You will see the
Presentation Gallery. Here, select the
Blank Presentation option to open a blank presentation with a new slide. You can
change the slide layout to Title Only by selecting the
Home tab | Layout | Title Only. Type some text within the Title placeholder. You can also
change the text font to something "blockier",
(see Figure 1, above). Make sure that the entire placeholder is selected.
- This makes the Shape Format tab visible on the
Ribbon as shown highlighted in blue
within Figure 1. Activate this Ribbon tab by clicking on it.
Note: The Shape Format tab is a Contextual tab. These contextual tabs are special tabs in the Ribbon that are
not visible all the time. They only make an appearance when you are working with a particular slide object which can be edited using special options within these tabs.
- Within the Shape Format tab, locate the Text Fill button and click the downward pointing arrow, as shown highlighted
in blue within Figure 2.
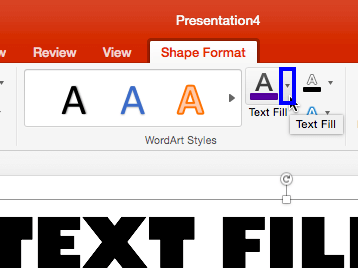
Figure 2: Text Fill button- This opens the Text Fill drop-down gallery, as shown in Figure 3.
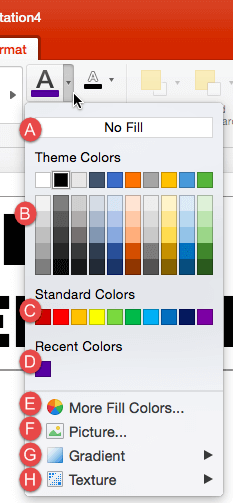
Figure 3: Text Fill drop-down gallery- Options within the Text Fill drop-down gallery are explained below, as marked in Figure 3, above:
A. No Fill
- Choose this option to remove any fill from the selected text.
B. Theme Colors
- Here you can select any of the colors which are from the active Theme of the presentation. You can also select any of the 5 tints
or shades for any Theme color. Learn more about Themes here.
C. Standard Colors
- Here you can choose from any of the ten standard colors. These ten standard colors are just choices of colors that PowerPoint believes to
be widely used. You don't have to limit yourself to either the Theme colors or Standard colors, as you'll learn in the next options, although it's a good design
idea to use Theme colors as far as possible.
D. Recent Colors
- Here you can find the colors most recently used. If you have just launched PowerPoint and created a new presentation, the
Recent Colors option may be entirely absent since you haven't selected any color recently!
E. More Fill Colors
- This option is to summon the Mac OS X Color picker, as shown in Figure 4. Here, you can select a color
and make changes to it and click OK button to apply it as text fill.
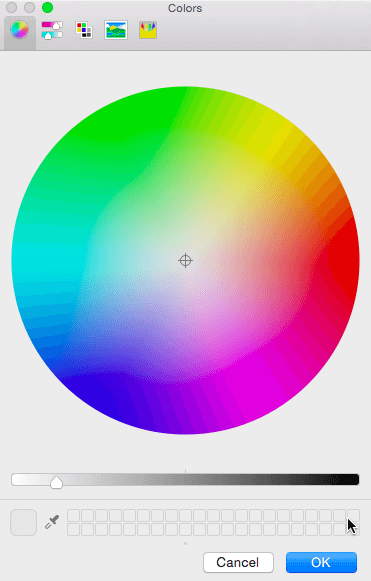
Figure 4: Mac OS X Color picker F. Picture
- This option allows to use a picture as a fill for
selected text. You need to use fairly large sized text so that picture fills look effective.
G. Gradient
- With this option, you can apply a gradient as text
fill.
H. Texture
- Use this option to apply a texture as a fill for your
text.
I. Pattern
- This option is not listed within the Text fill drop-down gallery, but you can fill your text with pattern, as explained
in our Pattern Fills for Text in PowerPoint 2016 for Mac tutorial.
- Choose and apply any fill for your text from within the Text Fill drop-down gallery as required. As you can see in
Figure 5, we merely changed the color of the text.
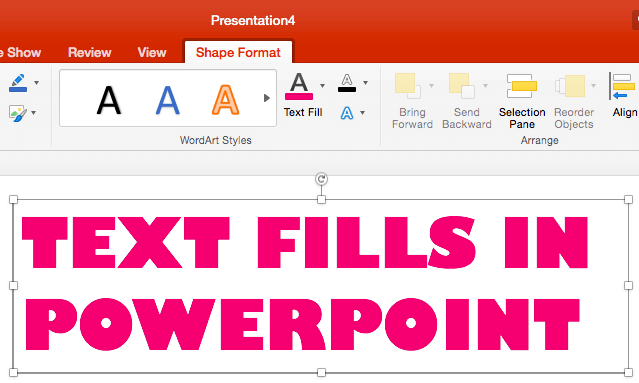
Figure 5: Text with changed fill color- Remember to save your presentation often.


