Among the tabs within Backstage view, we have already explored the Open, New, and Save tabs. In this tutorial, we will explore the Share tab, that provides you with options to share the current presentation through the cloud via OneDrive. You can also email the presentation as an attachment, a link, or a PDF.
Follow these steps to learn more about Share options within Backstage view in PowerPoint 365 for Windows:
- Open a presentation to be shared and click the File menu, as shown highlighted in red in Figure 1.

Figure 1: File menu - This opens Backstage View. Select the Share option in the sidebar as shown highlighted in blue in Figure 2.

Figure 2: Share options within Backstage view - This opens the Share window as shown in Figure 3.
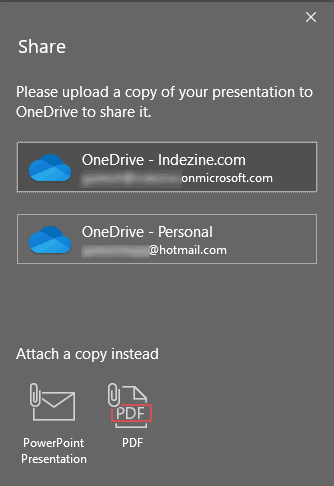
Figure 3: Share options within Backstage view - As you can see in Figure 3, above, there are two ways to share your presentation:
- You can upload the presentation to OneDrive. Do note that you may see more than one OneDrive option here if you have both Personal and Business accounts. In that case, you can choose the OneDrive account you want to use.
- You can send the presentation as an attachment. Here, there are two options again:
PowerPoint Presentation
- Selecting this option opens a new email in your default mail application, with a copy of the PowerPoint file attached.
PDF
- Exports your presentation as a PDF file, that attaches to a new email in your default mail application.
- Click any of the OneDrive options to upload the presentation to OneDrive. PowerPoint indicates the presentation being uploaded to OneDrive, as shown in Figure 4.
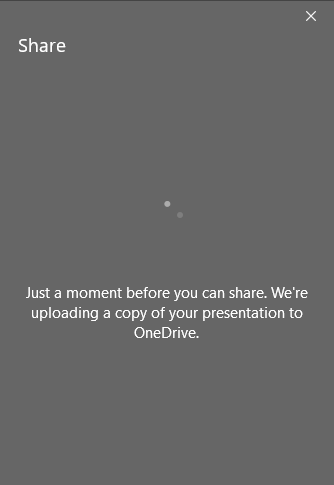
Figure 4: Presentation being uploaded to OneDrive - Once the uploading is over, the Send Link dialog box appears, as shown in Figure 5.
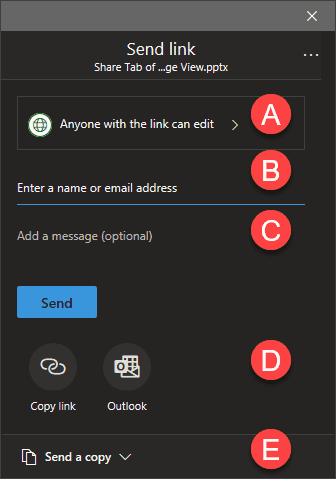
Figure 5: Send Link dialog box - Options within Share Task pane are explained below, as shown in Figure 5 above:
A. Share and Invite people
- Clicking the Anyone with the link can edit option opens up another screen with several sharing options, shown in Figure 6, below. You can choose from these options:
- Anyone with the link: Allows recipient to access the original PowerPoint file hosted on OneDrive
- People in <organization> with the link: Allows recipients within the organization to access the file. This option works for business Microsoft 365 accounts that are implemented within an organization.
- People with existing access: This option is to resend a link to recipients who already have access.
- Specific people: Allows you to share access with specific people. You can type these names in the B area, shown in Figure 5, above.
One you upload your presentation to OneDrive, do note that you now have two copies of the same presentation. Once is your original local copy, and the second one is now on OneDrive.
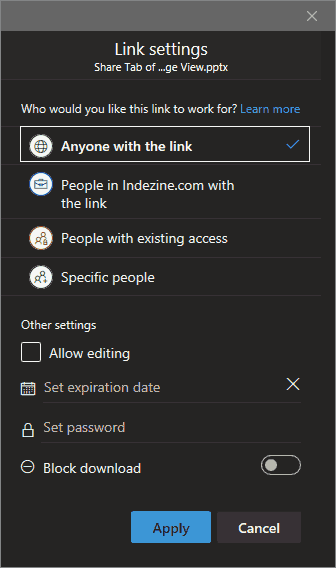
Figure 6: Share with people - You can also allow or prevent recipients from editing the PowerPoint file. Plus, you can set an expiration date, set a password, and also block downloads of the file. Some of these options may not be available if you change whom you are sharing the file with.
- Once you make choices, click the Apply button to get back to the dialog box shown in Figure 5, previously on this page.
B. Enter a name or email address
- Here, you can type in the name or email address of the recipient. Unless the names are saved within your organization, you will have to type in complete email addresses. You can type multiple email addresses separated by commas.
C. Add a message
- Optionally, you can type in a message in this area for the recipients.
D. Send
- You can use the large Send button to share your file. You can also click the Copy link button to bring up a window with a share link, as shown in Figure 7, below. In this dialog box, click the Copy button to copy the link to your clipboard so that it can be pasted elsewhere.
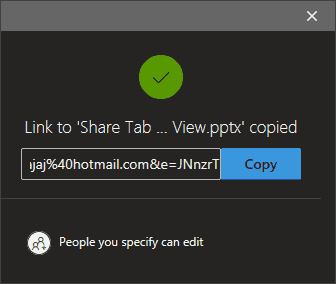
Figure 7: Copy link - You can also click the Outlook button to launch a new email that already has a link to share your presentation pasted, as shown in Figure 8, below.
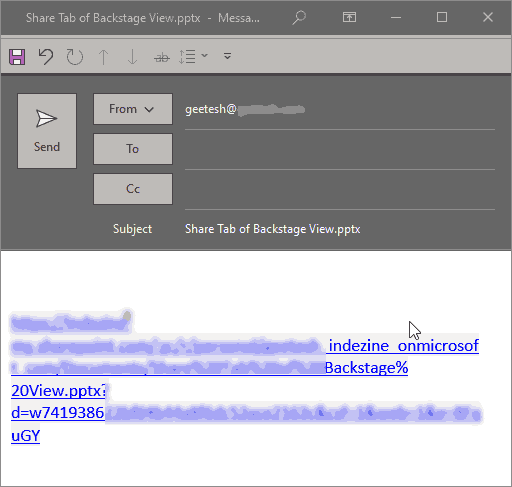
Figure 8: Launch email application with a link pasted E. Send a copy
- Clicking this option brings up a flyout menu with two options, as shown in Figure 9, below.
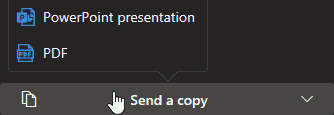
Figure 9: Send a copy


