Archived Content
Content on this page is not recent and has been retained for historical reasons.
In a previous tutorial, we showed you how you can share PowerPoint presentations online using the Microsoft Office Web Viewer. That option works great if you have your own domain where you want to upload and share PowerPoint presentations (or even Word and Excel files). However, if you already use Microsoft's OneDrive to create and edit your presentations, then it makes sense to use a similar sharing option that is already built within the OneDrive service.
We are assuming that your presentations are already on OneDrive, if not yet, do upload your presentation, and then follow these steps to learn more:
- Access the PPTX file already on OneDrive, and select it, as shown in Figure 1, below. Note the check-mark towards the left side of the selected file, as shown in Figure 1.
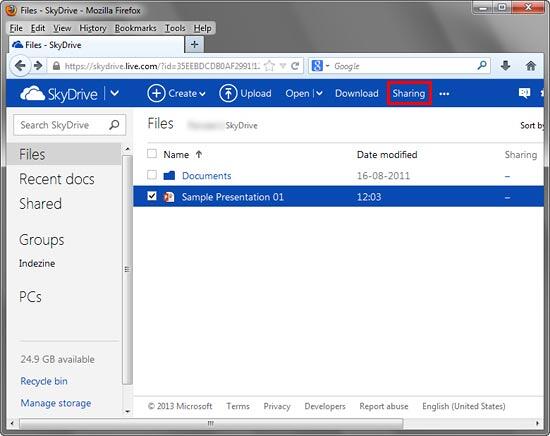
Figure 1: PowerPoint file selected within SkyDrive- Choose the Sharing menu option, as shown highlighted in red within Figure 1, above. In the resultant screen, choose the Get a link option in the sidebar, as shown highlighted in red within Figure 2, below.
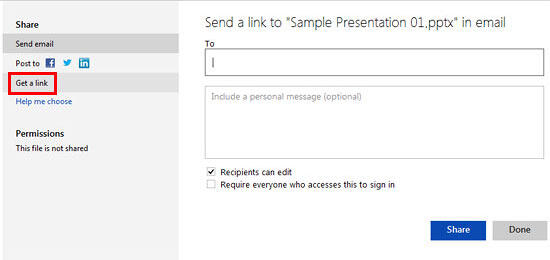
Figure 2: Get a link option to be selected- In the subsequent screen, you'll be provided with three sharing options, as shown in Figure 3, below.
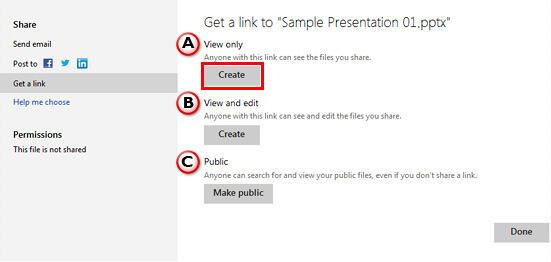
Figure 3: Sharing options in SkyDrive- These three sharing options are explained below, as marked in Figure 3:
A. View only
- This option provides a link to only view the presentation.
B. View and edit
- Select this option to get a link to view and edit the presentation.
C. Public
- This option makes your selected presentation publicly accessible. This means that anyone can search and view your presentation, even if you don't share the link with them.
- For now, we will go with the View only option. To select any of these three options, you need to click the Create button associated with them. You can see the Create button associated with the View only option is selected, as shown highlighted in red within Figure 3, shown previously on this page.
- This action will provide a link which can be shared, as shown highlighted in red within Figure 4, below. Notice that this link is quite long. Fortunately, there's a convenient Shorten option, as shown highlighted in blue within Figure 4, click this option.
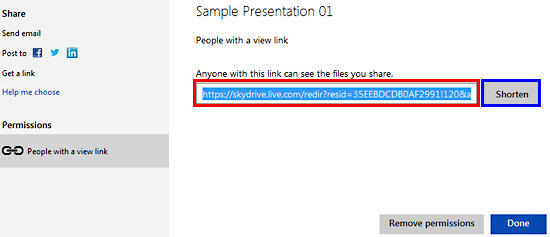
Figure 4: Link for sharing presentation- Doing so will create a short URL, as shown highlighted in red within Figure 5, below.
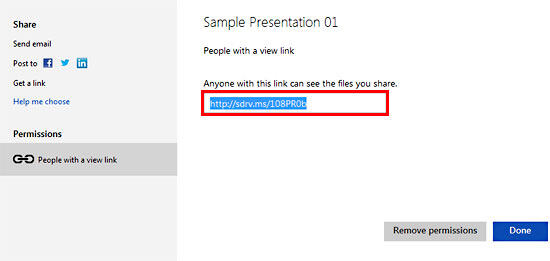
Figure 5: Shorten URL for sharing presentation- You can send this link to share your presentation. Once you have retrieved your link, click the Done button.


