The new Search feature in PowerPoint is an option that brings up definitions, images, and other results from various online resources about a word or phrase, right within PowerPoint. PowerPoint’s online documentation sometimes calls this feature Smart Lookup or even Insights.
Follow these steps to search online resources by using the Search Task Pane in PowerPoint 365 for Windows:
- There are three ways to bring up the Search Task Pane. First, you can select the word or phrase on the slide that you want to explore further, and click the Review tab on the Ribbon, as shown highlighted in red within Figure 1, below. This brings up the Review tab options. Click the Search button within the Insights group, as shown highlighted in blue within Figure 1.
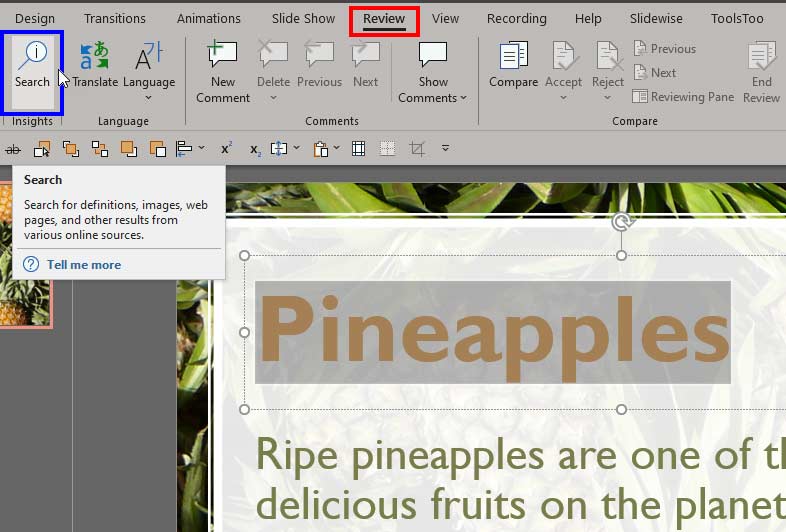
Figure 1: Search option within the Review tab
Search or Find?
- Yes, search and find are synonyms, so it can be confusing when PowerPoint has options named Search and Find, and both have different objectives. While Search looks for content online, Find looks for content within your presentation file.
- You can also type the required word within the Search box in the PowerPoint Title bar, as shown highlighted in red within Figure 2, below. If you do not see a Search box, click the magnifying glass icon on the Title bar. Doing so brings up the Search drop-down list. Within this list, type in the word you are looking for, and then click on the last option, as shown highlighted in blue within Figure 2.

Figure 2: Search option on the Title bar
Search Box, Magnifying Glass Icon, and Tell Me
- If you see a magnifying glass rather than the full Search box on the PowerPoint Title bar, that's because you may have turned off the Search box in the PowerPoint Options dialog box, and that's great because you end up with more space in the Title bar. Learn more in section AE on our General Program Options in PowerPoint 365 for Windows page.
- This Search box is also called the Tell Me text box. Explore our Tell Me in PowerPoint tutorial to learn more.
- The third way is the simplest. You right-click the selected word or term, and from the contextual menu that appears, select the Search option, as shown highlighted in red within Figure 3, below.
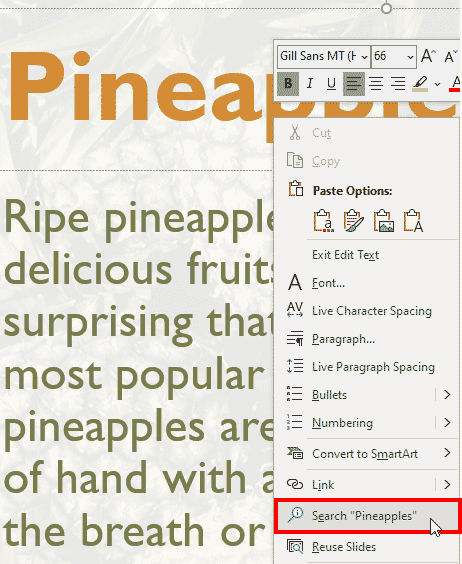
Figure 3: Search option within the right-click contextual menu - Either of the three options explained will bring up the Search Task Pane, as you can see in Figure 4, below. The results in this Task Pane will depend upon your search term.
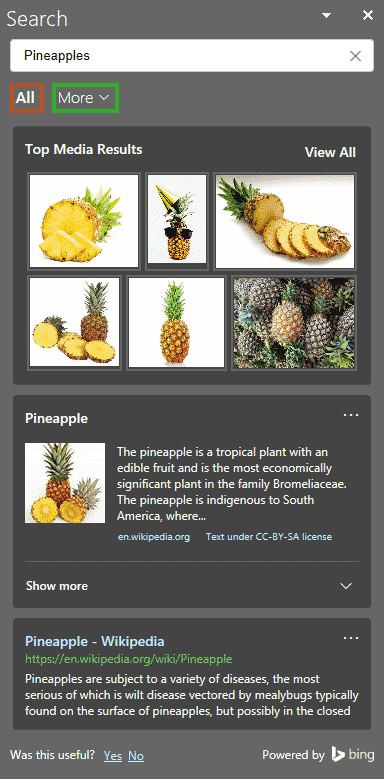
Figure 4: Search Task Pane - Do note that all results are shown by default, as indicated by the term All that's shown highlighted in red within Figure 4, above. To filter results so that you see only web resources, media sites, etc., you can click on the More option, shown highlighted in green within Figure 4. Doing so brings up a small menu, as shown in Figure 5, below.
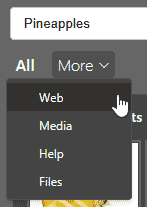
Figure 5: Search filters - These filters are explained below:
- Web: Searches online on web sites such as Wikipedia and elsewhere for information about your search term.
- Media: Restricts searches to online images.
- Help: Searches within PowerPoint's help documentation.
- Files: Searches within recent files opened in PowerPoint.
- These filters can be helpful, especially if you want to do a web search, and not search within PowerPoint's help documentation or recently opened files. Figure 6, below, shows the Search Task Pane with the Web filter enabled, highlighted in red.
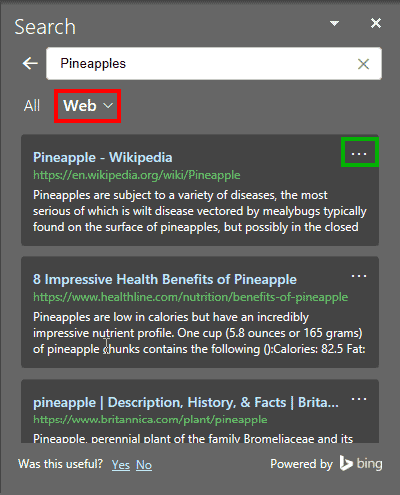
Figure 6: Web filter in the Search Task Pane - When you hover your cursor, you'll notice that each search result includes a three ellipses icon on the top-right, highlighted in green within Figure 6, above. Once you click on this icon, you will see a small menu with three options, as shown in Figure 7, below.
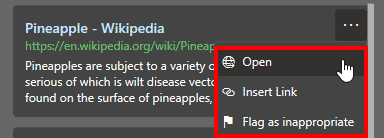
Figure 7: Menu in the Search Task Pane - These options are explained below:
- Open: This option opens the linked web page in your default web browser.
- Insert Link: Insert a link to the web page at the insertion point on your slide.
- Flag as inappropriate: This sends a message to Microsoft that the link was inappropriate. Be careful while clicking this option because there's no warning, and there's no undo.
- Figure 8, below, shows the Search Task Pane with the Media filter enabled, highlighted in red. When you hover your cursor, you'll notice that each media result includes a three ellipses icon on the top-right, highlighted in green. Plus, you will also see the Copy icon as an overlay, highlighted in blue.
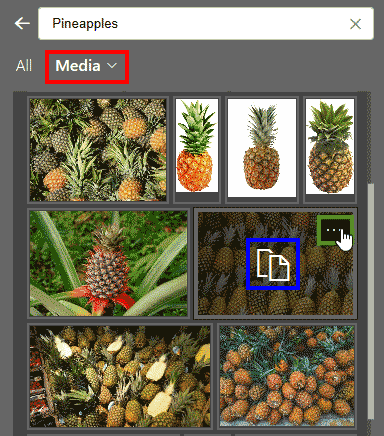
Figure 8: Media filter in the Search Task Pane - Once you click the three ellipses icon, you will see two options, as shown in Figure 9, below.

Figure 9: Menu in Media Search - These options are explained below:
- Open: This option, highlighted in red within Figure 9, above, shows the width and the height of the media clip in pixels. When clicked, it opens the linked web page for the media clip in your default web browser.
- Flag as inappropriate: This sends a message to Microsoft that the link was inappropriate. Be careful while clicking this option because there's no warning, and there's no undo.
- The Copy icon, when clicked copies the image to the clipboard. You can then navigate to the slide where you want to use the image, and press the keyboard shortcut for Paste, which is Ctrl + V.
Using options explained in this tutorial, you can do some basic research about a word or a phrase right inside PowerPoint.


