By its very nature, PowerPoint is an application that takes content of different types and arranges them all together coherently within a slide. Such content often includes text, pictures, charts, multimedia, and other types. Additionally, since many people use PowerPoint for training programs, you will find many slides that contain screenshots of computer program interfaces. Typically, you capture these screenshots in another program and then insert that screenshot like a regular picture within PowerPoint 2013 for Windows. Many users do not realize that you can add a screenshot from within PowerPoint without the need for another program.
Note: The Screenshot option works the same way in other Microsoft Office programs including Excel, Outlook, and Word.
Follow these steps to add a screenshot within PowerPoint 2013 for Windows:
- Make sure that the other non-PowerPoint program from which you want to capture a screenshot is open and ready.
- Launch PowerPoint 2013 for Windows. Within the Presentation Gallery, select the Blank Presentation option. PowerPoint will open with a new slide, and you can change the slide layout to Blank by selecting the Home tab | Layout | Blank option. Of course, if you already have an existing presentation within which you want to add a screenshot, just open that presentation, and follow these subsequent steps.
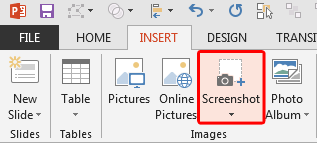
- Access the Insert tab of the Ribbon, and then click the Screenshot button, as shown highlighted in red within Figure 1.

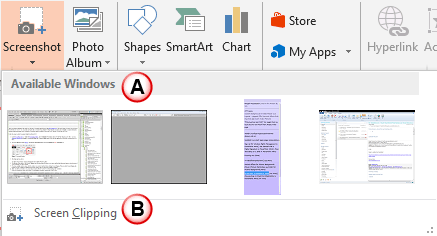
Figure 1: Screenshot button - This brings up the Screenshot drop-down gallery, as shown in Figure 2.

Figure 2: Screenshot drop-down gallery - There are two options within the Screenshot gallery and both these options are explained below, as marked in Figure 2, above.
A. Available Windows
- Here you can see representations of all open applications. To add a screenshot of the whole window of the application, just click the corresponding thumbnail within this section.
B. Screen Clipping
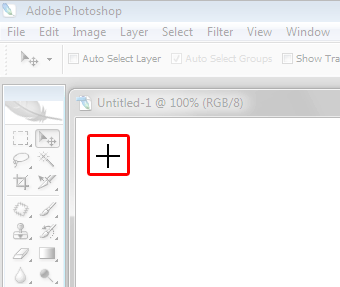
- To add a partial section of any window, first make sure that you visit the application from which you want to capture a screenshot. Thereafter go back to PowerPoint and click the Screen Clipping option. This will change the cursor to a cross, as shown highlighted in red with Figure 3. To take the screenshot, press and hold the left mouse button and drag to select the area of your screen that you want to capture.

Figure 3: Cursor changed to a cross - When you are capturing the Screen Clipping, PowerPoint is minimized and only the application window that you recently visited is available for clipping.
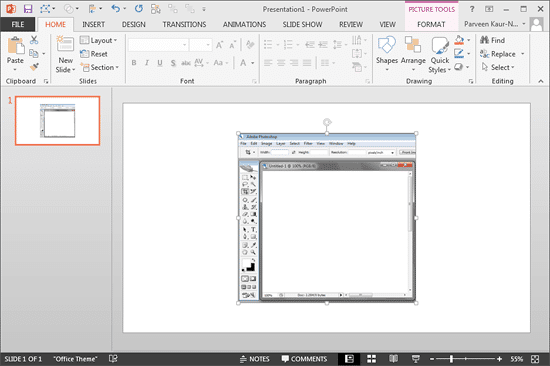
- Instantly thereafter, a screenshot is added to the active PowerPoint slide, as shown in Figure 4.

Figure 4: Screenshot added on slide - After the screenshot is added, you can apply various Picture Tools options to edit and enhance the screenshot.
- Make sure to save your presentation often.
Note: Only one screenshot can be added at a time. To add multiple screenshots, repeat steps 3 and 4.


