Learn how to resize shapes in PowerPoint 365 for Mac. You can resize shapes by dragging, or by using keyboard shortcuts.
Author: Geetesh Bajaj
Product/Version: PowerPoint 365 for Mac
OS: Mac OS X
You typically insert shapes on a slide, by clicking or click-dragging, but even then, you may realize that the shape you placed is not the perfect size. Do you want it larger, or a wee bit smaller? Either way, it's easy to make the size change in a jiffy, right inside PowerPoint.
Follow these steps to resize shapes in PowerPoint 365 for Mac.
Like most Microsoft Office programs, PowerPoint follows the concept of selection, then action. So, the first thing you need to do is to select the shape! Any shape that is selected shows several handles, as shown in both shapes you see in Figure 1, below.
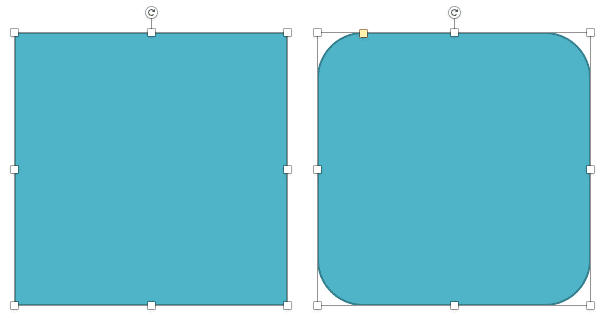
Figure 1: PowerPoint shapes have several handles
Look closely at Figure 1, and you'll find that any selected shape has several handles.
You can resize shapes by either dragging them, using keyboard shortcuts, or by typing in exact values. We look at all these resizing options on this page:
When you drag any of the eight white handles, you can resize the shape in various ways, depending upon certain factors, as explained below:
To maintain the width to height proportions of the shape, hold the Shift key while you drag one of the four corner handles, as shown in Figure 2, below.
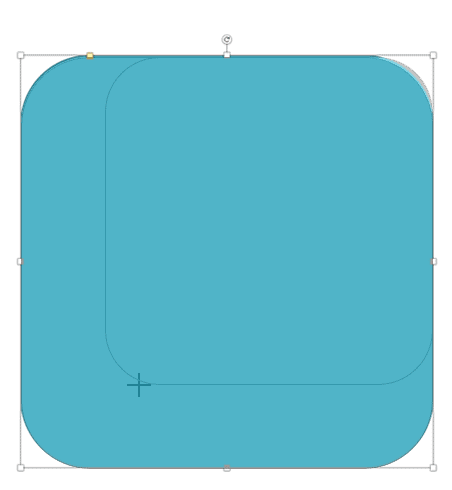
Figure 2: Shift drag to maintain the width to height proportions
To resize from the center of the shape rather than from a corner or side, hold the Ctrl key while you drag one of the four corner or side handles, as shown in Figure 3, below. Do note that doing so does not maintain the width to height proportions of the shape.
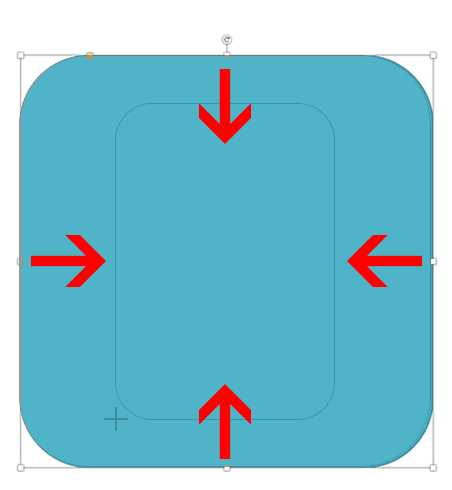
Figure 3: Ctrl dragging resizes from the center of a shape
To resize from the center and still maintain the width to height proportion, hold both the Shift and Ctrl keys while you drag one of the four corner handles, as shown in Figure 4, below.
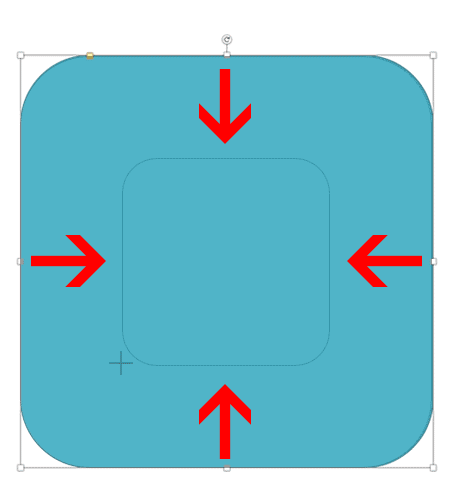
Figure 4: Combine both Ctrl and Shift dragging options
To resize only one side, drag the corresponding side handle, as shown in Figure 5, below.
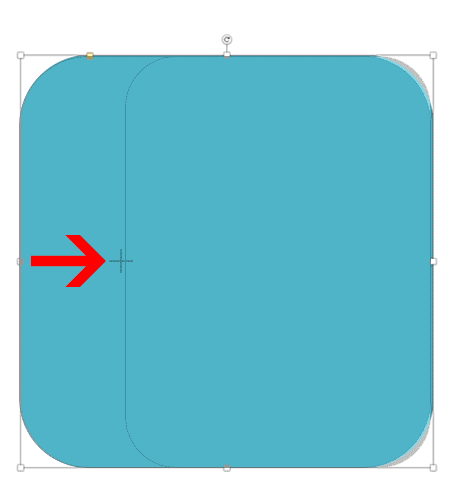
Figure 5: Drag from one side to resize only one side
To resize opposite sides equally, hold the Ctrl key while you drag a side handle, as shown in Figure 6, below. Doing so will resize the side you dragged, and the opposite side.
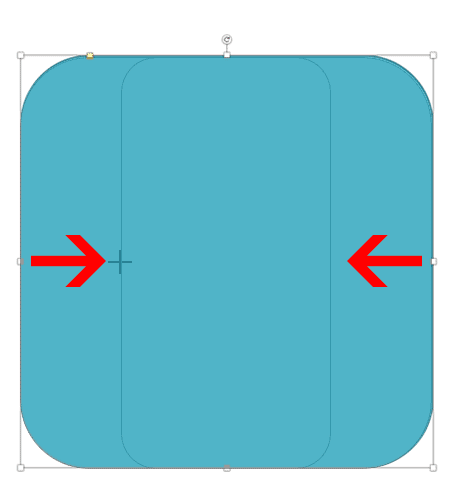
Figure 6: Resize two opposite sides at the same time

Do you want more keyboard shortcuts?
Explore our PowerPoint Keyboard Shortcuts and Sequences Ebook that is updated for all PowerPoint versions.
We explored how you can use modifier keys such as Shift and Ctrl while dragging in the preceding section. Even without dragging, you can resize the selected shape by pressing the Shift key and then pressing any of the four arrow keys on your keyboard. This option takes the center of the shape as an anchor point to resize from. Use any of the following command combinations to resize the shape.
As you resize the shape, you can see the height and the width change dynamically within the Size group of the Shape Format contextual tab of the Ribbon, as shown highlighted in red within Figure 7, below.

Figure 7: The Shape Format tab includes the Size group
The Shape Format tab is a contextual tab. Contextual tabs are special tabs in the Ribbon that are not visible all the time. They only make an appearance when you are working with a particular slide object which can be edited using special options.
To resize any shape to an exact size, you first select it. This activates the Shape Format tab on the Ribbon, as shown in Figure 7, above. You can then enter values in the Height and Width boxes, highlighted in green and orange respectively within Figure 7. As you enter new values in these boxes, the height and width of the shape on your slide will change. You may have to press the Enter key after typing in values within the Height and Width boxes. You can also use the Increase or Decrease buttons next to the numbers to enlarge or reduce the values in the boxes.
Do you want the height and width to change proportionately? To do so, you can select the Lock aspect ratio check-box, highlighted in blue within Figure 7, shown previously on this page. You can do so within the Format Shape pane, which we will explore on this page later.
To view even more resize options, click the Format Shape button, highlighted in purple within Figure 7, shown previously on this page.
You can also right-click (or Ctrl + click) the shape and choose the Format Shape option in the ensuing menu, as shown highlighted in red within Figure 8, below.
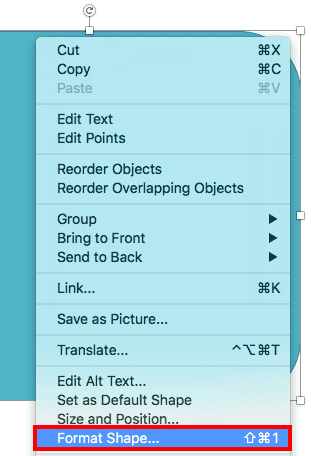
Figure 8: Format Shape option in the right-click menu
Either way, you bring up the Format Shape pane, as shown in Figure 9, below.
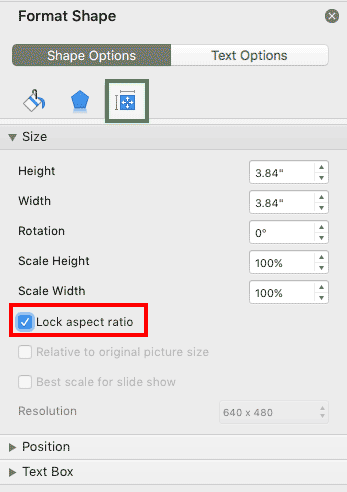
Figure 9: Format Shape task pane
Make sure you select the Resize tab, as shown highlighted in green within Figure 9, above. Within this tab, you'll find several options related to resizing shapes, but we will first look at one option.
Select this check-box, as shown highlighted in red within Figure 9, above, so any change in height reflects a proportionate change in the width, and vice versa. Selecting this check-box influences all parameters mentioned below, except Rotation.
Type in a value or use the increase/decrease buttons to change the height of a shape.
Type in a value or use the increase/decrease buttons to change the width of a shape.
Type in a value or use the increase/decrease buttons to rotate the shape.
Change the height based on percentage values.
Change the width based on percentage values.
Other options shown in Figure 9, are not relevant to resizing shapes, and are more geared towards resizing pictures.
06 01 03 - Basics About Shapes: Resizing Shapes in PowerPoint (Glossary Page)
Resizing Shapes in PowerPoint 365 for Windows
Resizing Shapes in PowerPoint 2016 for Windows
Resizing Shapes in PowerPoint 2016 for Mac
Resizing Shapes in PowerPoint 2013 for Windows
Resizing Shapes in PowerPoint 2011 for Mac
Resizing Shapes in PowerPoint 2010 for Windows
Resizing Shapes in PowerPoint for the Web
You May Also Like: 3D Content Guidelines for Microsoft: Conversation with Michelle Maislen and Jeremy Kersey | Flags and Maps - T PowerPoint Templates


Microsoft and the Office logo are trademarks or registered trademarks of Microsoft Corporation in the United States and/or other countries.