Text Boxes in PowerPoint need to be moved and resized within different areas of the slide. While you may think that selecting and resizing is all
that is to be done, that's not the entire truth because there's so much more you can do even with mere resizing, if you know that these options
exist! In a previous tutorial, you learnt how to move text
boxes on a slide. As emphasized within that tutorial, you should only resize Text Boxes, and not Text Placeholders most of the time since the size of the latter
in best controlled by the Slide Master.
Tip: Typically Text Placeholders for regular text content or even slide titles are located in the same position on successive slides. So, if you really do need to resize a Text Placeholder, do it within the Slide Master not only to provide a consistent look to your
presentation, but also to prevent yourself from monotonous job of resizing Text Placeholders on each and every slide. Don't know the difference
between a Text Box and a Text Placeholder? Look at our
Text Boxes vs. Text Placeholders in PowerPoint 2016 for Windows tutorial.
Now that you are more aware of why you should not resize the Text Placeholders, let us tell you that all techniques on this page apply to both
Text Placeholders and Text Boxes. Actually they also apply to any shapes in your slides that contain text.
Learn more about how you can resize your Text Boxes in PowerPoint 2016 for Windows:
-
Open any slide which has a Text Box, as shown in Figure 1. Note that of the three text containers on this slide, only one is a
Text Box, and, that's the one on the right side of the slide (which includes blue colored text).
-
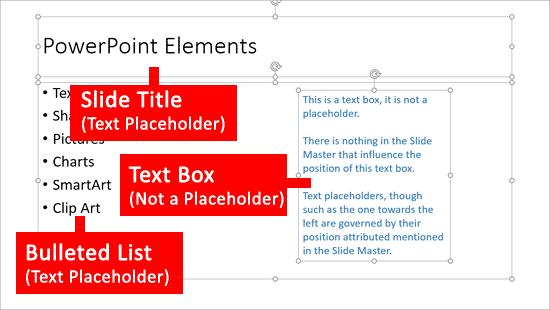
Figure 1: Slide with all text containers selected
-
Click on the edge of the Text Box so that it shows a solid line with selection handles on its perimeter (see Figure 2).
-
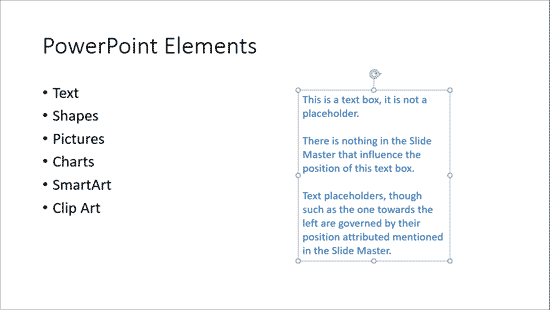
Figure 2: Text Box selected
Tip: If you click within the Text Box, you'll see a dotted line surrounding the perimeter of the Text Box indicating that you are
editing the text inside the box. A solid line indicates the selection of entire Text Box rather than some text within.
-
The selected Text Box now also shows several handles, as shown in Figure 3. These handles are explained below:
-
Four handles on the corners (highlighted in red within Figure 3): These are round shaped and
are on the corners of the Text Box.
-
Four handles on the sides (highlighted in green within Figure 3): These are also round shaped
and placed at the midpoint of each of the four border lines on the Text Box.
-
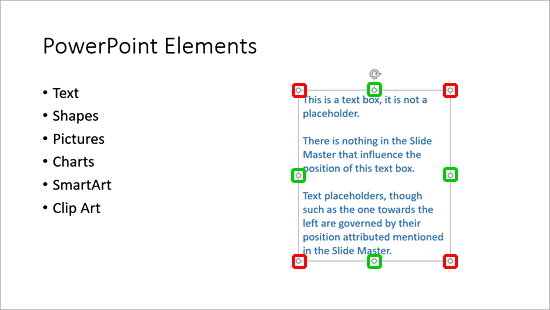
Figure 3: Text Box with transform points
-
Note that if you have selected the Resize shape to fit text option as explained in our
Text Box Autofit Options in PowerPoint 2016 for Windows tutorial, you
may not be able to resize the Text Boxes as you wish. It is possible only when you have selected the Do not Autofit option. So,
first select the Do not Autofit option and then you will be able to resize the Text Box using these eight square handles as
explained below:
- Drag any of the handles inwards, and you reduce the size of the Text Box.
- Drag any of the handles outwards, and you increase the size of the Text Box.
- To maintain the width:height proportion of the Text Box, hold the Shift key while you drag any of the four corner handles.
The Shift key does nothing to the four side handles.
- To resize equally on opposite sides of a Text Box, press the Ctrl key while you drag one of the four side handles.
- To resize equally from the center on all four sides of a Text Box, press the Ctrl key while you drag one of the four corner
handles.
-
You can also press both the Shift and Ctrl keys together to combine the results based on the details mentioned
above.
-
In Figure 4 you can see that the selected Text Box is being resized by dragging one of the corner handles.
-
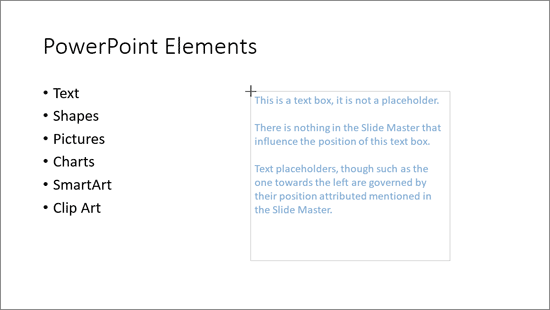
Figure 4: Text Box being resized
Tip: Resizing your Text Box is changing the position of your Text Box? You need to
control Autofit Options for the particular Text Box or
Placeholder you are resizing.
-
Figure 5 shows the resized Text Box. Compare it to Figure 2 shown earlier on this page.
-
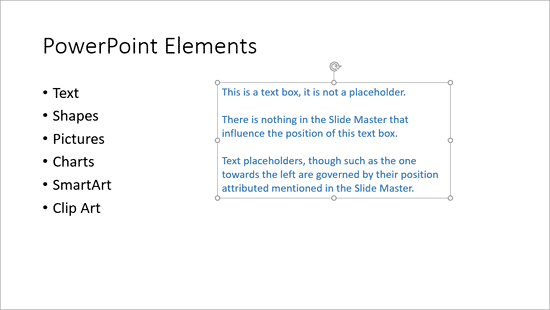
Figure 5: Text Box is resized
-
Make sure to save your presentation often.
This tutorial looked at resizing Text Boxes by dragging. If you want to move Text Boxes more accurately, explore our
Resize Text Boxes Accurately on a Slide in PowerPoint
2016 for Windows tutorial.


