In PowerPoint 2016 resizing Text Boxes is easy. You select any Text
Box and you get eight handles, four on corners, and four on sides, you then
drag any of these eight handles to
resize. The problem with this approach is that the resized Text Box you end up with is not accurate. If you do not need
accuracy, then you need not follow the rest of this tutorial. However, there might be times when you need your Text Box sized
exactly as the size of a picture you have inserted, or even an exact size based on a specification. Look at the slide in
Figure 1 to understand what we are explaining:
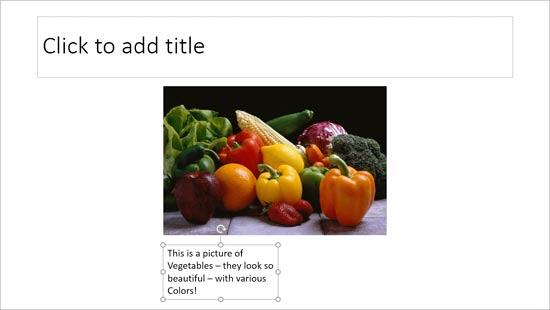
Figure 1: The picture in this slide is much wider than the Text Box underneath
As you can see in Figure 1 above, the picture is much wider than the Text Box below that includes a caption
for the picture. If we want the width of the Text Box to exactly match the width of the picture, then we need to do two
things:
- Find out the width of the picture.
- Then change the width of the Text Box to match the width of the picture.
Follow these steps to proceed with these twin objectives in PowerPoint
2016:
- Select the picture. This activates the Picture Tools Format tab of the
Ribbon, as shown in Figure 2.
Note: The
Picture Tools Format tab is a
Contextualtab. Contextual tabs are
special tabs in the
Ribbon that are not visible all
the time, they only make an appearance when you are working with a particular slide object which can be edited using special
options.
- Within the Size group you'll find the Width and the Height attributes of
the selected picture. Make a note of the Width of the picture (highlighted in red
within Figure 2). For this particular example the picture width is 5.42 inches.
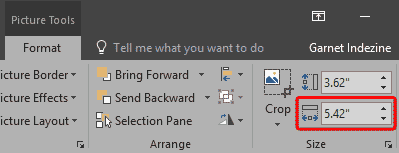
Figure 2: Width and the Height values of the selected picture- Now, select the Text Box beneath the picture. Note that you no longer see the Picture Tools Format tab. Rather, you now see the Drawing Tools Format tab. Both of these tabs are contextual tabs, and the contextual
tab you see in the Ribbon depends upon what you select on your slide.
-
For now, access the Drawing Tools Format tab, and click the dialog launcher located at the bottom right corner
of the Size group (highlighted in red within Figure 3).
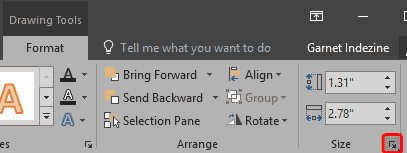
Figure 3: Dialog launcher within the Size group- This brings up the Format Shape
Task Pane, as shown in Figure 4.
Make sure you choose Shape Options tab (highlighted in red within
Figure 4). Then select the Size & Properties button (highlighted in
blue within Figure 4). Deselect the Lock aspect ratio check-box
(highlighted in green within Figure 4). This ensures that any change in the width
of your Text Box will not change its height. If this check-box is not already deselected, then leave it untouched.
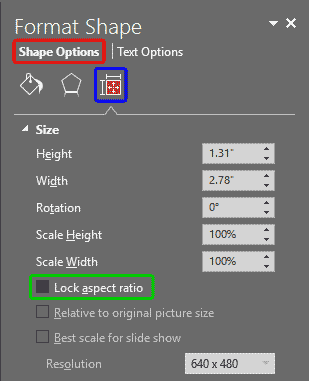
Figure 4: Format Shape Task Pane- Within the Format Shape Task Pane, locate the Width option (highlighted in
red within Figure 5) and type in the width value to match the picture width (5.42
inches). You will see the resized Text Box immediately on your slide. When done resizing, close the
Format Shape Task Pane.
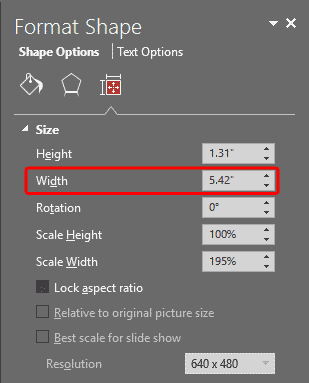
Figure 5: Width of the Text Box changed to match the picture's width- This will resize the Text Box, as shown in Figure 6 (compare to Figure 1).
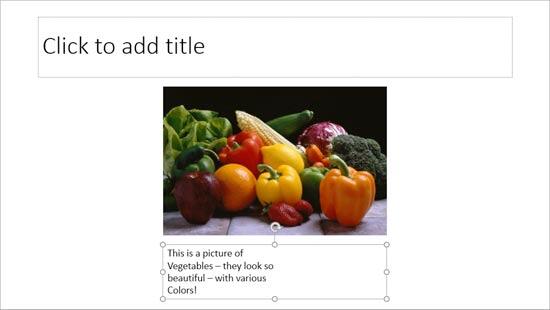
Figure 6: Text Box resized- Once the Text Box is resized, you might want to align
it with the picture so that it is positioned right beneath the picture. PowerPoint 2016 also lets you
smart align the Text Box with the picture.
- In some cases a resized Text Box may result in your text becoming smaller, or the text overflows outside the Text Box. To
correct this you need to tweak the Text
Autofit options.
- Make sure to save your presentation often.
Tip: While this tutorial shows you how to accurately resize a Text Box (or a shape), it can also be used to
resize text placeholders, in the
Slide Master. Don't
know the difference between a Text Box and a text placeholder? Look at our
Text Boxes vs. Text Placeholders
tutorial. Typically text placeholders for regular text content or even slide titles are located in the same position on
successive slides. So, if you really do need to resize a text placeholder, do it within the
Slide Master not
only to provide a consistent look to your presentation, but also to prevent yourself from monotonous job of resizing text
placeholders on each and every slide.


