We already showed you how to remove the background from an inserted picture in PowerPoint 2011 for Mac. This process works great for simple pictures that have fairly distinct foreground and background areas. However, if the picture is little crowded, or does not have clearly demarcated areas, you need to manually select the areas to be retained or removed in the picture using some fairly advanced background removal options.
Figure 1 is a good example since the businessman in this picture is the object that we want to separate from the background. Yet, there are two distinctly different areas in the background. The first area is the sky and the second distinct background area is the racing track. In addition, there's also a pole visible behind the businessman's left arm (right side of the picture).

Figure 1: Picture showing a track, sky, and a businessman (Picture is from Office.com)
Follow these steps to learn how to manually select areas to remove or retain in the picture:
- Before you start, we assume you have already inserted a picture on your slide and initiated the process of removing the picture's background. At this stage, PowerPoint tries to detect areas to remove or retain on its own and may not do a great job! The picture selected for background removal may appear similar to the one that you can see in Figure 2.

Figure 2: Incomplete background removal Tip: Did you not follow how the magenta areas showed up in
Figure 2? This tutorial is the continuation of our
simple background removal tutorial that explains how the magenta areas get highlighted.
- Next, you will manually fine-tune the selection with the help of three options that are explained below:
Mark the Areas to Keep
- Hover the mouse cursor over the areas that have been selected for removal by default, but which you want to be retained in the picture. The cursor will show a plus sign within a green button, as shown in Figure 3 (highlighted in blue). Note that there are no buttons for marking or unmarking areas in the Ribbon or elsewhere. All markings are done using contextual interface elements that show up right on the selected picture.
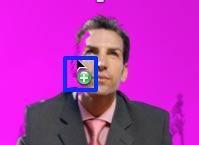
Figure 3: Cursor showing a plus sign within a green button - Now, draw lines by dragging this cursor. For some reason, diagonal lines work better than horizontal or vertical lines, unless you are selecting a long-thin or a wide-thin area. Your selection will expand and show a plus sign with a line, as shown in Figure 4. You can always undo your last few markings by using the Command + Z key combination.
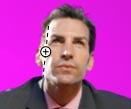
Figure 4: Picture area manually selected for retaining Mark the Areas to Remove
- Hover the mouse cursor over the areas that have been selected for retaining, but which you want to be removed from the picture. The cursor will show a minus sign within a red button, as shown in Figure 5 (highlighted in blue).
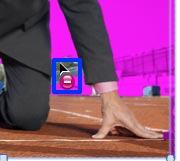
Figure 5: Cursor showing a minus sign within a red button - Now, draw lines by dragging. Your selection (areas selected for removal) will show a minus sign with a line as shown in Figure 6, to indicate the removal. You can always undo your last few markings by using the Command + Z key combination.
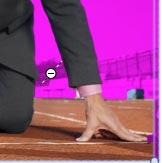
Figure 6: Picture area manually selected for removal Delete the Mark
- After manually selecting some areas in the picture either for removal, or for retaining, you may want to cancel any of the selections made. You can easily delete these selections. Just hover your mouse cursor over the line, and don't click yet. The cursor will change to a cross mark, as shown in Figure 7 (highlighted in blue). Now, click on the line that you want to remove completely.
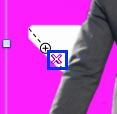
Figure 7: Cursor changed a cross sign to delete the selection or removal made earlier - As you mark and unmark lines, an instant preview shows with the magenta highlighted areas changed to reflect your background selection. In Figure 8, you can see the selected picture with fine-tuned selections made, ready for background removal. Compare Figures 2 and 8 (shown earlier on this page), and also, notice the plus and minus lines in Figure 8 that have caused the difference. Note that in Figure 8 below, we have only removed the sky, the pole, and all parts of the stadium except the ground. If required, you can select the ground area for removal as well using the same selection principles, as explained previously on this page.

Figure 8: Picture with fine-tuned selection - Now, you have two options to proceed with:
- If you are not happy and want to start all over again, or just want to abandon the background removal process, click the Esc key on the keyboard. If you click Esc by mistake, quickly press Command + Z twice in succession to get back to one step earlier than when you made your last selection. Note that pressing Command + Z just once will actually do the background removal based on your selection markers.
- If you want to go ahead with the background removal, click on the slide area, away from the picture, or just press
the Return key on your keyboard.
- In the two example pictures shown below in Figure 9, you can see variations of the same picture after background removal. Towards the left, you can see the picture with only the sky, the pole, and stadium areas removed, and towards the right, you can see the same picture with everything else removed except the businessman. Compare both these variations with Figure 1, shown earlier on this page.


Figure 9: Two variations of the same picture, showing different background areas removed - Save your presentation often.


