Sometimes, the original look of the inserted video may not work well with the color palette of your presentation. In such situations, you could play around with the brightness and contrast for an inserted video by using the Corrections option. Additionally, you can also completely recolor your inserted video. Further, you can make your full-color video appear as a grayscale video, or even like a duotone video such as blue and grayscale. Do remember that the video Color options work almost similar to the Color options for the pictures.
In this tutorial, we will explore the Color options for video clips in PowerPoint 2016 for Windows:
- Open your presentation, and navigate to the required slide where you have already inserted a video clip. Select or double-click the video clip to bring up the two Video Tools tabs in the Ribbon. These two tabs are Format and Playback. Click the Format tab to activate it, as shown highlighted in blue within Figure 1, below.
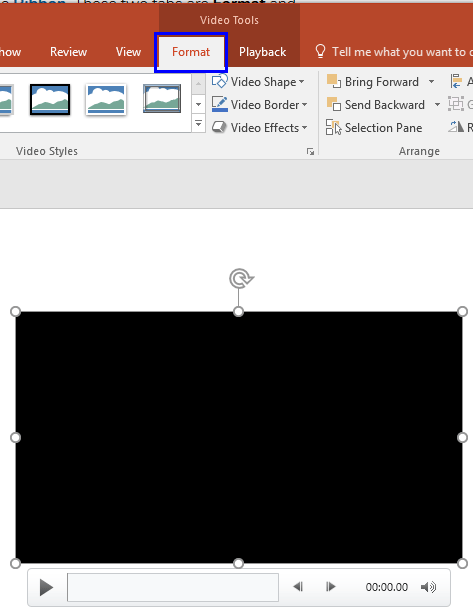
Figure 1: Video Tools Format tab of the Ribbon - When you insert a video on your slide, it may display a black rectangle on the slide (see Figure 1, above). If your video clip does not show a black rectangle, then directly proceed to Step 3.
- If you see the black rectangle in place of the video clip, then you will not see any Live Preview of the options you select within the Color drop-down gallery. This is because you see a black rectangle instead of a frame associated with the video clip. To make sure you see a video frame during live preview, add a Poster Frame to your video clip. This ensures that you will see a video frame in the place of black rectangle, as shown in Figure 2 below.
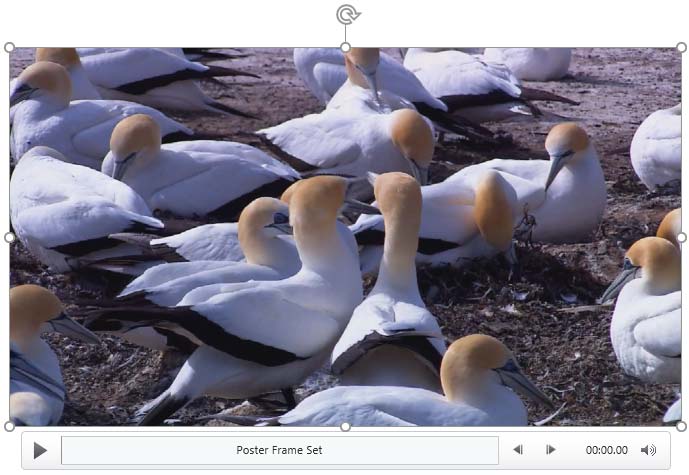
Figure 2: Video clip with a poster frame added - Now, within the Video Tools Format tab, click the Color button, as shown highlighted in red within Figure 3, below, to bring up the Color drop-down gallery that you can see in Figure 3.
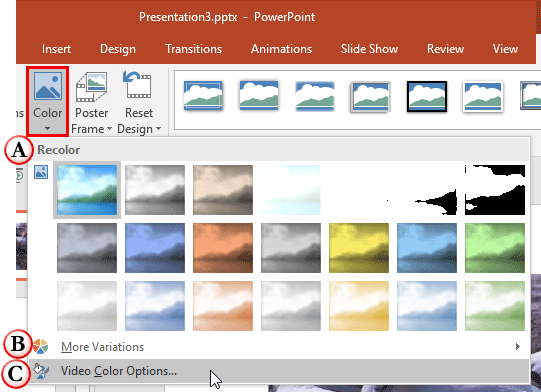
Figure 3:Color drop-down gallery - In Figure 3, above, you can see that the Color drop-down gallery sports just one section: Recolor, which include preview thumbnails. To select any of the variants, just click on the preview thumbnail of your choice. In addition to these sections, you can also see two more options used to recolor the selected video. Let us explore all of Color drop-down gallery contents one by one, as marked in Figure 3, above:
A. Recolor
- Accents, tints, grayscale, and black and white variants are shown as previews in this group. Previews in the 2nd and 3rd row of this section are influenced by the Theme of the active presentation. So, if the Theme is changed, colors of these previews will change. Just hover your mouse cursor on any of the variants in this section to see its name as a tool tip. In addition, you will also see how the change affects the actual video clip's frame.
B. More Variations
- This option when selected opens a sub-gallery, as shown in Figure 4, below.
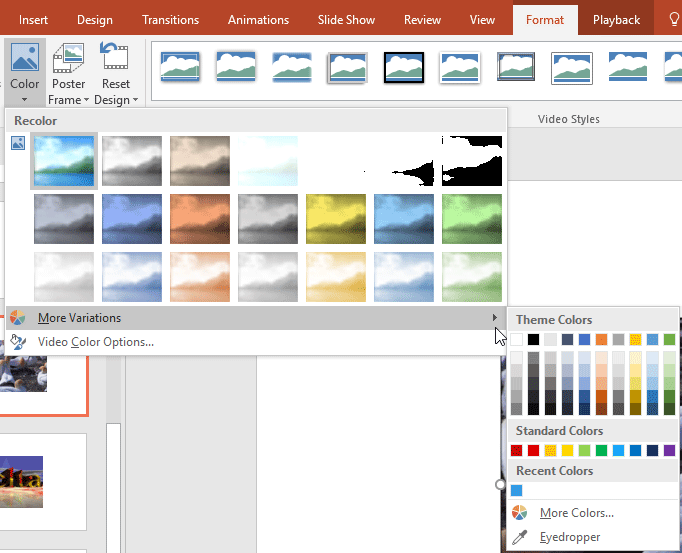
Figure 4: More Variations sub-gallery - Within the More Variations sub-gallery you'll get five sections, which are explained below:
1. Theme Colors
- Here you can select any of the colors which are from the active Theme of the presentation. You can also select any of the 5 tints or shades for any Theme color. Learn more about Themes here.
2. Standard Colors
- Here you can choose from any of the ten standard colors. These ten standard colors are just choices of colors that PowerPoint believes to be widely used. You don't have to limit yourself to either the Theme colors or Standard colors, as you'll learn in the next options, although it's a good design idea to use Theme colors as far as possible.
3. Recent Colors
- Here you can find the colors most recently used. If you have just launched PowerPoint and created a new presentation, the Recent Colors option may be entirely absent since you haven't selected any color recently!
4. More Colors
- This option summons the Colors dialog box, which helps you to create new colors to use as a background fill. To learn more about how to work with the More Colors option, read our Add Solid Fills to Shapes in PowerPoint 2016 tutorial, explore step 3E in that tutorial.
5. Eyedropper
- This option enables you to pick an exact color from anywhere, sometimes even from somewhere outside PowerPoint. Explore our Eyedropper Option in PowerPoint 2016 tutorial to learn more.
C. Video Color Options
- Brings up the Format Video Task Pane as shown in Figure 5, below. Make sure that the Video button is selected, as shown highlighted in red within Figure 5. Note that in Figure 5, the options that are not related to Color have been blurred out. These other options are explained in our Video Correction Adjustments in PowerPoint 2016 for Windows tutorial.
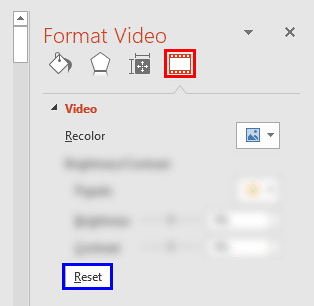
Figure 5: Video Recolor options within the Format Video Task Pane - Here, you can select any of the Recolor Presets types (same as in Recolor section within the Color drop-down gallery) as shown in Figure 6, below.
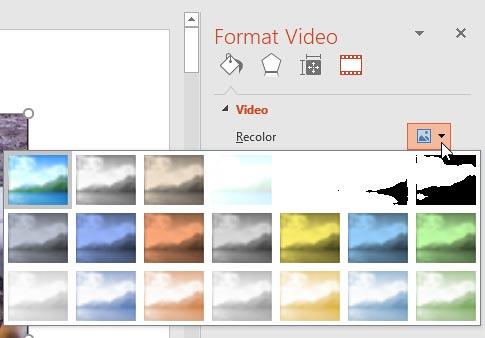
Figure 6: Recolor Presets drop-down gallery - If you want to abandon all Color (and also Brightness and Contrast), adjustments made to the video clip, click the Reset button highlighted in blue within Figure 5, shown earlier on this page. Note that when you click this button, the video will be reset to its original form.
- Once you have recolored your video, close the Format Video Task Pane.
- You can Recolor the video by selecting any thumbnail preview variant, or using the Color options within Format Video Task Pane. In Figure 7, below, you can see the selected video after recoloring. Compare the videos in Figures 2 and 7 to see the difference.
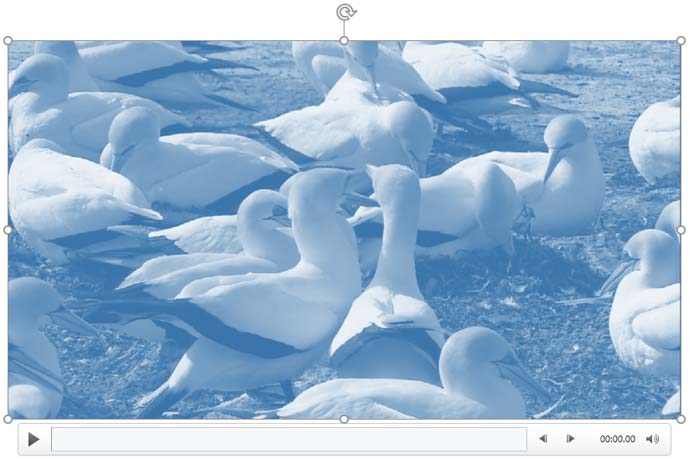
Figure 7: Selected video recolored - Play your video clip to see the difference. Make sure to save your presentation.


