Learn about using Hemera's Photo-Objects within PowerPoint. Hemera was bought over by Getty, and this product is no longer available in its original form.
Author: Geetesh Bajaj
Product/Version: PowerPoint
Content on this page is not recent and has been retained for historical reasons.
The Storyline
Photo-Objects, PowerPoint, and Alpha Channels
Purpose of This Page
The Presentation Proceeds...
Inserting in PowerPoint
In Conclusion
Our presentation is for a fictitious company that is in the real estate business. They will be showing this presentation at their annual shareholder's meeting. Year after year, the in-house team of Sun, Shine and Storm has churned up these presentations like lemonade on a picnic. They use the same stable of templates and clip art that ship with PowerPoint. So much so, that by now everyone has seen that picture of a businessman with the briefcase, or the one that shows money raining. The lack of imagination does not stop here. Shareholders and invited press get to see the same presentation each year, with some topics and figures changed. To put it in a phrase, the show is already as stale as last week's newspaper. Can matters get worse?
The directors of the company are aware of this problem. So, this year they want all canned illustrations to go altogether. In its place, they want real photographs. That should be easy—with digital cameras available aplenty, photos are going to be as easy as a piece of cake. If that's what the in-house team believes, who are we to disillusion them?
So, Sun sends Shine to click snaps, and Storm brews them into the computer—and then, they insert pictures into their presentation slides. However, and you knew there had to be a 'however' somewhere, one of the directors views the presentation before the actual showing, and his verdict is not going to earn any promotions for the trio of Sun, Shine and Storm. Rather, they are told that the squares of pictorial content in the presentation look as out-of-place as an umbrella on a clear day! So, what's wrong with the pictures? Well, look at this one; Mrs. Growbold looks good as a computer operator, but did you have to include her lettuce sandwiches and apple juice as well? And another instance—that chess pawn is small enough to be ineffective, even if it was not photographed on the wrong background in the first place. So, just cut out just the pawn from the rest of the image, so that it does not obstruct that chart. You were asked to use pictures, but pictures need not be squares or rectangles. Why can't we have cutout photos of objects?
There were more problem areas, but you must have guessed the pattern by now. So, our sympathies are with Sun, Shine, and Storm, who now look more like Dumb, Dull and Dazed. Luckily for them, a new colleague gives them a box of Photo-Objects!
Photo-Objects from Hemera Technologies is a clip media collection that's different from conventional offerings, since it contains pre-masked objects extracted from regular photographs, also known as cutouts. If you want to learn more about the Photo-Object concept, look at this review:
On the other hand, if you do not know what masking or alpha channels are—and how PowerPoint supports them, you could look up this page:
Next, we'll look at techniques to use Photo-Objects with PowerPoint. Before that, let's discuss the scope of this page. First, we'll create a PowerPoint presentation. Then, we will export some Photo-Objects to a mask aware graphics format like to TIFF files, a mask-aware graphics format that supports cutouts. Next, we will insert these Photo-Objects in PowerPoint and finally look at distribution aspects of such a presentation.
To appeal to the largest user base, let's imagine we're creating a basic business presentation with the usual charts, visual content, backgrounds, etc. I'm using a designer background from Ppted, a house of presentation templates promoted by Indezine.
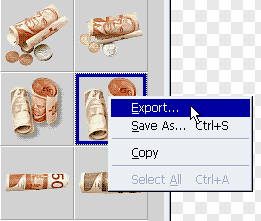
The presentation was intended to be processed normally, with charts, figures, text content, etc. Photo-Objects were chosen to impart visual content. We followed this procedure:

We've just completed the difficult part in this tutorial, and the rest of the technique is simple. In PowerPoint, choose the Insert | Picture option, and navigate to your saved Photo-Object in the TIFF format. Choose the Photo-Object, and press the Insert button. You'll notice that your Photo-Object is not a typical square object—it's shaped around the contours of the original design. It looks different, well-designed, and professional too!

You May Also Like: Don’t Hold Yourself Back. Speak Up! | Hazelnuts PowerPoint Templates


Microsoft and the Office logo are trademarks or registered trademarks of Microsoft Corporation in the United States and/or other countries.