Read the Indezine review of GST PawerLaunch 2.
Author: Geetesh Bajaj
Product/Version: PowerPoint
Introduction
About PowerLaunch
Download & Installation
A Sample Presentation Project
Testing The Compilation
Pricing & Support
In Conclusion
To create an autorun CD from a PowerPoint presentation must be a very popular task indeed. As of now, there are three distinct add-ins available which claim to do the job. And you could even do it yourself if required without an add-in - but that could entail a lot of hardship and heartburn.
PowerLaunch 2 is from GS Technologies - their web site is aptly called autorun-autoplay-tools.com - apart from their PowerLaunch product for PowerPoint, they create similar tools to autorun generic CD-ROMs, Flash movies, HTML pages and Acrobat PDFs.
The metamorphosis from PowerLaunch 1 to 2 has been very impressive. From an 'also-available' to a 'cutting-edge' existence must have been very satisfying to the folk at GS Technologies. So, when discussions with them led to possibilities for a review at Indezine, I agreed immediately.
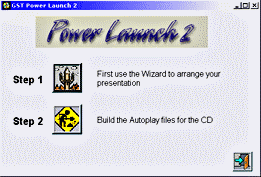
BackAs already discussed, PowerLaunch is a tool to create autorun CDs from PowerPoint presentations. Yet, its greatest assets lie beyond its mere definition as an autorun tool. Unlike other PowerPoint autorun add-ins, PowerLaunch arranges all linked files for you. On the other hand, it's interface is not something contemporary - in fact it may remind you of the days of Windows 3 or before. We'll discuss more about the pros and cons later in this review.
BackYou can download a trial version of PowerLaunch from their site (link no longer exists).
The downloaded file is approximately 4 MB in size - run it to install PowerLaunch on your system. Unlike other autorun systems for PowerPoint, PowerLaunch does not require the existence of the PowerPoint Viewer on your system - the Viewer files are actually built-in as part of the PowerLaunch installation.
BackI'm using a sample presentation project I created sometime ago. This presentation called 'The PowerPoint Trivia Show' details the chronology of successive PowerPoint versions.
This is how one could proceed:


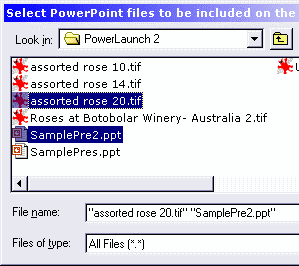
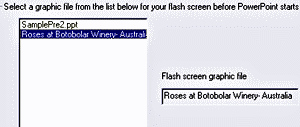
To test the compilation, I copied the entire contents of the 'Staging' folder to the root of a new CDRW disc. The first casualty of the compilation was in the form of the flash graphic. I had chosen a TIF file - somehow, PowerLaunch does not seem to be too friendly to that format. Changing to a JPG file however removed the problem.
On other fronts, the compilation posed no problems. Thereafter, I burnt the contents on a regular blank CD.
BackGST PowerLaunch 2 costs US$79 - ordering is through a third-party secure server. When your transaction is through, you'll be sent a license file which converts your unregistered installation into a full registered one. A wide variety of credit cards and currencies are accepted as well as payments by checks, international money orders and the PayPal system. You can also buy PowerLaunch as a package with other GST products at considerable cost savings.
I did ask Gerry Stope of GS Technologies about volume discounts - this is how he responded:
We don't have a volume discount policy established but are open to special offers if the customer is interested.
I communicated with Gerry Stope about support options as well:
Support is included at no cost. Support is handled by email first at [email protected] and then phone contact if needed. We normally respond to email queries in 2 to 4 hours and in 95 % of the cases answer the concern in one or two tries. If the user needs more help phone contact is established. If we can't make it work to the customer's satisfaction we will gladly give a refund. This happens very infrequently.
My own support questions included my problems with the flash picture option. Here's the reply I received:
On the flash panel JPG, GIF and BMP are the only formats supported. The timing on the flash panel will not hold up the PowerPoint presentation. The concept here is that large PowerPoint presentations normally take a while to come up in the viewer and the flash panel gives the user an indication that something is happening and also something about the developer, but if the presentation is ready we felt it is more important to show it as soon as possible so the time is really that long only if the presentation is slow.
BackPowerLaunch 2 does estabilish itself as a very credible alternative to other PowerPoint autorun add-ins. Yet like a few of them, it runs only in standalone mode - there's no way to run it from within PowerPoint itself. This of course can be seen from two angles - while you lose the convenience of using PowerLaunch within PowerPoint, you do gain an advantage in being able to PowerLaunch in a machine with no PowerPoint installed.
All in all, PowerLaunch is definitely a frontrunner PowerPoint add-in that deserves a closer look. The trial version available for download is similar to the full version in all respects other than the lack of the nag screen in every compiled autorun CD.
You May Also Like: Azerbaijan Flags and Maps PowerPoint Templates | Impatica for BlackBerry


Microsoft and the Office logo are trademarks or registered trademarks of Microsoft Corporation in the United States and/or other countries.