Using pictures in your presentation slides is an effective way of making your ideas more comprehensible. To make pictures even more effective, you can apply various effects and borders to them, and also use some preset Picture Styles that PowerPoint offers. Other than these options, there is the new Picture Layout option in PowerPoint 2010 that converts selected picture(s) into SmartArt. This option works similarly as the Convert to SmartArt option, that is used to convert text to SmartArt.
Follow these steps to learn more about the Picture Layout option:
- Select the picture (or even multiple pictures on a slide) that you want to apply a Picture Layout to. Alternatively, if you just want to follow this tutorial step-by-step, launch PowerPoint to open a blank presentation with a new slide. You can then change the slide layout to Blank by selecting the Home tab | Layout | Blank option. Then, insert a picture and select it, as shown in Figure 1. As already specified, you can also insert and select multiple pictures on the same slide. When converted into SmartArt, all selected pictures will constitute elements of a single SmartArt graphic.
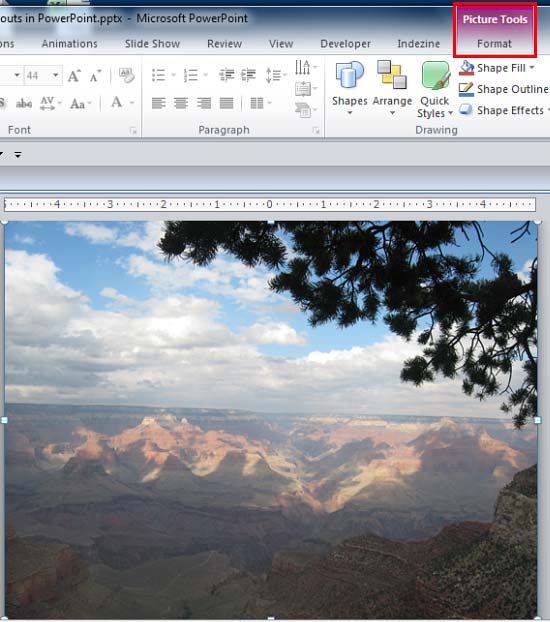
Figure 1: Picture Tools Format tab on the Ribbon - This brings up the Picture Tools Format tab (highlighted in red within Figure 1, above) on the Ribbon. Select this tab to bring up all picture editing options. Among various picture editing options, locate and click the Picture Layout button, as shown highlighted in red within Figure 2. This opens the Picture Layout drop-down gallery, shown in Figure 2 again.
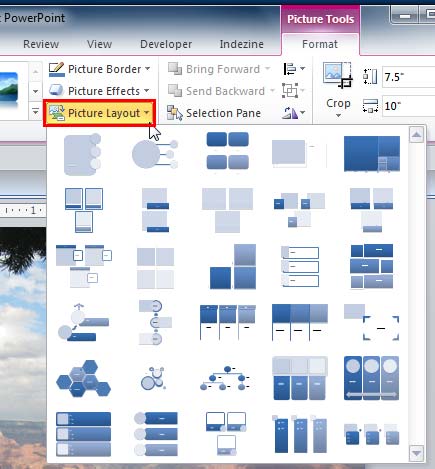
Figure 2: Picture Layout drop-down gallery Note: The
Picture Tools Format tab is a
Contextual tab. These contextual tabs are special tabs in the
Ribbon that are not visible all the time. They make an appearance only when you are working with a particular slide object that can be edited using the options within these tabs.
- When you hover your cursor over the Picture Layouts within the Picture Layout drop-down gallery, you will see a Live Preview of the Picture Layouts on your selected picture(s) on the slide. In Figure 3 below, you can see the live preview of the Picture Layout named Alternating Picture Circles (highlighted in red) on the single picture selected on the slide. Click on any Picture Layout to apply it to the selected picture(s).
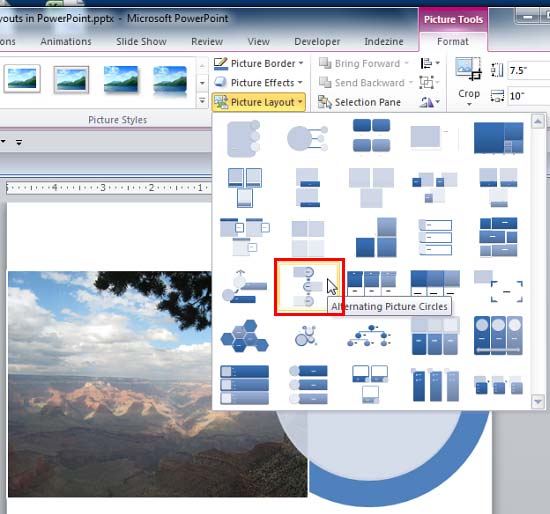
Figure 3: Picture Layout being selected - Doing so applies the chosen Picture Layout to the selected picture(s) on the slide, as shown in Figure 4 below. Within the left half of the slide, you can see the Picture Layout applied to a single picture, and within the right half, you can see the same Picture Layout applied to three different pictures, at a time.
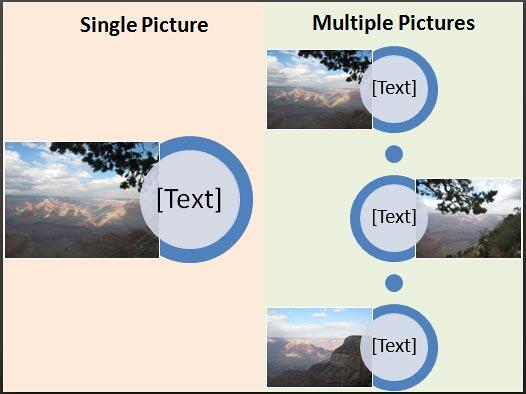
Figure 4: Picture(s) applied with a Picture Layout - At this point of time, the picture you started with is no more a picture, as it has been converted into a SmartArt graphic. To confirm this, first select the picture(s) on the slide that you just applied a Picture Layout to and then check within the Ribbon area. You will see that the Picture Tools tab has been replaced by the SmartArt Tools tab, as shown highlighted in red within Figure 5. Now, you can continue editing this resulting SmartArt graphic using available SmartArt editing options.
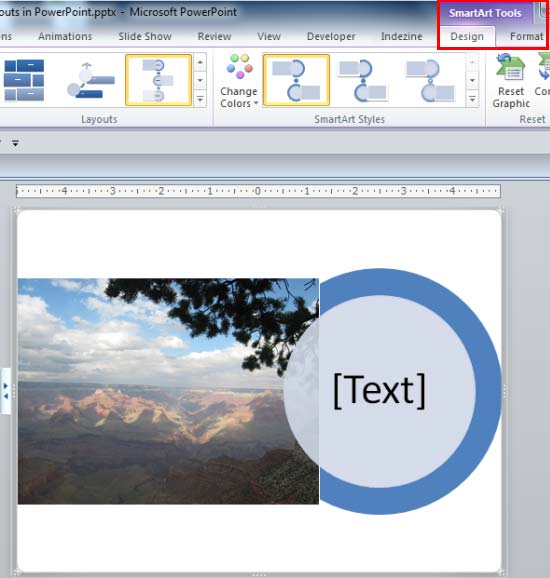
Figure 5: SmartArt Tools tab on the Ribbon - Save your presentation often.


