PowerPoint's Text Fill gallery provides you with plenty of text fill options
which work similar to the fills for shapes within the
Shape Fill gallery. However, a basic color fill is not the only option available for text fills in PowerPoint. In this tutorial, we will explore
how you can use a picture as a fill for your selected text. Although picture fills can look awesome on text and make it stand apart, you must use some caution.
Look at Figure 1 below, and you will notice that the text on the top portion of the slide uses a busy picture with too many colors.
This results in a text fill that makes the text very segmented and distracting. Comparatively, the text on the bottom half of the slide uses a picture
that is not too crowded and has fewer colors. The resulting text fill looks more calm and appealing.
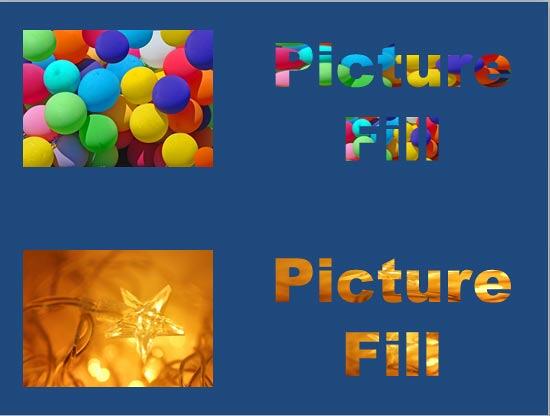
Figure 1: For text fills, use pictures that are not too busy, and have fewer colors
The learning we achieve from the sample shown in Figure 1 is:
- First, never use a busy, confused picture as a fill. A picture that has too many colors will rarely look good.
- Secondly, always remember that picture fills work best with text that's a little thicker and larger. So, picture fills for the body text on your
slides is certainly a no-no!
Follow these steps to add a picture fill to text in PowerPoint 2013 for Windows:
- Select the text to which you want to apply a picture fill.
Alternatively, if you just want to follow this tutorial step-by-step, insert a
text box on a blank slide and type some text in it. Also, change the text font
to something blockier, such as Arial Black (see Figure 2). Select the text, or the entire text box to bring up the
Drawing Tools Format tab on the Ribbon as shown highlighted in
red within Figure 2.

Figure 2: Drawing Tools Format tab of the Ribbon
Note: The
Drawing Tools Format tab is a
Contextual tab. These contextual tabs are special tabs in the
Ribbon that are not visible all the time. They, only make an appearance when you
are working with a particular slide object which can be edited using special options within these tabs.
- Within the Drawing Tools Format tab, locate the Text Fill button and click the downward pointing arrow, as shown
highlighted in red within Figure 3.
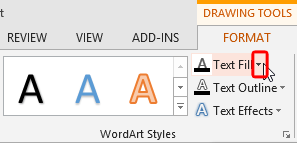
Figure 3: Text Fill button- This opens the Text Fill drop-down gallery, as shown in Figure 4. Within this drop-down gallery, select the
Picture option, shown highlighted in red within Figure 4.
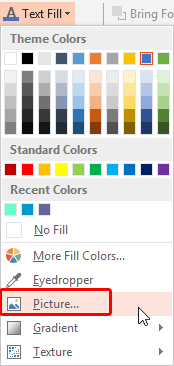
Figure 4: Picture option- This bring up the Insert Pictures dialog box, as shown in Figure 5. Within this dialog box you'll find options to
insert picture from a file (highlighted in red
within Figure 3) and insert online pictures (highlighted
in blue within Figure 5). For this tutorial we used the From a file option.
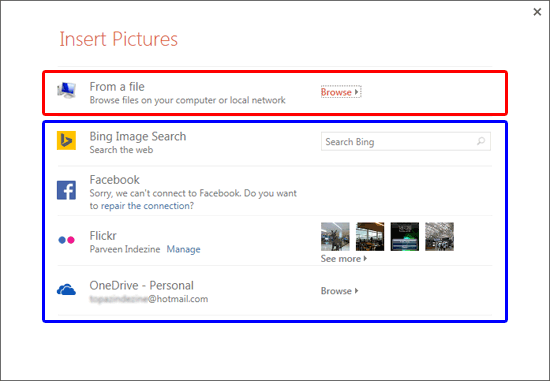
Figure 5: Insert Pictures dialog box- Click the Browse hyperlink associated with the option you have selected. We clicked the Browse hyperlink
associated with From a file option (look within red highlighted area in Figure 5, above). This
opens the Insert Picture dialog box as shown in Figure 6. Navigate to where you have saved pictures to be used as fills.
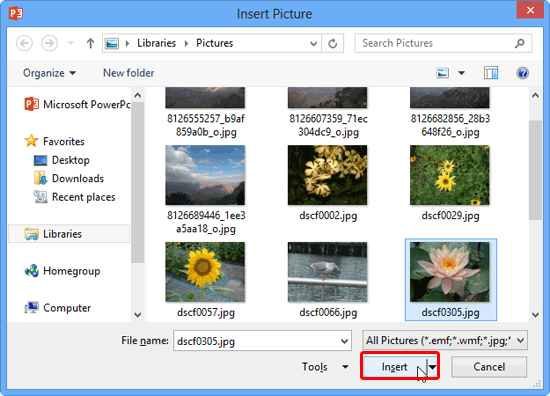
Figure 6: Insert Picture dialog box- Select the picture and click the Insert button, as shown highlighted in red within
Figure 6, above.
- The selected picture now forms a fill for the selected text, as shown in Figure 7.
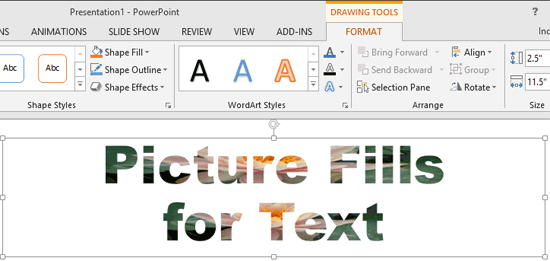
Figure 7:Text with picture fill added- Remember to save your presentation often.


