PowerPoint's Text Fill gallery offers you various text fill options like
Solid Color fill,
Picture fill,
Gradient fill,
Texture fill etc. Additionally, another
fill option is available for your text—this is the Pattern fill, and we will show you where you can find this option. Just
like any other text fill, the successful appearance of text filled with a Pattern depends upon certain factors like the type of
Pattern, colors used to create the Pattern, and also the size of text, etc. Look at the slide shown below in
Figure 1. Notice that the pattern used for text on the top part of the slide has a pattern fill that makes it
very difficult to read whereas the pattern used for the text on the bottom part of the slide looks good, and is much more
legible.
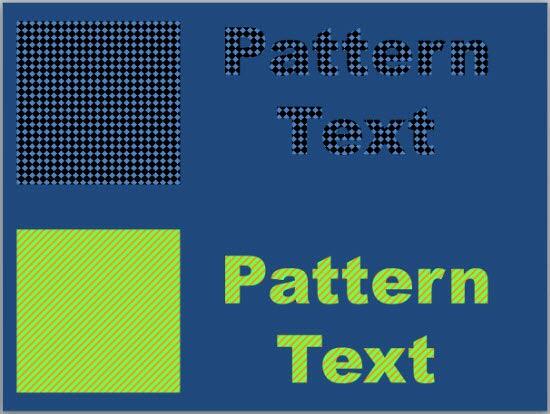
Figure 1: Two examples of Pattern fills for text
Follow these steps to learn how to apply a Pattern fill to your text in
PowerPoint 2013:
-
Select the text to which you want to apply a
Pattern fill. Alternatively, if you just want to follow this tutorial step-by-step,
insert a text box on a blank slide and type
some text in it. Also, change the text font
to something blockier, such as Arial Black (see Figure 2). Select the text, or the entire text
box to bring up the Drawing Tools Format tab on the
Ribbon as shown highlighted in
red within Figure 2.
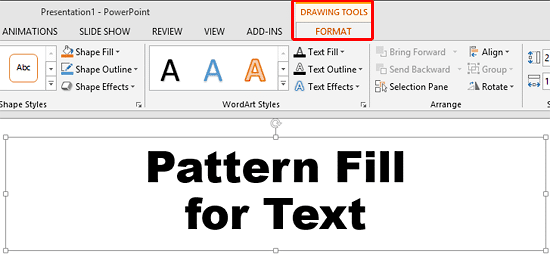
Figure 2: Drawing Tools Format tab of the Ribbon
Note: The
Drawing Tools Format tab is a
Contextual tab. These tabs are special
tabs in the
Ribbon that are not visible all the time. They only make
an appearance when you are working with a particular slide object which can be edited using special options within these tabs.
- Within the Drawing Tools Format tab, locate the WordArt Styles group. Click on the
Format Shape Task Pane launcher that you can see highlighted in red within
Figure 3.
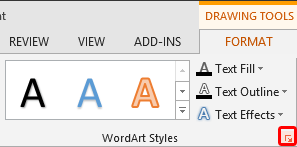
Figure 3: Format Shape Task Pane launcher
- This opens the Format Shape
Task Pane, as shown in
Figure 4. Make sure that the Text Options tab is selected (highlighted in
red within Figure 4). Then select the Text Fill & Outline
button (highlighted in blue within Figure 4). Also, select the
Pattern fill radio button if not selected. All the Pattern fill option are shown highlighted in the
green area within Figure 4.
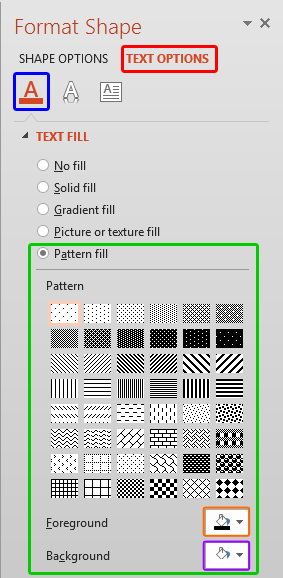
Figure 4: Pattern fill options within Format Shape Task Pane
- Click on any of the pattern style previews to apply it to your text. Whichever pattern you choose, you can then change its
foreground and background colors using the Foreground and Background buttons that you can see
in Figure 4 (highlighted in orange and purple
respectively). When you click any of these buttons, you can see the Color gallery shown in
Figure 5.
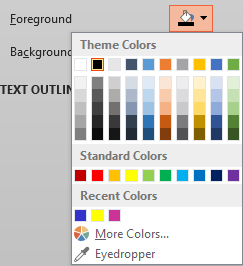
Figure 5: Foreground / Background Color gallery - The options within Foreground and Background Color gallery will work in the same way as explained in the
Text Fills in PowerPoint 2013 tutorial. In that
tutorial, refer to the points 4-A, 4-B, 4-C, 4-E and
4-F for more info on how to use the options within Foreground and Background Color gallery. Also note that even
though More Colors option has been named as More Fill Colors within the
Text Fills in PowerPoint 2013 tutorial, both options
serve the same purpose.
-
If you don't want to change the foreground and background colors, you can just accept the default color values.
- Make your choices as required. In Figure 6 you can see the foreground and background colors for the pattern
have been changed, and the pattern with the name Diagonal brick is being selected.
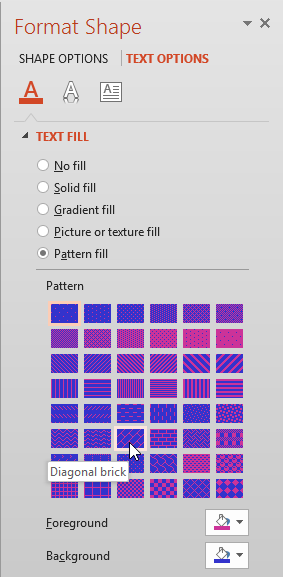
Figure 6: Various Pattern fill options selected for the text
- As and when you make your choices within the Format Shape Task Pane, you can see the result on the selected
text. Once you are happy with the effect achieved, close the Format Shape Task Pane. Figure 7
shows the selected text with a pattern fill applied.
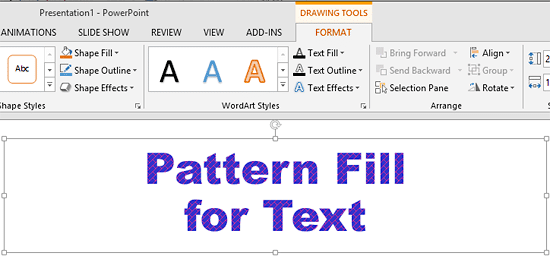
Figure 6: Text with a pattern fill applied
- Remember to save your presentation often.


