Do you want to create some text that needs to be printed in black and white? Or maybe you need some text that has awesome contrast. In either
case, text with a solid color fill is your best option. Other
text fill types including pictures,
gradients, and
textures rarely have that sort of contrast. However,
there is another fill option available for your text—the Pattern fill that lets you add contrast, and is yet different from the regular solid
fills.
Just like any other fill, the effect of pattern fills on text depends upon certain factors such as the type of pattern, colors used to create the
pattern, and also the size of text, etc. Look at the slide shown below in Figure 1, and you will notice that the pattern used for
text on the top part of the slide has a texture fill that makes it very difficult to read whereas the pattern used for the text on the bottom part of
the slide looks so much better since it is much more legible. Also, notice that we have used text that is fairly large in size.
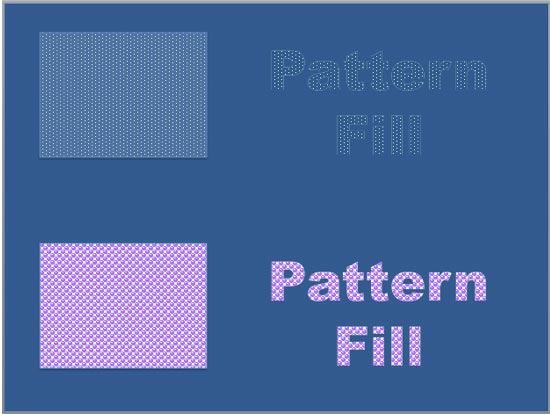
Figure 1: Two examples of Pattern fills for text
Follow these steps to learn how to apply a pattern fill to your text:
- Select the text to which you want to
apply a texture fill. Alternatively, if you just want to follow this tutorial step-by-step,
insert a text box on a blank slide and type
some text in it. Also, change the text font to
something "blockier", such as Arial Black (see Figure 2).
Select the text, or the entire text box to bring
up the Format tab on the Ribbon as shown highlighted in
red within Figure 2.
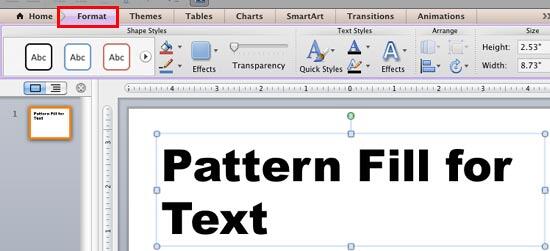
Figure 2: Text box selected brings up the Format tab on the Ribbon
Note: The Format tab is a Contextual tab. These tabs are special tabs in the
Ribbon that are not visible all the time. They only make an
appearance when you are working with a particular slide object which can be edited using special options within these tabs.
- Within the Format tab, locate the Text Styles group. Then click the down-arrow within the
Fill button that you can see highlighted in red within Figure 3.

Figure 3: Fill button within Text Styles group
- This opens the Fill drop-down gallery for text, as shown in Figure 4. In this drop-down gallery,
select the Text Effects option, shown highlighted in red within Figure 4.
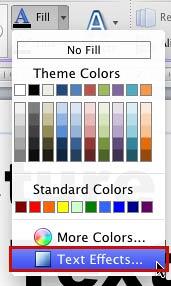
Figure 4: Text Effects option to be selected- Alternatively, you can right-click (or Ctrl + click) the selected text
box, and from the contextual menu, select the Format Text option as shown in Figure 5.
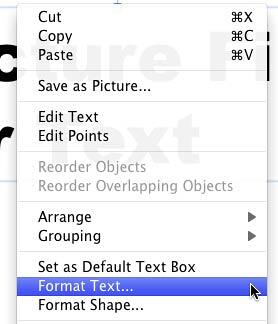
Figure 5: Format Text option to be selected
- Either way, you will summon the Format Text dialog box. Make sure that Text Fill option is
selected within the sidebar (highlighted in red within Figure 6, below).
Select the Pattern tab (highlighted in blue within Figure 6, below). Initially,
you will see that all options within this tab are greyed out, because none of the Patterns are selected yet.
Click on any of the pattern style previews to apply it to your text. This action
activates all of the Pattern options as shown in Figure 6.
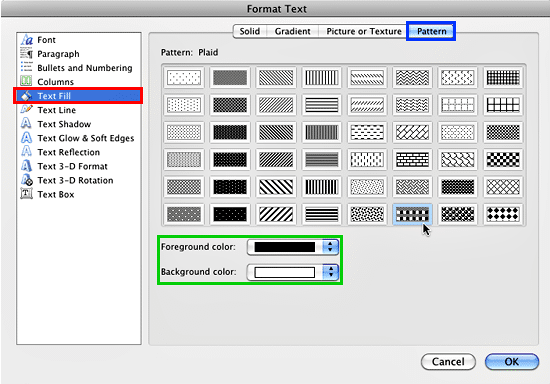
Figure 6: Pattern tab selected within the Format Text Effects dialog box
- Whichever pattern you choose, you can change its foreground and background colors using the Foreground color
and Background color buttons that you can see in Figure 6, above
(highlighted in green). When you
click any of these buttons, you can see the Color gallery shown in Figure 7.
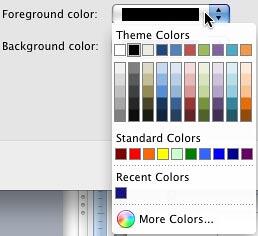
Figure 7: Color gallery for Foreground and Background colors
- The options within Color gallery will work in the same way as explained in the
Text Fills in PowerPoint 2011 for Mac tutorial. In that
tutorial, refer to the points 4-B through 4-E for more info on how to use these options within the
Color gallery.
- If you don't want to change the Foreground and Background colors, you can just accept the default colors as they are.
- Make your choices as required. In Figure 8 you can see that a pattern has been selected (highlighted in
red within Figure 8) and the Foreground and Background colors for the pattern have changed.
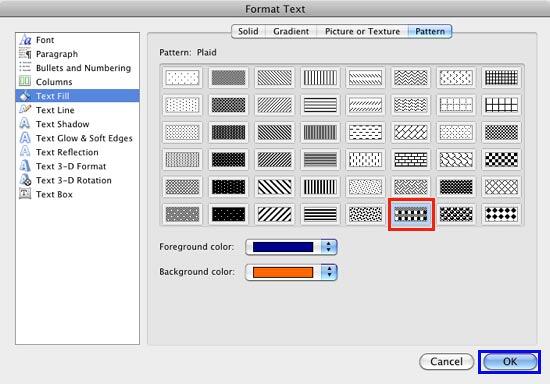
Figure 8: Pattern fill options selected for the text
- As and when you make your choices within the Format Text dialog box, you can see the result on the selected text.
Do make sure that the Format Text dialog box does not hide the selected text, drag it away from the text. Once you are happy
with the effect achieved, click the OK button (highlighted in blue within Figure 8).
- Figure 9 shows the selected text with a pattern fill applied.
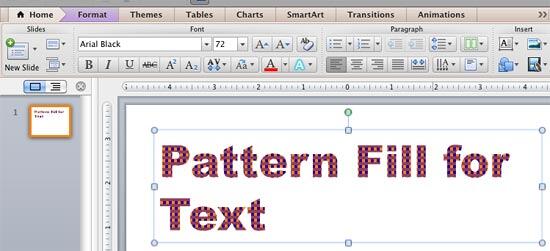
Figure 9:Text with a pattern fill applied - Remember to save your presentation often.


