Nudging a shape or any other slide object is essentially moving it just a wee bit, preferably using the arrow keys on your keyboard rather than the mouse. Now, nudging is also moving, but the larger Move option is different from a nudge. While nudging involves moving in increments, non-nudge options result in more creative freedom in moving. We will understand these concepts better in this tutorial.
PowerPoint 2016 for Windows provides more than one way to nudge or move any selected shape or slide object:
- Select the shape, and press any of the four arrow keys on the keyboard to nudge the shape towards any of the four directions: top, right, bottom, or left.
- To nudge the selected shape in even smaller increments, hold down the Ctrl key while you press the arrow keys. Sometimes, you may find that there is no real difference between pressing the arrow keys while holding the Ctrl key, or not. However, there is a difference, especially when you are trying to reduce or increase the empty space between two adjacent slide objects.
- To move the shape anywhere around the slide, select and drag it on or off the slide, as illustrated in Figure 1, below.

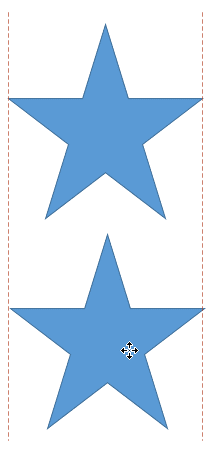
Figure 1: Selected shape being moved by dragging- To move the shape in a straight line, select the shape and then hold the Shift key. Now, drag it horizontally or vertically as required, as shown in Figure 2, below. See also our Shift Key Fun tutorial for more ideas.

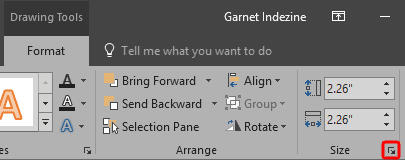
Figure 2: Move shape in a straight line- To nudge or move the selected shape in an exact coordinate position on the slide, access the Drawing Tools Format tab of the Ribbon. Within the Size group, click the dialog launcher button, as shown highlighted in red within Figure 3, below.

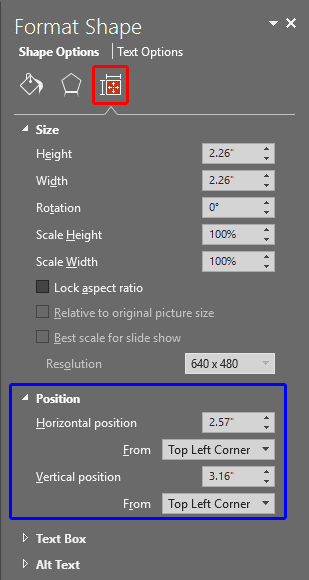
Figure 3: Dialog launcher button- This action will launch the Format Shape Task Pane, as shown in Figure 4, below. Make sure you select the Resize tab, as shown highlighted in red within Figure 4. Next, select the Position option, as shown highlighted in blue within Figure 4.

Figure 4: Format Shape Task Pane- Doing so brings up the Position options, as shown highlighted in blue within Figure 4, above. These options are explained below:
Horizontal Position
- Type in a value or use the increase/decrease buttons to change the horizontal position of a shape.
Vertical Position
- Type in a value or use the increase/decrease buttons to change the vertical position of a shape.
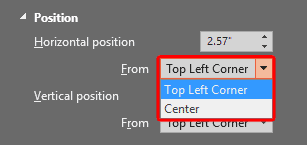
- For both the options, you can use the From drop-down list, as shown highlighted in red within Figure 5, below. By default, all values are calculated from the Top Left Corner, but there is one more option that can be chosen to move or nudge from the Center of the slide, as shown in the drop-down list, as shown in Figure 5.

Figure 5: Nudge From drop-down list- Save your presentation often.


