When most people use Motion Path animations, the feature they probably use the least is locking and unlocking of Motion Paths. This may be because these options are not too well documented. However, that’s no reason to ignore this option, especially, since locking and unlocking Motion Paths can help you create better animations. You have already learned how to add a motion path animation to any slide object by either using a preset motion path or by drawing your own custom motion path. We also explained the concept of reversing paths and opening and closing paths.
Follow these steps to learn how to access and use the Lock and Unlock options for Motion Paths in PowerPoint 2016 for Windows:
- First, add a shape to a blank slide, and apply a motion path animation. Refer to our adding a motion path or drawing a custom motion path tutorials to get started.
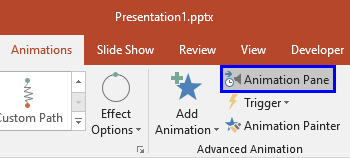
- Now, access the Animations tab of the Ribbon, and click the Animation Pane button, as shown highlighted in blue within Figure 1, below. Remember that this is a toggle button, so if your Animation Pane is already visible, then clicking this button will make it disappear.

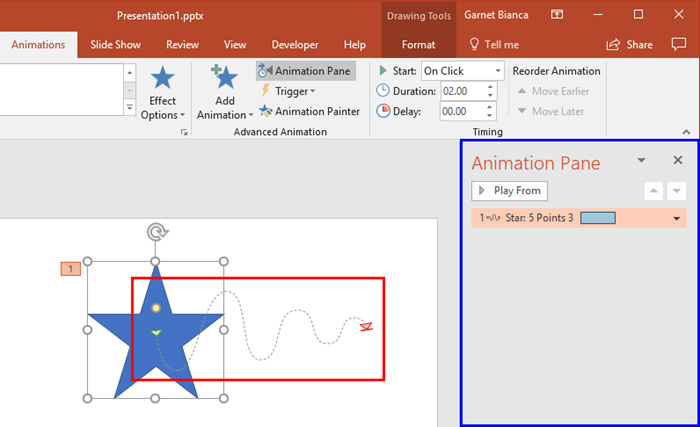
Figure 1: Animation Pane button - Doing so opens the Animation Pane. as shown highlighted in blue within Figure 2, below.

Figure 2: Animation Pane- Select the shape that has a motion path animation applied, and you shall be able to see a dashed line representing the motion path, as shown highlighted in red within Figure 2, above.
- Now, move the selected shape, and you'll discover that the motion path also moves along with the shape. In PowerPoint parlance, this means that the motion path is unlocked to the shape.
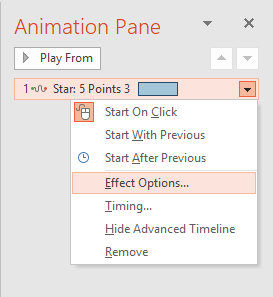
- You can now unlock (lock in PowerPoint parlance) the motion path from the shape. To do so, ensure that the correct motion path animation is selected in the Animation Pane (crucial if you have more than one animation applied to a slide object). Within the Animation Pane, right-click the animation item to bring up a drop-down list. Within this drop-down list, choose Effect Options, as shown in Figure 3, below.

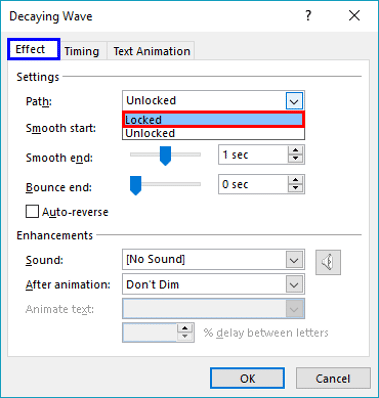
Figure 3: Effect Options to be selected - This action summons a multi-tabbed dialog box as shown in Figure 4, below. Click the Effect tab, as shown highlighted in blue within Figure 4, below, and from the Path drop-down list, choose the Locked option as shown highlighted in red within Figure 4. Click the OK button to apply these changes.

Figure 4: Locked option to be selected - Now, you can drag the shape (slide object) around, and the motion path won't move with it!
Remember
- You don't need to lock/unlock a motion path from its slide object to move it around. To do so, select the actual motion path, not the slide object to which it has been applied, and drag it around as required. This process moves the motion path and leaves the slide object in its original place. However, if you move the slide object, the motion path also starts moving accordingly, even though it is away from the slide object. Confusing? Yes, it is a little, unless you play around with this technique a few times!
- To unlock the locked motion path, first select it within the Animation Pane. Then, follow the procedure explained in Steps 6 and 7, but within the Path drop-down list, select Unlocked option instead of Locked. Now, the unlocked motion path also moves along when you move the slide object associated with it.


