In PowerPoint, a placeholder is a container that you can use to fill in with some content. When you launch PowerPoint, you will see distinctive
boxes that invite you to add some content. Haven't you noticed the "Click to add
title," "Click to add text,” or “Click to add picture” suggestions? All these boxes are
placeholders. When selected, these boxes have a solid border around them, as shown in Figure 1 below.
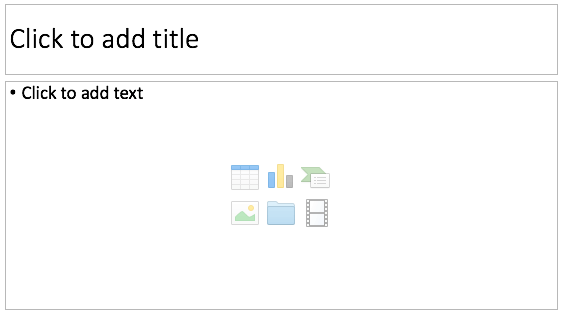
Figure 1: Part of a new slide showing placeholders with solid borders
All of PowerPoint's built-in Slide Layouts except the Blank layout contain placeholders. PowerPoint provides several placeholders
that can contain various types of content such as text, tables, charts, pictures, clip art, SmartArt diagrams, or media clips. For example, if you
add a new slide based on the Title and Content layout, you'll find two placeholders: one for the slide title and the other for any
single content type (see Figure 1, shown previously on this page). Each of the default layouts comprises a collection of various
placeholders. If none of the available layouts work for you, you can create your own layout with custom placeholders in
PowerPoint 2016 for Mac, as explained in the following steps:
-
Launch PowerPoint. You will see the
Presentation Gallery. Here, select the Blank Presentation to open a blank presentation with a new slide. Access the View
tab of the Ribbon and click the
Slide Master button, as shown highlighted in blue within Figure 2.

Figure 2: Slide Master button within the View tab of the Ribbon
- This opens Slide Master view, as shown in
Figure 3. In Slide Master view, you'll see that the left pane contains two distinctly different elements: a larger thumbnail
representing the Slide Master (highlighted in red within Figure 3) and several smaller
slide thumbnails below representing individual Slide Layouts (highlighted in blue within
Figure 3).
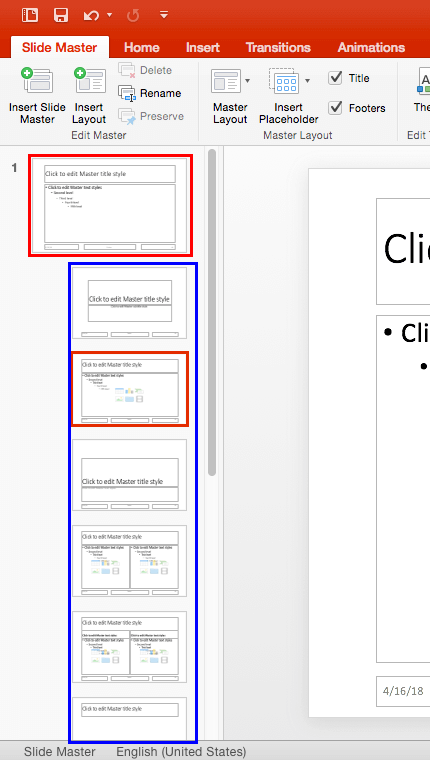
Figure 3: Slide Master and Slide Layouts within PowerPoint
- Now, insert a new Slide Layout and make
sure it is selected, as shown in Figure 4. We will add one or more placeholders to this layout. Optionally,
you can follow the same procedure to add placeholders to any of the existing Slide Layouts.
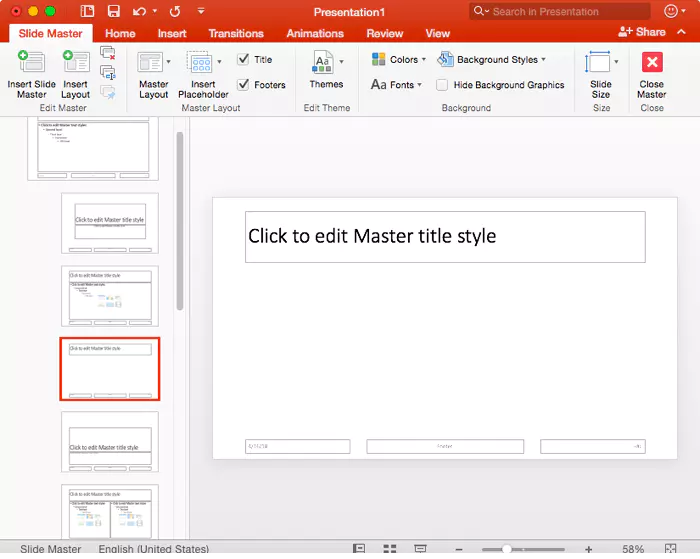
Figure 4: New Slide Layout selected
- With the Slide Layout still selected, click the down-arrow of the Insert Placeholder button
(highlighted in red within Figure 5) within the Slide Master tab
of the Ribbon.
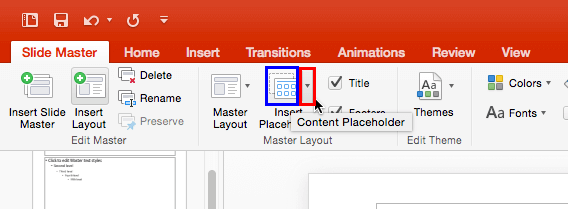
Figure 5: Insert Placeholder button
- This brings up a drop-down gallery, as shown in Figure 6.
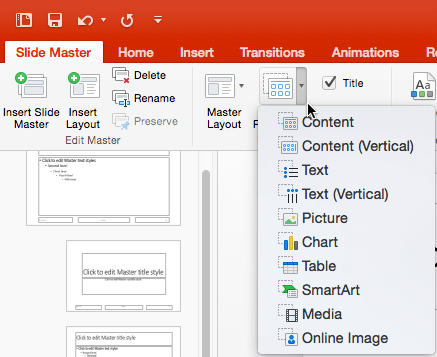
Figure 6: Insert Placeholder drop-down gallery
Note: If you click the left portion of the Insert Placeholder button (highlighted in blue
within Figure 5, shown earlier on this page), you will end up selecting your last-inserted placeholder type.
- All the placeholder types within the Insert Placeholder drop-down gallery can
be populated with the content types explained below.
Content
- A content placeholder is a combination of seven types of content: text, pictures, charts, tables, SmartArt,
media clips, and clip art. This placeholder appears almost like a text placeholder. But it additionally contains a small palette of icons in the center:
one for each of the other 6 non-text content types. Note that each Content placeholder can hold only one type of content at a time within a slide.
Figure 1, earlier on this page shows a Content placeholder.
Content (Vertical)
- This placeholder is same as Content placeholder, but text and content will be placed vertically,
as shown highlighted in red within Figure 7.
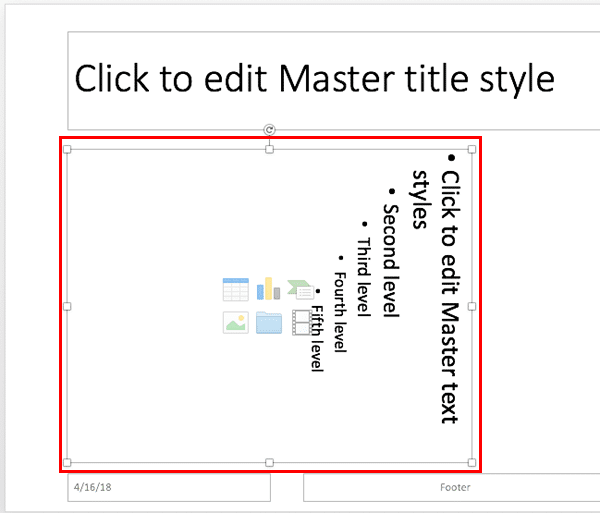
Figure 7: Content (Vertical) placeholder
Text
- For bulleted text.
Text (Vertical)
- This placeholder is same as Text placeholder, but the text will be placed vertically. It looks
just like the Place holder you see in Figure 7 above, but there will be no content place holders.
Picture
- For a picture.
Chart
- For a chart.
Table
- For a table.
SmartArt
- For a SmartArt diagram.
Media
- For media files such as audio or video clips.
Online Image
- For an online image.
- Choose the placeholder type you want to add, and drag on the slide layout to insert the placeholder. You can insert
multiple placeholders one after the other to create your customized layout. For this tutorial we have
added Text, Chart, and SmartArt
placeholders as you can see in Figure 8 below (compare with Figure 4, shown earlier on this page).
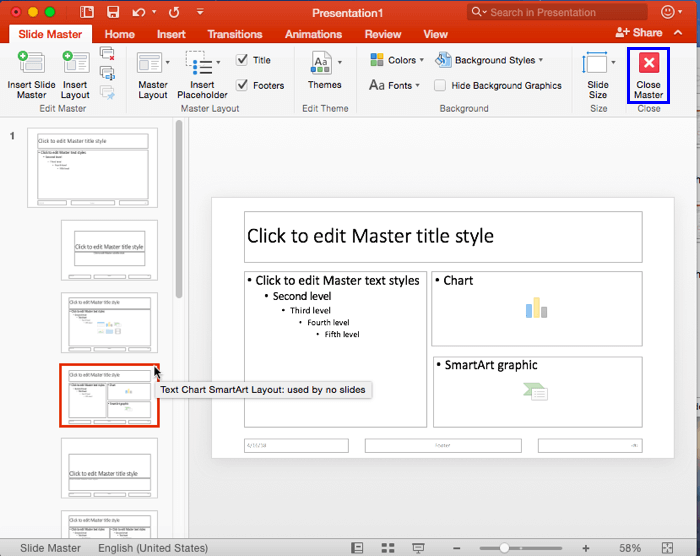
Figure 8: Placeholders added to the new slide layout
- You can then rename the new slide layout as explained in our
Duplicate, Rename, and Edit Slide Layouts
in PowerPoint 2016 for Mac tutorial. We renamed our new layout as "Text Chart SmartArt", which can
be seen in the tool-tip in Figure 8 above.
- When done, click the Close Master View button on the Slide Master tab of
the Ribbon (highlighted in blue within Figure 8). This will get you back to
Normal View.
- Access the Home tab of the Ribbon and click the Layout button to
bring up the Layout drop-down gallery as you can see in Figure 9, below. Notice that your
new layout shows up here with the name that you provided
(highlighted in blue within Figure 9), ready to be used to create a new slide.
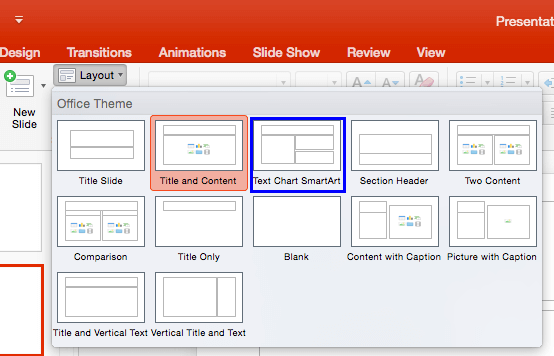
Figure 9: Custom Layout added with new placeholders.- Save your presentation often.


