PowerPoint 2016 for Mac enables you to work with various types of sound files such as MP3, AIFF, or WAV. However, inserted sounds are always embedded within your presentation, that are different from the default behavior in previous versions of PowerPoint that always linked sound files rather than embedding them. This has a plus side since you now no longer have to worry about linked files getting misplaced or lost. On the flip side, this can balloon file sizes. Having said that, it is still a good practice to keep your sound files in the same folder in which you save your PowerPoint 2016 presentation—even before you insert them.
Before You Begin with Audio Files
As far as possible, work with a presentation that’s saved at least once. Also, do explore our PowerPoint Friendly Audio Formats page to understand which common and exotic audio file types you can insert in your PowerPoint slides.
Follow these steps to insert sound clips in your slide in PowerPoint 2016 for Mac:
- Navigate to the slide where you want to add a sound. Within the Insert tab of Ribbon, locate the Audio button. Clicking this button brings up the menu, as shown in Figure 1, below. From this menu, choose the Audio from File option, as shown highlighted in red within Figure 1.
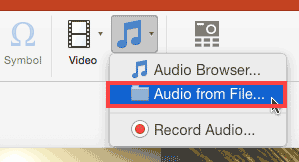
Figure 1: Audio from File option within the Media drop-down menu - Alternatively, choose the Insert | Audio | Audio from File menu option, as shown highlighted in red within Figure 2, below.
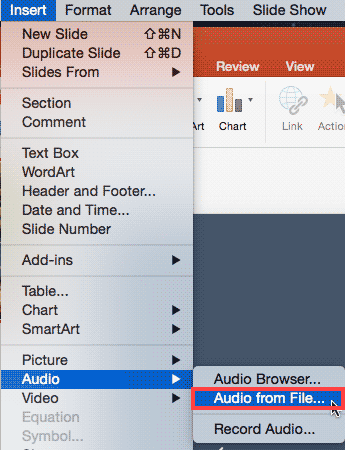
Figure 2: Audio from File option within Insert menu
Audio Browser
- You can also insert video into your slide through Audio Browser, the other menu option you can see in Figures 1 and 2, shown previously on this page.
- Either menu option brings up the Choose Audio dialog box, as shown in Figure 3, below. Navigate to the folder where your audio clips are saved, and select a file.
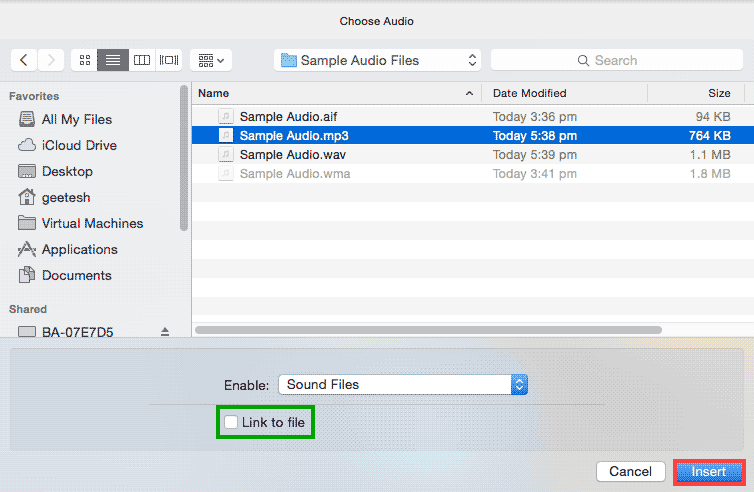
Figure 3: Choose Audio dialog box - You will notice that the WMA file in Figure 3 is grayed out because this format is not compatible with Mac versions of PowerPoint. However, WMA files can be inserted in Windows versions of PowerPoint. Similarly, AIF (AIFF) files can be inserted within Mac versions of PowerPoint but do not work in all but the recent Windows versions of PowerPoint, and even then, you may have codec issues. To maintain maximum compatibility across operating systems, it's best to use the MP3 file format for audio files.
- Now, click the Insert button, as shown highlighted in red within Figure 3, above, to add the audio to the active slide and embed it as part of your presentation.
- To link rather than embed, select the Link to file check-box, as shown highlighted in green within Figure 3, above, located within the Choose Audio dialog box. Selecting the Link to File option does not store the audio clip as part of your presentation but links to it. This is the same as the default behavior in older versions of PowerPoint (PowerPoint 2008 and earlier). If you do select the Link to File check-box, always copy your audio clip to the same folder as your presentation before you insert it within your slide.
- Irrespective of whether you embed or link, PowerPoint will place an audio icon in the center of the slide, as shown in Figure 4, below.
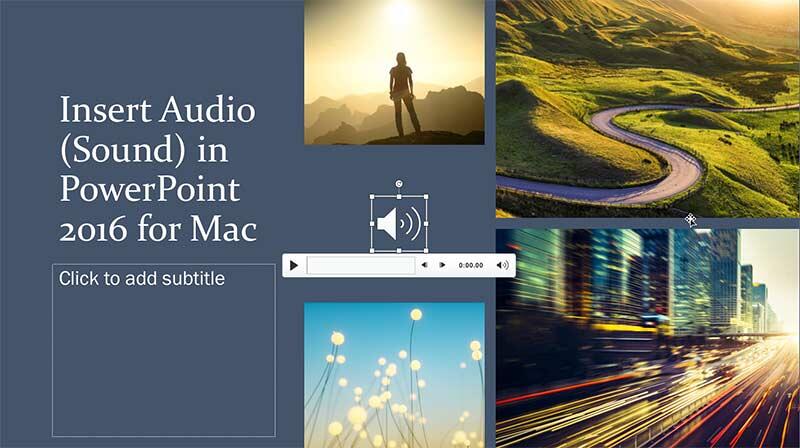
Figure 4: Audio icon placed on slide - Note that when you hover your cursor over the audio icon in Normal view, you will see the Player Controls bar. You see a similar bar even in Slide Show view. You can use the Play button on the Player Controls bar, as shown in Figure 4, above.
- If you want the sound to play automatically in Slide Show view without having to hover or click the Play button, you first select the audio icon so that the Playback contextual tab is active on the Ribbon, as shown highlighted in green within Figure 5, below.

Figure 5: Playback tab of the Ribbon activated
Contextual Tabs
- The Playback and Audio Format tabs are contextual tabs. Contextual tabs are special tabs in the Ribbon that are not visible all the time. They only make an appearance when you are working with a particular slide object which can be edited using special options.
- This tab offers you different options to control the playback of the audio you have selected. Locate the Start option, as shown highlighted in red within Figure 5, above. Clicking this option brings up a drop-down list. From this list select the Automatically option, as shown highlighted in red within Figure 6, below. This step causes the selected audio clip to play automatically when the slide containing the clip comes up in Slide Show mode.

Figure 6: Automatically option selected within Start drop-down list - Note that the default option is In Click Sequence. If you select this option, the sound plays only after you press the space bar, or click your cursor in Slide Show mode to proceed to the next event. In addition, you can also see a third option, When Clicked On in the drop-down list, as shown in Figure 6, above. This option shows the Player Control, and you must press the Play button.
The Curious Case of the Visible Audio Icon
- One small issue that many presenters face is the visible audio icon, even in Slide Show view. Yes, there is a Hide During Show option in the Playback tab of the Ribbon, but even easier to just drag the audio icon off the Slide Area to the workspace area, as shown in Figure 7, below. Make sure you do so only if you choose the In Click Sequence or Automatically options in the Start drop-down list, shown in Figure 6. If you choose the When Clicked On option, the audio icon needs to be visible, to click upon!
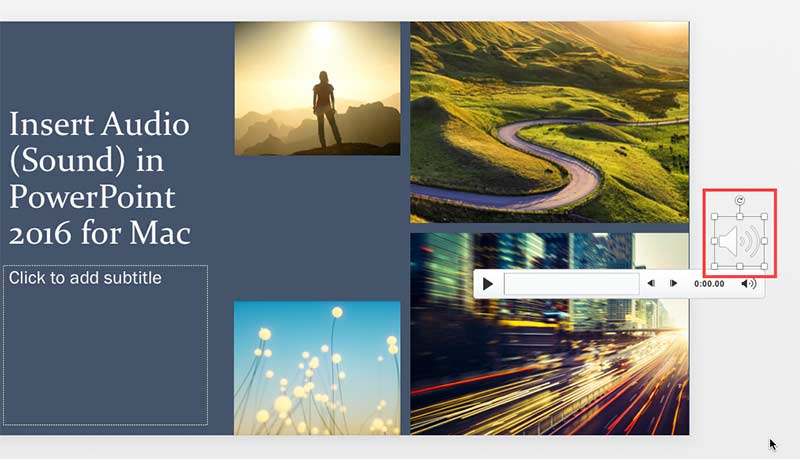
Figure 7: Drag the audio icon off the Slide Area
- Save your presentation often.


