Fonts are more than just pretty characters, although your choice of fonts can have a profound effect on how readable your text
is to the audience. We have already explored how you can
format font styles to make your text bold,
italicized, underlined, etc. Beyond these basic offerings, PowerPoint 2016's Font dialog box offers some
advanced format options for the selected text. You can still change the font type, set the font size, color, and other font
attributes in this dialog box, and you can also do more. In this tutorial, we'll explore the font format options within the
Font dialog box in PowerPoint 2016 for windows:
- Open any presentation and select the text you want to format, as
shown in Figure 1.
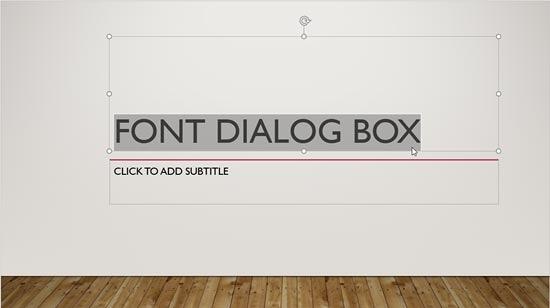
Figure 1: Text selected on the slide
- With the text still selected (refer to Figure 1, above), access the Home tab of the
Ribbon, and click the dialog launcher, as shown
highlighted in red within Figure 2.
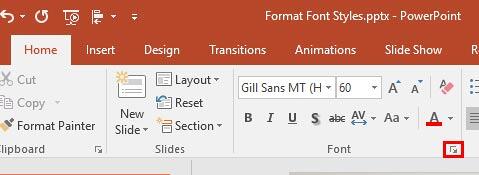
Figure 2: Dialog launcher within the Font group
-
Alternatively, you can right-click the selected text to bring up a contextual menu and select the Font option,
as shown highlighted in red within Figure 3.
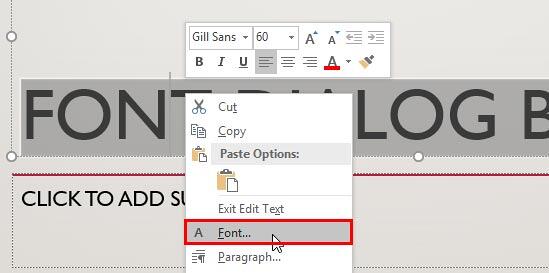
Figure 3: Font option selected
- Either way you end up summoning the two-tabbed Font dialog box, as shown in Figure 4. Make
sure that the Font tab is selected. We explore options within the Character Spacing tab in our
Character Spacing in PowerPoint 2016 tutorial.
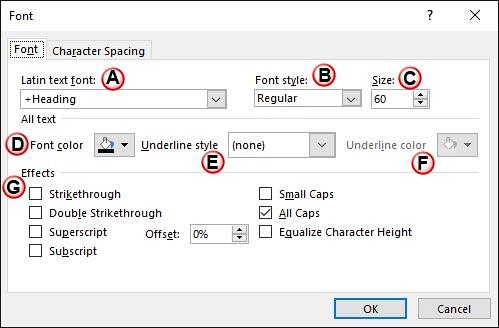
Figure 4: Font dialog box
-
All the options within the Font dialog box are explained below, as marked Figure 4, above:
A. Latin text font
- Click the down-arrow to bring up a list of installed fonts, as shown in Figure 5.
Note that the top two fonts named +Heading and +Body are from the active
Theme Fonts set. Choose any font typeface available within
Latin text font list. Alternatively, you can directly type the name of the font within the
Latin text font box. Typing the first few alphabets of your font name should work.
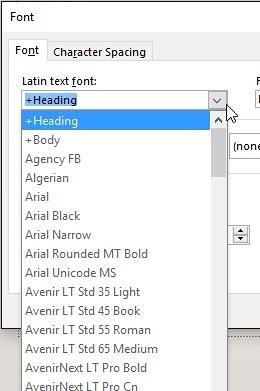
Figure 5: Font typeface drop-down list
B. Font style
- This option also brings up a drop-down list from where you can choose a font style such as
Bold, Italics, etc. for your selected text, as shown in Figure 6.
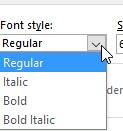
Figure 6: Font style drop-down list
C. Size
- Use the up or down arrows to increase or decrease the font size. Also you can directly type in the font size
value within the Size box.
D. Font color
- Changes color of selected text.
E. Underline style
- PowerPoint offers 16 underline styles for text, such as: single line, wavy line, etc, as shown in
Figure 7.
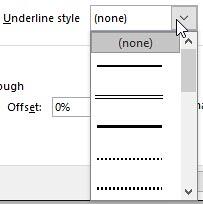
Figure 7: Underline style drop-down list
F. Underline color
- Here you can select a color for the underline. Note that this option will be only active when
underline style is applied to the text.
G. Effects
- This section provides seven effects for selected text. Select the required Effects
check-box(s) to apply to the selected text. Figure 8 shows all the results of applying all these effects.
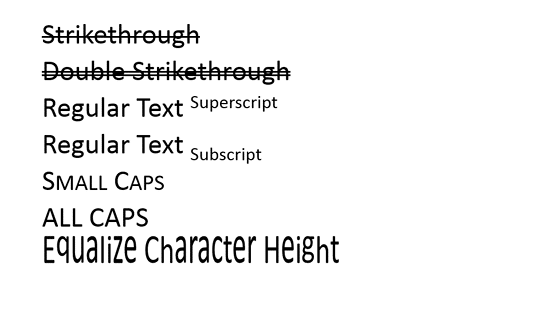
Figure 8: Text Effects
- Once the options are choosen, click the OK button within the Font dialog box.
- This will apply the changes to the selected text, as shown in Figure 9. Compare this text with the text in
Figure 1, shown earlier on this page.
Figure 9: Text formatting changed
- Save your presentation often.


