Introduction
Using FillSlammer
Pricing and Support
Conclusion
Introduction
FillSlammer is a very interesting PowerPoint add-in that allows creating blends between the
shapes you insert on your PowerPoint slides,
as shown in Figure 1. These blends can be between
shape fills (including solid color
fills and picture fills). Other than creating blends between shape fills, FillSlammer can also enables you to blend the
shape outline, font color, etc.
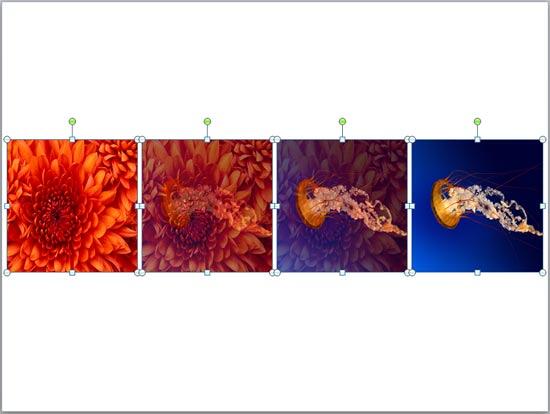
Figure 1: Shapes with blended picture fills
FillSlammer is a PowerPoint add-in created by Steve Hards, a developer and promoter of various
PowerPoint add-ins, including Opazity. You can get more info on
FillSlammer and can contact Steve Hards at
FillSlammer.com.
With FillSlammer, you can set up blended shape attributes using any of these parameters:
- Shapes placed horizontally
- Shapes placed vertically
- Shapes, blended by size
- Shapes, blended by fill color
- Shapes, blended by line color
- Shapes, blended by font color
Back
Using FillSlammer
Download the installer, run the setup routine and follow the instructions. When installed, follow these steps to use
FillSlammer:
Remember: To use FillSlammer, you need three or more shapes to fill. These can be shapes which are in a
horizontal or vertical relationship to each other, or which are of different sizes - or use any of the parameters explained
in the preceding section.
- Select the shapes within your PowerPoint presentation that you want to blend. Activate the Add-Ins tab of the
Ribbon, highlighted in red in Figure 2.
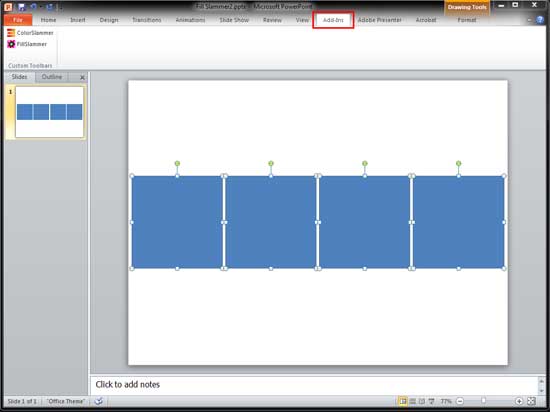
Figure 2: Add-Ins tab on the Ribbon- Within the Custom Toolbar group, click the FillSlammer button
(see Figure 3).
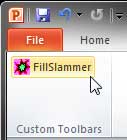
Figure 3: FillSlammer button- This opens the FillSlammer dialog box,
as shown in Figure 4.
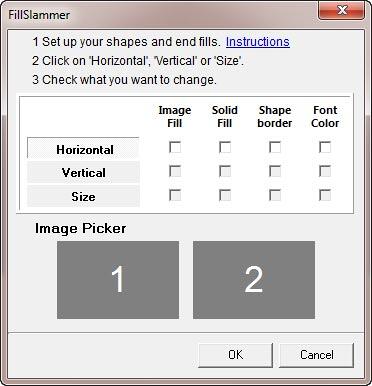
Figure 4: FillSlammer dialog box- Within this dialog box, you can select the attribute that you want to blend:
a. Image fill
- To use this option, Fill Slammer will add picture fills to your shapes in the next steps.
b. Solid fill
- To use this option, your starting and ending shapes should have a solid color fill.
c. Shape border
- This uses the shape outline attributes of your selected shapes.
d. Font color
- This uses the font color of your starting and ending shapes -- and of course you can use text boxes
as well since they are also a variation of shapes in PowerPoint.
- To get amazing results, just play around with mixing fills, borders, and size. Multiple aspects can be checked
at the same time. Within the FillSlammer dialog box, select the Image Fill check
box (highlighted in red in Figure 5). For the direction in which you want the images to blend, click
the Horizontal button or anything else you want (highlighted in blue in Figure 5).
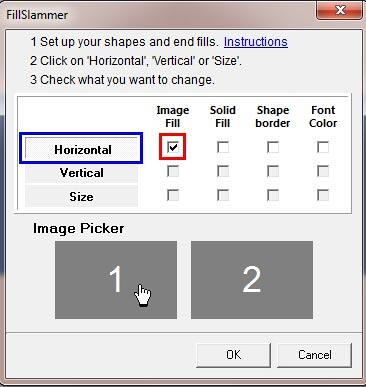
Figure 5: Image Fill blend horizontally
Note: To blend the image fill vertically rather than horizontally, make sure you have placed your shape
vertically on the slide. For this tutorial I have placed the shapes horizontally (refer to Figure 2 above) on
the slide.
- To choose the images, click the gray box with '1' written in it (refer to Figure 5 above).
This brings up a file navigation dialog box that lets you select the picture you wish to use. Select the required picture, and
once you get to the FileSlammer dialog box -- you will find that the selected picture will appear in the dialog box. Choose
a picture for box '2' in the same way.
- With both the images selected click the OK button (see Figure 6), to start the blending process.
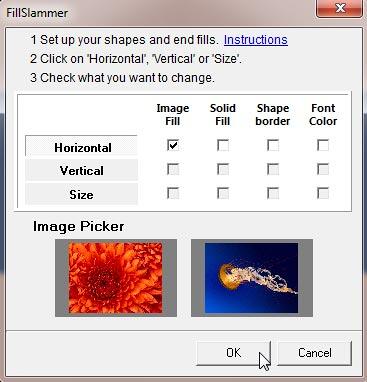
Figure 6: Click OK button to start blending process- Figure 7 below shows the two selected images blended within the shapes selected
earlier (refer to Figure 2 above).

Figure 7: Blended images
Back
Pricing and Support
FillSlammer costs US$ 49.00.
Support options includes an online video tutorial. A user guide can also be downloaded from the link given above. In addition,
you can get support by email.
Back
Conclusion
FillSlammer is one of those one-trick ponies that do their tasks so well, and you probably don't even realize that you
need a product of this type unless you use it! Thereafter, it can be addictive.
Back


