In PowerPoint, animating table components is not possible unless you ungroup the table. Once your table is ungrouped, you can animate the ungrouped table components as you wish. However, for those of you who don't want to ungroup your table, there is another workaround where you don't apply any animation to the table components, but when you play the slide containing the table, it appears that your table components are animating!
Follow these steps to fake-animate tables in PowerPoint 2013 for Windows:
- Open your presentation and navigate to the slide containing the table that you want to fake-animate. If you don't have an existing table, insert a new table, and populate it with some content, as shown in Figure 1, below.

Figure 1: Table in PowerPoint 2013 - Decide how you would like to animate your table, i.e., whether row by row or column by column. Then, insert a rectangle over the first row/column of the table in such a way that it hides the entire row/column. In Figure 2, below, you can see a rectangle being drawn over the first row.
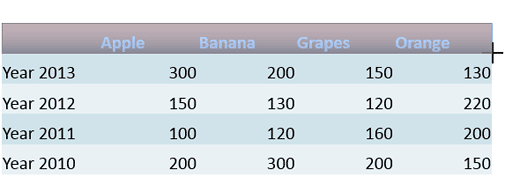
Figure 2: Rectangle inserted over the first row - After the rectangle is drawn, remove any outlines or shadow effects from it. Thereafter, add a Slide Background Fill to the rectangle. Doing so will make the rectangle completely invisible, and also hide the table row/column upon which it was placed, as shown in Figure 3, below. More importantly, it will show the background of your slide. This step is very helpful if your slide does not have a plain white background.
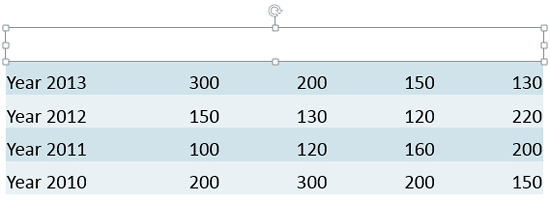
Figure 3: Rectangle after removing shadow and outline, and applying Slide Background fill What's a Slide Background Fill?
- A slide background fill is essentially a fill that contains the background used by your slide. So, if the slide is a solid white color, all your slide background fills will be white. If your slide background is a picture or a gradient, then any shape with a slide background fill attribute will contain the same picture or gradient fill.
- Learn more about the slide background fill in our Add Slide Background Fill to Shapes tutorial.
- Now, apply an Exit animation to the rectangle. In Figure 4, below, you can see that we have selected the Wipe exit animation, as shown highlighted in red within the Add Animation drop-down gallery.
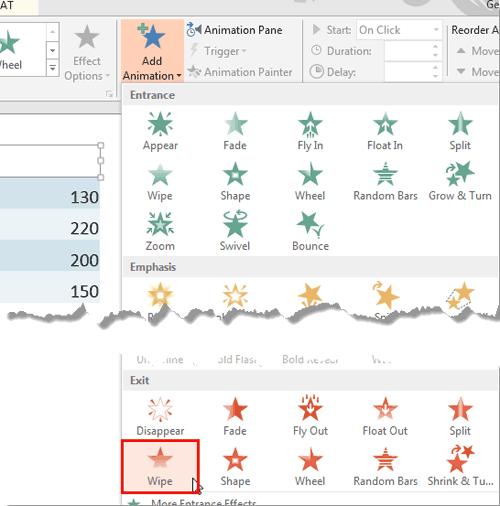
Figure 4: Wipe exit animation within the Animation drop-down gallery - After applying the animation, click the Effect Options button within the Animations tab of the Ribbon to bring up a drop-down gallery that contains options pertaining to the selected animation type. In Figure 5, below, you can see that we set our Wipe animation to play From Left.
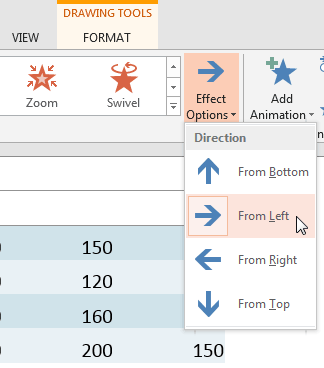
Figure 5: Wipe animation set to play From Left - Then, set the animation event and speed as required. In Figure 6, below, you can see that the animation event has been set to After Previous, as shown highlighted in red and Duration (speed) set to 1.50 seconds, as shown highlighted in blue.
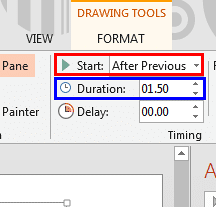
Figure 6: Animation event and speed set for the rectangle - You can also try some other options to make the animation more effective. To learn more about various animation options, explore our Animation and Transitions page.
- Once you are done with applying an Exit animation to the rectangle, preview the animation once to check whether everything is fine. Then, duplicate the rectangle by dragging so that the duplicate copy of the rectangle covers the next row/column. Similarly, continue duplicating the animated rectangles so that your entire table is covered by a set of adjacent rectangles, as shown in Figure 7, below. Since these rectangles were already animated, the animation also duplicates!
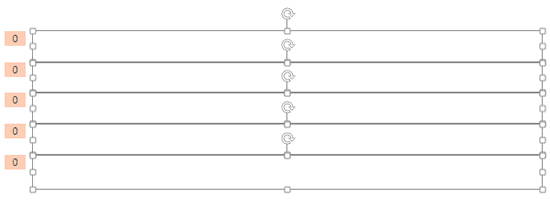
Figure 7: Table covered by the animated rectangles - When you play this slide, animating rectangles leave the slide one by one making the table row/column below them to appear as they exit. This creates an illusion as if the table is animating.
- Save your presentation often.


