When you share your PowerPoint presentations with other people, you may want to protect or lock your content so that the slides may be accessed by only the people whom you permit to open the presentation. Or perhaps you have no problems with the recipients viewing slides but do not want them to edit the presentation. PowerPoint provides an Encrypt with Password option to protect your presentation. However, let us ponder about why anyone would need to password protect their PowerPoint presentations. There are many reasons, and here are two of them:
- A presentation with confidential content can be prevented from being edited if it is password-protected. Nobody without access to the password can open or edit the presentation file.
- The password-protected presentation is safer to share. You can provide the password to the person whom you are sharing the presentation with if they need to edit.
Remember
If you forget your password, you will no longer be able to open or modify your password-protected presentation. Many people forget passwords and cannot access their slides any more. So, do choose a password that's easy to remember, or at least note your password and save in a secure place.
There are two ways to add password protection to your presentation in PowerPoint 2013 for Windows. Let's explore the easy way first:
Password to Open
- Open an existing presentation. If you want to retain the original presentation as unprotected for yourself, it is a good idea to choose the Save As command and work on a copy of the file.
- Access the File tab of the Ribbon, and choose the Info Pane as shown in Figure 1.
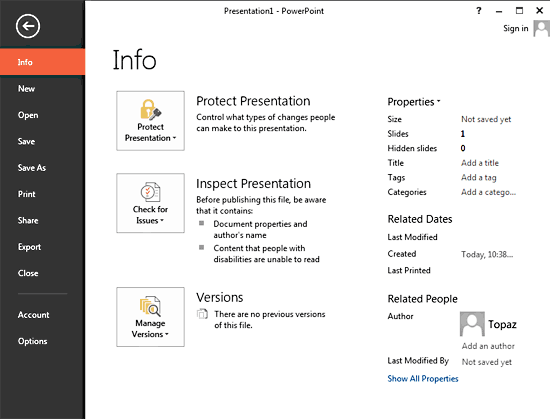
Figure 1: Info Pane- Within the Info pane, click the Protect Presentation button to bring up the menu, as shown in Figure 2, below. Choose the Encrypt with Password option.
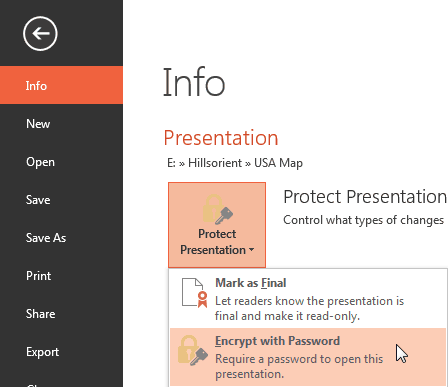
Figure 2: Encrypt with Password option- Doing so brings up the Encrypt Document dialog box, as shown in Figure 3, below. Type the password within the provided field, and click the OK button.
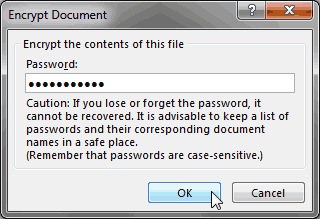
Figure 3: Encrypt Document dialog box- This action opens the Confirm Password dialog box, as shown in Figure 4, below. Retype the same password that you typed in Step 4 and click the OK button.
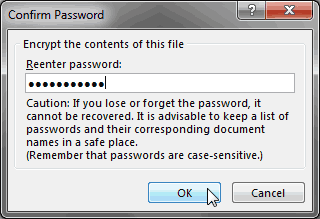
Figure 4: Confirm Password dialog box- Now, within the Info pane, as shown in Figure 5, you'll see a message mentioning that a password is required to open this presentation (the yellow box). This indicates that the presentation is now password protected. Click the File tab or the left-arrow above the Info option to go back to the default PowerPoint Interface.
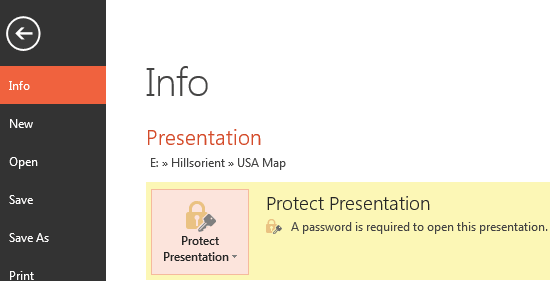
Figure 5: Password applied to the presentation- Save your presentation often.
Password to Edit
There is an alternative way to add password protection that allows you to enable passwords not only for opening the presentation but also for editing. If you enable an editing password, users will still be able to view your slides without making any edits to them. Follow these steps:
- Access the File tab, and choose Save As option, as shown in Figure 6, later on this page.
- Now click the Browse button, as shown in Figure 6, below.
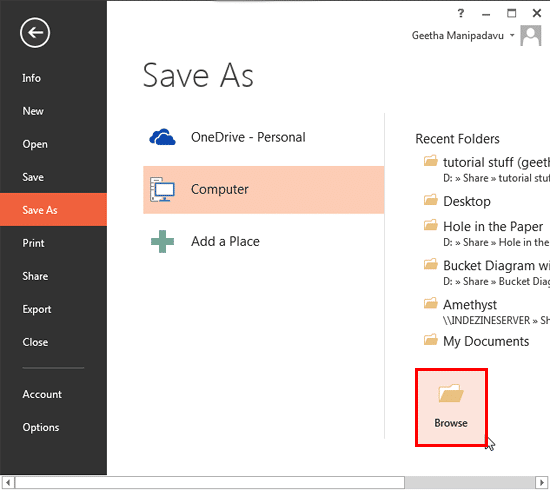
Figure 6: Browse button within the Save As Pane- This action opens the Save As dialog box, as shown in Figure 7, below. Select Tools | General Options from the Tools drop-down list, as shown in Figure 7.
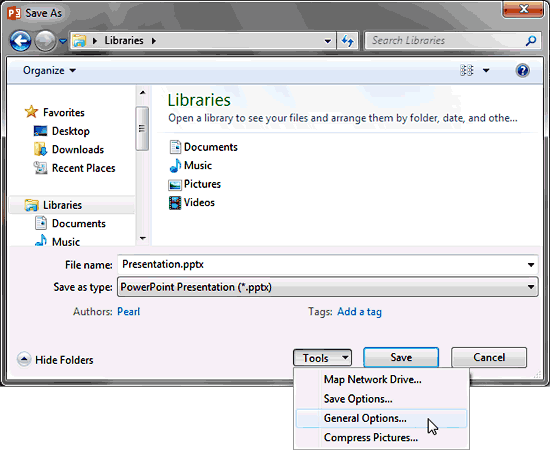
Figure 7: General Options- Doing so brings up the General Options dialog box, as shown in Figure 8, below.
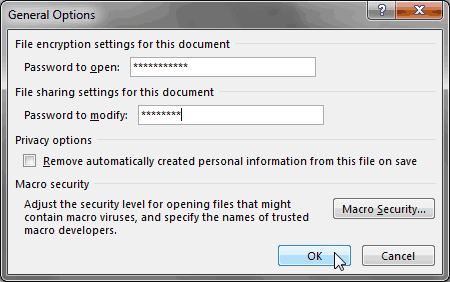
Figure 8: General Options dialog box- There are two password choices:
Password to Open
- Type a password in the field, and the next time you or anybody else opens the file, PowerPoint will prompt to enter the password. This option is the same as the one explained in the preceding section.
Password to Modify
- Type a password in the field to make the presentation readable and visible, but not editable.
- After typing passwords in one or both fields, click the OK button. Doing so opens the Confirm Password dialog box, as shown in Figure 4, previously on this page. Re-enter the password(s). If you opted for both open and modify passwords in the preceding steps, you'll get the confirmation password dialog box twice. Enter the passwords and click the OK button to get back to the Save As dialog box.
- Save your password-protected presentation.
Opening Password Protected Presentations
Opening password protected presentations has its own share of procedures you need to follow:
- If you opted for a Password to Open while providing the password, you'll see the password dialog box, as shown in Figure 9, below, when you open the presentation.
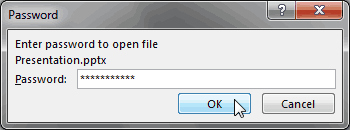
Figure 9: Password to open- If you have applied Password to Modify option, then you'll get a password dialog box, as shown in Figure 10, below, while opening the presentation, where you have to only enter the modify password if you need to edit the presentation. Alternatively you can click the Read Only button and view the presentation.
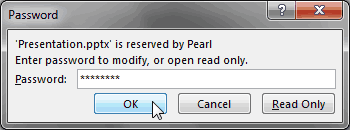
Figure 10: Password to modify


