Indezine Logo


Edit Points: Open and Close Paths in PowerPoint 2016 for Windows

Learn how you can open and close paths for shapes in PowerPoint 2016 for Windows. This technique is very useful and will help you modify some complicated shapes easily.


Author:

Product/Version: PowerPoint 2016 for Windows

OS: Microsoft Windows 7 and higher


Learn PowerPoint

PowerPoint Makeover 01: Don't Use Icons and Pictures Together.


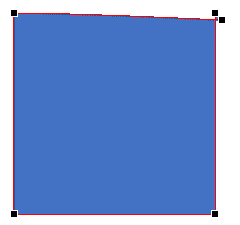
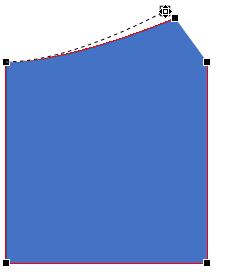
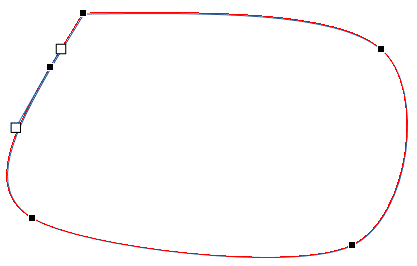
The Shapes gallery in PowerPoint 2016 for Windows consists of various shapes, both open and closed. Closed shapes are ones that do not have a "visible" beginning or an end such as the Rectangle, Ellipse, and Triangle shapes. Open shapes have a "visible" beginning, and an end. An example of an open shape is a straight point to point line. Some tools within the Shapes gallery let you create both open and closed shapes; these are the Freeform Line, Curve, and Scribble tools. In addition, you can convert any closed shape into an open shape and vice versa, as you will learn in this tutorial.
Note: In PowerPoint, the terms vertex and point are often used interchangeably.

Open Shape (Path)

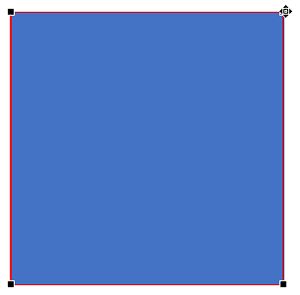
  1. Select a closed shape such as a Rectangle and switch to Edit Points mode (right-click the shape and choose the Edit Points option from the contextual menu). Place the cursor over any point, and cursor will change to a four-directional arrow, as shown in the top right corner of the Rectangle in Figure 1.
  2. Place cursor over the point
    Figure 1: Place cursor over the point
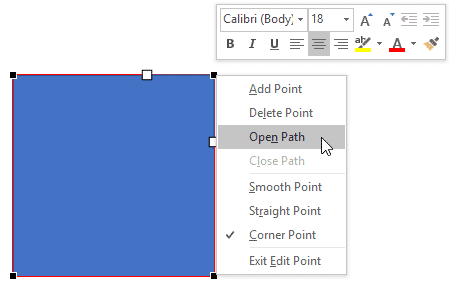
  3. Right-click to bring up the contextual menu, as shown in Figure 2. From this menu, choose the Open Path option.
  4. Open Path option
    Figure 2: Open Path option
  5. This action converts the closed shape into an open shape, as shown in Figure 3. Essentially, the single point you selected is replaced with two points; the gap between these two points is what converts the closed shape into an open one.
  6. Closed shape changed to open shape
    Figure 3: Closed shape changed to open shape
  7. Select any of these two points and drag it elsewhere, as shown in Figure 4. As you can see, the selected shape is no longer a closed shape as there is no outline path visible between these two vertexes.
  8. Opened shape
    Figure 4: Opened shape

Closed Shape (Path)

You need an open shape to start with; draw one with the Freeform Line, Curve, and Scribble tools.
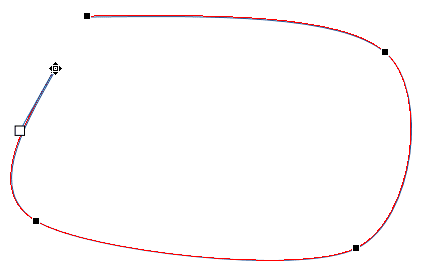
  1. Select the open shape and switch to Edit Points mode (right-click the shape and choose the Edit Points option from the contextual menu). Place the cursor over one of the open points at the end of the shape (path). The cursor will change to a four-directional arrow, as shown in Figure 5.
  2. Place cursor over the opened point
    Figure 5: Place cursor over the opened point
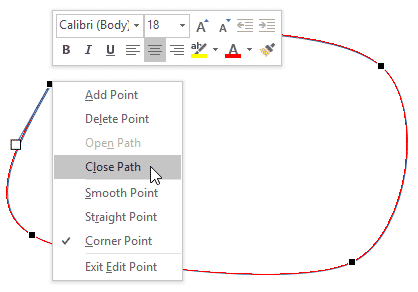
  3. Right-click to summon a contextual menu, as shown in Figure 6. From this menu, choose the Close Path option.
  4. Close Path
    Figure 6: Close Path
  5. PowerPoint automatically creates a connecting segment between the two open points and thus creates a closed shape, as shown in Figure 7.
  6. A Closed Path
    Figure 7: A Closed Path
  7. The closed shape has no fill applied but you can apply any shape fill as required.

See Also:

06 14 04 - Advanced Drawing Techniques: Edit Points: Open and Close Paths in PowerPoint (Glossary Page)

Edit Points: Open and Close Paths in PowerPoint 2003 for Windows
Edit Points: Open and Close Paths in PowerPoint 2007 for Windows
Edit Points: Open and Close Paths in PowerPoint 2010 for Windows
Edit Points: Open and Close Paths in PowerPoint 2011 for Mac
Edit Points: Open and Close Paths in PowerPoint 2013 for Windows

You May Also Like: PowerPoint Presentation Design Deep Dive 2021: Conversation with Amy Balliett | Recycle PowerPoint Templates


Popular Posts

Notes Page View in PowerPoint 2016 for Windows
Learn about Notes Page view in PowerPoint 2016 for Windows.

Christmas PowerPoint Presentation
This presentation is a great introduction to why we celebrate Christmas for both Christian and non-Christian audiences.

Applying Slide Masters to Individual Slides in PowerPoint 2010
Learn how to apply Slide Masters to individual slides in PowerPoint 2010.

Copy and Remove Highlighting for Text in PowerPoint 2013
Learn how to copy and remove highlighting for text in PowerPoint 2013.


Jigsaw Graphics for PowerPoint

Here are 10 jigsaw graphics containing different shapes. These graphics are available in both black and white and are contained within separate sample presentations that you download. Additionally, these jigsaw graphics are vector shapes, so you can easily edit them within your Microsoft Office program by changing fills, lines, and effects or even applying Shape Styles.

Download and use these Jigsaw Graphics in your slides for just $4.99+


Microsoft and the Office logo are trademarks or registered trademarks of Microsoft Corporation in the United States and/or other countries.

Home | PowerPoint | Photoshop | PowerPoint Templates | PowerPoint Tutorials | Blog | Notes | Ezine | Media Kit | Feedback | Site Map | About Us | Contact Us

Link to Us | Privacy | Testimonials

PowerPoint Backgrounds | Christian PowerPoint Backgrounds | Business PowerPoint Presentation Templates

Plagiarism will be detected by Copyscape

©2000-2023, . All rights reserved.