When a shape is inserted into a PowerPoint
slide, its default appearance is related to the points that it contains. Alter the points, and you can change the
original shape to anything you want. PowerPoint's native Edit Points tool makes it almost a drawing
program that provides you the option to play with vertexes (points), handles, etc. This is very similar to what
you would do in Adobe Illustrator, CorelDRAW or another drawing program. By using the Edit Points tool, you can change a
rectangle to a rhombus, or even edit a curved or freeform line differently.
The Edit Points option basically works on individual vertexes. Vertexes are points within the outline
of any shape that can be dragged or edited to change the appearance of the shape. You can see these vertexes as small black
squares (in Figure 1, below you can see four such black squares). Notice that when you select a vertex,
one or two blue handles appear. These handles end with transparent square, and these transparent squares can be
dragged to alter the structure of the selected shape.
Note: PowerPoint uses the terms vertex and point interchangeably.
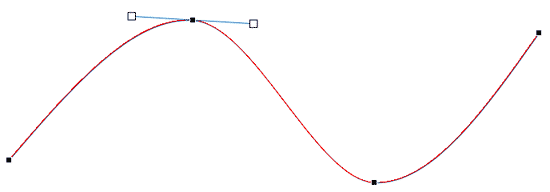
Figure 1: Vertexes (small black squares)
Follow these steps to get to the Edit Points mode for any shape (rectangle, line, drawn shape, etc.)
in PowerPoint 2016 for Windows:
- Select the drawing so that
the Ribbon area now shows the
Drawing Tools Format tab, as shown highlighted in red within
Figure 2. Activate this Ribbon tab by clicking on it.
-
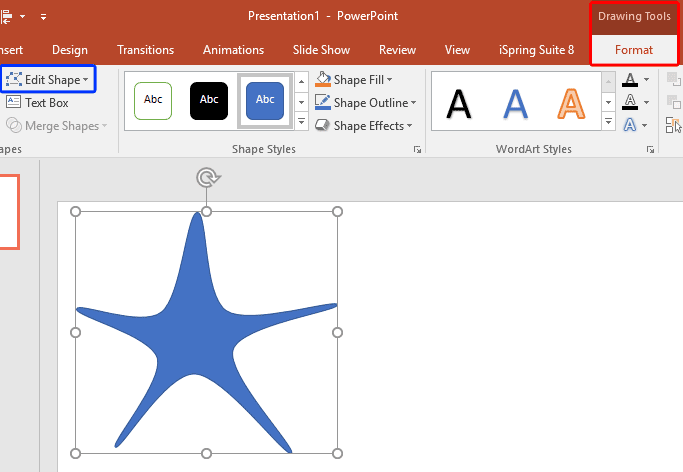
Figure 2: Drawing Tools Format tab of the Ribbon
Note: The
Drawing Tools Format tab is a
Contextual tab. Contextual
tabs are special tabs in the
Ribbon that
are not visible all the time. They only make an appearance when you are working with a particular slide object which can
be edited using special options.
- Within the Drawing Tools Format tab, click the Edit Shape button (highlighted
in blue within Figure 2, above) to view a drop-down menu that you can see
in Figure 3. And, within Edit Shape drop-down menu, choose the Edit Points
option (refer to Figure 3 again).
-
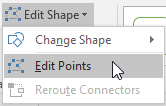
Figure 3: Edit Points option selected
- Alternatively, you can also right-click any shape, and then choose the Edit Points
option from the resultant menu, as show in Figure 4, below.
-
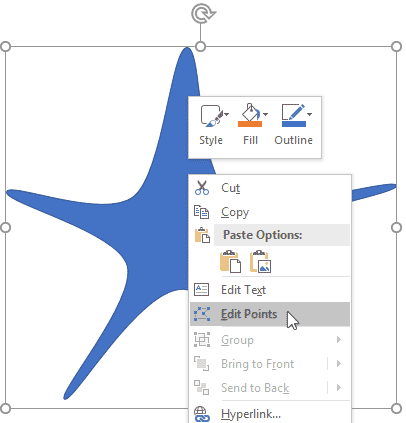
Figure 4: The right-click menu also provides the Edit Points option
Tip: Is the Edit Points option grayed out? Some shapes, especially a straight
point-to-point line will not allow you to choose the Edit Points.
- Either way, a number of small black squared points will appear on the outline of the shape, as shown in
Figure 5. These points are known as Vertexes, which mark any point in your shape that
denotes an extremity of a curve or line segment, or even the start and end point of an open shape.
-
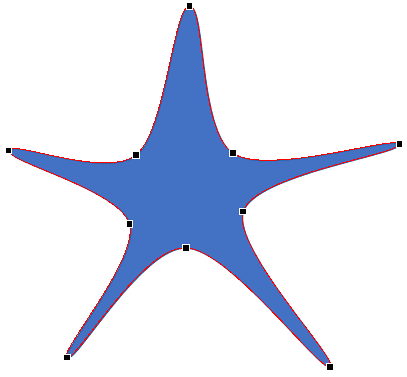
Figure 5: Vertexes appearing on the drawing
- Place the cursor on any of the vertexes - the cursor will change to a small rectangle with four-directional
arrows around it, as shown highlighted in red within Figure 6.
-
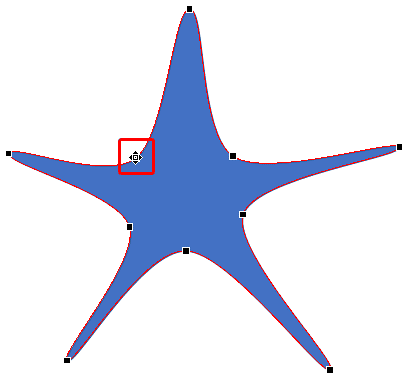
Figure 6: Cursor with a rectangle and four-directional arrows
- Now click on the vertex to select it, and reposition the vertex by dragging it to a new position. A black
dashed line appears showing the changes to the shape that you are making, as shown in Figure 7.
-
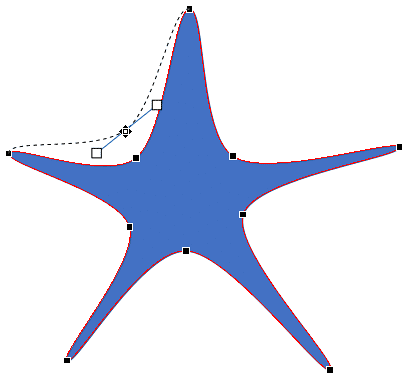
Figure 7: Editing vertexes
- You can also change how the shape looks without repositioning the vertex. A selected vertex shows one or
two blue handles (lines emanating from the vertex), as shown in Figure 8. To alter the degree of the
curve or line on either sides of the vertex in relation to the next vertex along the line, just click on one of the
handles and drag them to reorient the line's structure (refer to Figure 8 again).
-
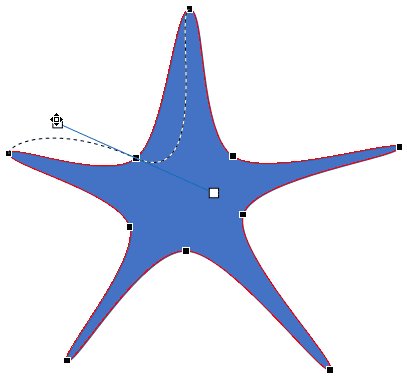
Figure 8: Editing with handles
- Once you have repositioned the vertex or reoriented the structure of the line as required, release the
mouse button. You will see your changed shape, as shown in Figure 9, below.
-
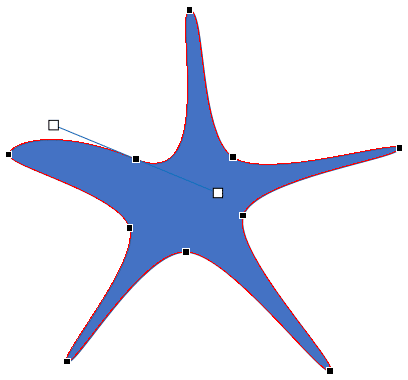
Figure 9: Editing vertexes changes the structure of the selected shape
- Save your presentation.


