When you insert a shape within PowerPoint,
you are not limited to what their default appearance looks like. You may want to change a rectangle to a rhombus, or even
edit a curved or freeform line differently. The good news is that you can do this using the Edit Points
option. This almost makes PowerPoint a drawing program that provides you the option to play with vertexes (points),
handles, etc.—very similar to what you would do in Adobe Illustrator or CorelDRAW.
A vertex is a point within the outline of any shape that can be dragged or edited to change the appearance of
the shape. A vertex is indicated by a small black square (you can see seven of these black squares in
Figure 1). Note that you will learn more about how to get to this Edit Points interface later in this
tutorial. Meanwhile, also notice that when you select a vertex, one or two blue handles appear. These handles
end with transparent squares, these transparent squares have black outlines and can be dragged to reorient the structure
of the selected shape.
Also in PowerPoint, the terms vertex and point are often used interchangeably.
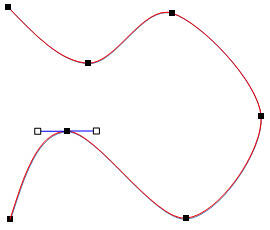
Figure 1: Vertexes (small black squares)
Follow these steps to get to the Edit Points mode for any shape (rectangle, line, drawn shape, etc.) in
PowerPoint 2007 for Windows:
- Select the drawing so that the Ribbon area now
shows the Drawing Tools Format tab, as shown in Figure 2. Activate this Ribbon tab by
clicking on it.
-
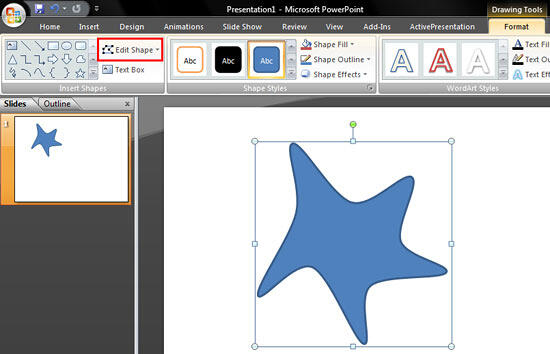
Figure 2: Drawing Tools Format tab of the Ribbon
Note: The
Drawing Tools Format tab is a
contextual tab. These tabs are
special tabs in the
Ribbon that are not visible all the time.
They only make an appearance when you are working with a particular slide object which can be edited using special options.
Tip: Is the Edit Shape button grayed out? Some shapes, especially a straight point-to-point
line will not allow you to click the Edit Shape button.
- Within the Drawing Tools Format tab, click the Edit Shape button (highlighted
in red, in Figure 2 above) to view a drop-down gallery that you can see in
Figure 3. In this gallery, select the Edit Points option (refer to Figure 3
again).
-
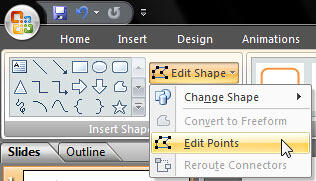
Figure 3: Edit points option
Note: At this point if you see that
Edit Points option is grayed out and
Convert to
Freeform option is active, then don't be surprised. That means you have selected a default PowerPoint Shape. In
PowerPoint 2007, the
Edit Points option will be available only for freeform shapes. For this tutorial we have
indeed used a freeform shape. But if you are using a
Shape you inserted from the Shape Gallery, you
first must convert it into a freeform shape. To do that, you have to select the
Convert to Freeform option
in the same drop-down gallery (see
Figure 4).
-
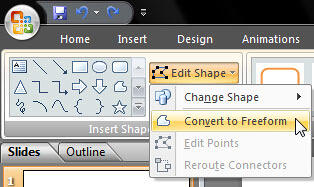
Figure 4: Convert to Freeform option
- Once you do that, Edit Points option becomes accessible. Just click it.
- A number of small black squared points will appear on the outline of the shape, as shown in
Figure 5. These points are known as vertexes, which mark any point in your shape that denotes an extremity
of a curve or line segment, or even the start and end point of an open shape.
-
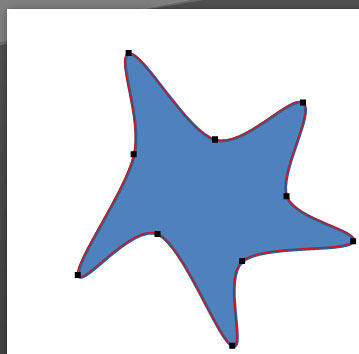
Figure 5: Vertexes appearing on the drawing
- Place the cursor over any of the vertexes - the cursor will change to a small square with four directional
arrows around it, as shown in Figure 6 (highlighted in red).
-
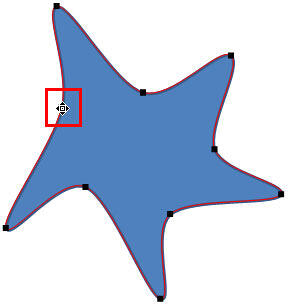
Figure 6: Cursor with a square and four directional arrows
- Now click on the vertex to select it, and reposition the vertex by dragging it to a new position. A semi
transparent area appears showing the changes to the shape that you are making, as shown in Figure 7.
-
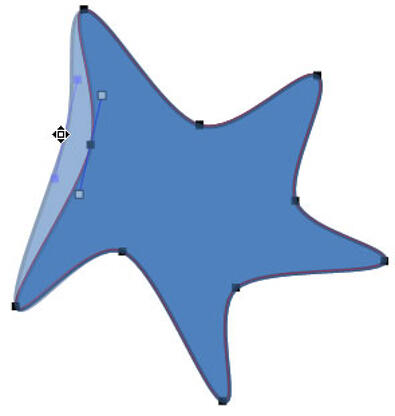
Figure 7: Editing vertexes
- You can also change how the shape looks without repositioning the vertex. A selected vertex shows one or
two blue handles (blue lines emanating from the vertex), as shown in Figure 8. To alter the degree of
the curve or line on either sides of the vertex just click on one of the handles and drag it to reorient the line's
structure (refer to Figure 8 again).
-
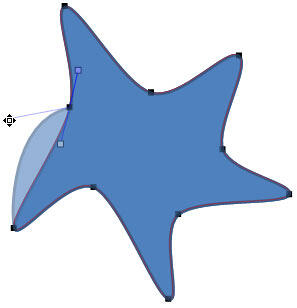
Figure 8: Editing with handles
- To alter the degree of the curve or line on either sides of the vertex in relation to the next
vertex along the line, you have to press the Shift key while dragging.
- Save your presentation often.


