PowerPoint 2013 for Windows has a ready-to-use collection of
shapes that can be
inserted with a click or two. You can add
multiple shapes on the same slide and then
flip,
rotate,
reorder,
or group them as required to create
your own combined diagrams and designs within PowerPoint. These combined shapes help create more involved diagrams
such as a target diagram. In this tutorial, we'll show you how simple it is to create a target by placing circles of
various sizes one on top of the other using the techniques of formatting shapes already explained. Before we begin,
let me show you how a target diagram created in PowerPoint can look like, as shown in Figure 1.

Figure 1: Target created using multiple circle shapes
Follow these steps to create your own target diagram:
- Launch PowerPoint 2013 for Windows. Most of the time, PowerPoint will open with a new slide in a presentation. You can
change the slide layout to
Blank by selecting the Home tab | Layout | Blank option.
- Within the Home or Insert tab of the
Ribbon,
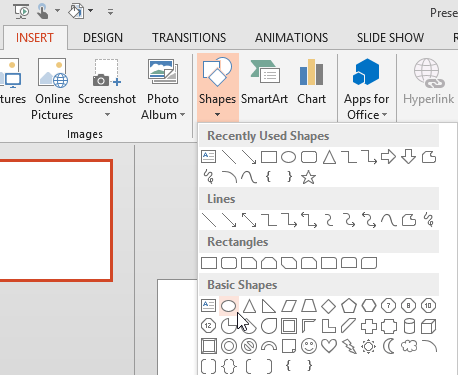
click the Shapes button to view the Shapes drop-down gallery that you can see in
Figure 2. Select the Oval shape, since we will use this shape variant to create a circle.

Figure 2: Oval shape selected - Now either drag and draw, or click once on the blank slide to
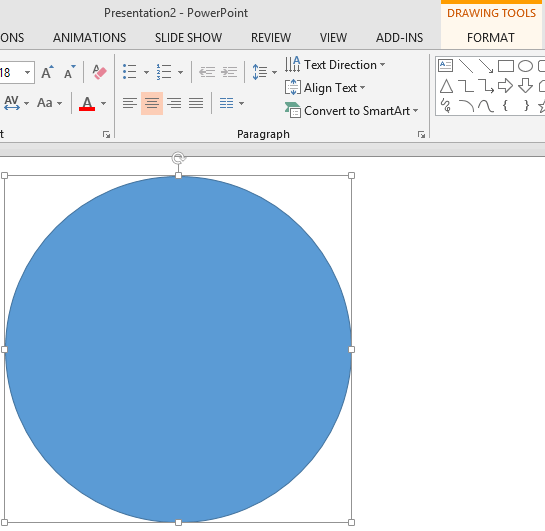
place a perfect circle shape, as
shown in Figure 3.

Figure 3: Circle shape placed on the slide - Double-click the selected shape to activate the Drawing Tools Format contextual tab in the
Ribbon (see Figure 4). We do not need the options in this tab for now, but we will
need them later in this tutorial.

Figure 4: Drawing Tools Format tab of the Ribbon- Create a duplicate of the circle, there are several ways you can duplicate:
- Duplicate a shape by dragging,
or
- Duplicate a shape using the Ctrl +
D shortcut , or
- Just use the Copy (Ctrl + C) and Paste
(Ctrl + V) shortcut keys.
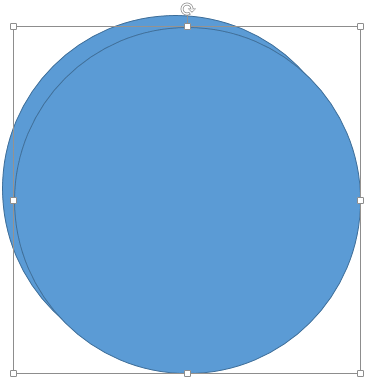
- Figure 5 shows a duplicated circle placed over the original circle we created earlier.

Figure 5: Circle's duplicate copy created- Now we have to resize the duplicated circle to an
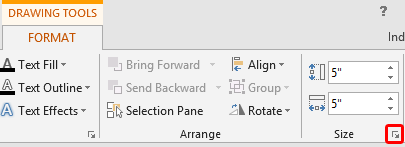
exact size that is a little smaller than the original circle. Within the Drawing Tools Format tab, click the small arrow
dialog launcher (highlighted in red within Figure 6).

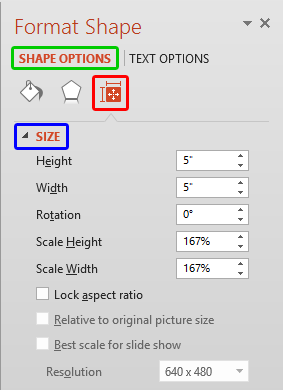
Figure 6: Format Shape task pane launcher- This brings up the Format Shape
Task Pane (see Figure 7).
Make sure that the Shape Options tab (highlighted in green within Figure 7)
is selected then select the Size button (highlighted in red within Figure 7),
then select the Size option (highlighted in blue within Figure 7).

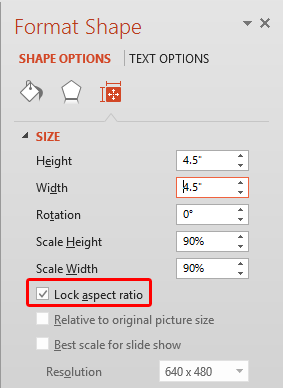
Figure 7: Format Shape Task Pane- First, make sure the Lock aspect ratio check-box is selected (highlighted in
red within Figure 8).
- Thereafter, reduce the Height and Width values incrementally as
required (we reduced by 0.5"). Previously, the Height and Width were 5" (refer
in Figure 7 above). After reducing 0.5", these values become 4.5", as shown in Figure 8.

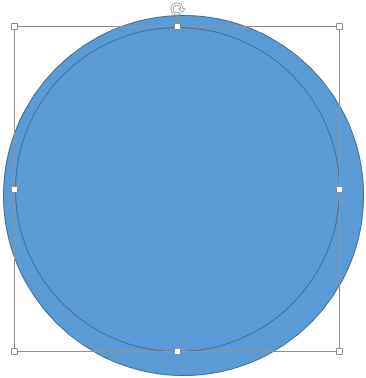
Figure 8: Size values changed within the Format Shape task pane- This will resize the duplicated circle, as shown in Figure 9.

Figure 9: Resized circle - Now create several such duplicated copies to end up with as many circles as you need (you will need to
repeat steps 5 through 9 for each circle you add). We did this repeatedly to end up with
ten circles, as shown in Figure 10.

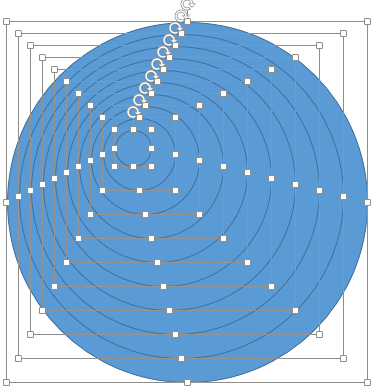
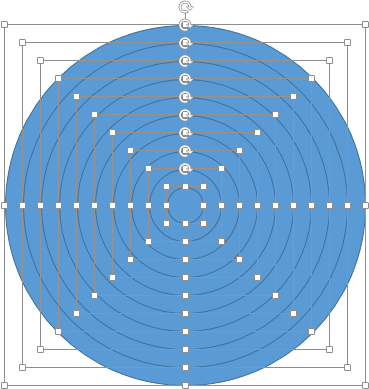
Figure 10: Ten circle shapes- Now select all the circle shapes by pressing Ctrl + A on your keyboard (see
Figure 11).
- You can learn more about ways to select objects in these tutorials:
- Select and Deselect Shapes, and
Select Using the Selection Task Pane

Figure 11: All the circle shapes are selected- With all the circle shapes selected, access the Drawing Tools Format contextual tab again. Click the
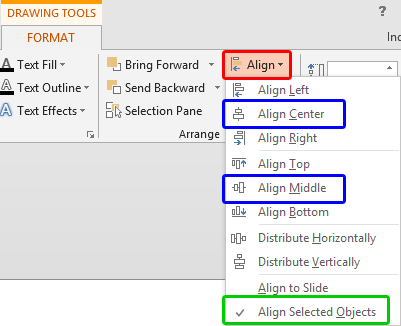
Align button (highlighted in red within Figure 12) to bring up the drop-down
gallery shown in Figure 12.

Figure 12: Align drop-down gallery- Make sure that the Align Selected Objects option (highlighted in
green within Figure 12, above) is selected. Thereafter click both the
Align Center and the Align Middle options (highlighted in blue within
Figure 12, above) one after the other. This will align all the circle shapes to the center of the first circle we
created, as shown in Figure 13. Learn more about alignment in our
Aligning Shapes in PowerPoint 2013 tutorial.

Figure 13: All the circle shapes aligned- Now you can change the color of individual circles. To do that, select an individual circle. Then access the
Drawing Tools Format contextual tab. Within this tab, click the down-arrow beside the Shape Fill button
(highlighted in red within Figure 14). This brings up the drop-down gallery as shown in
Figure 14.

Figure 14: Shape Fill drop-down gallery- Select one circle at a time and apply any of
shape fills. You can also change the
outline color of individual circles,
and you can also change both the fill and outline at the same time by applying a
Shape Style.
- Figure 15 shows the created target diagram.

Figure 15: Target diagram- You can even add an Arrow shape on the target we created, as shown in Figure 16.

Figure 16: Target with arrow shape added
Tip: It is a good idea to align the target to the center of the slide. To do that you first need to
select all the circles (and other
shapes such as the Arrow added) and then
group them. Then align the target to
center of the slide, as explained in our
Align shape to center of slide
in PowerPoint 2013 tutorial.
