Indezine Logo


Create Organic Boxes in PowerPoint

Learn how to create organic looking boxes in PowerPoint. This technique is awesome if you want your shapes to look hand-drawn or even different.


Author:

Product/Version: PowerPoint

OS: Microsoft Windows and Mac OS X


Learn PowerPoint

Learn how you can advance two PowerPoint presentations with a single click.


You may call them squares or rectangles, or if you are Metro-inspired, you may call them tiles. For the reasons of simplicity, let us just call them boxes. It does not matter what you call them, but most presenters use these boxes so often in their slides. It's easy to understand why these boxes are so popular - they can be added to your slides with one click, and you can type any text right inside them. Figure 1 below is a great example of such a slide!
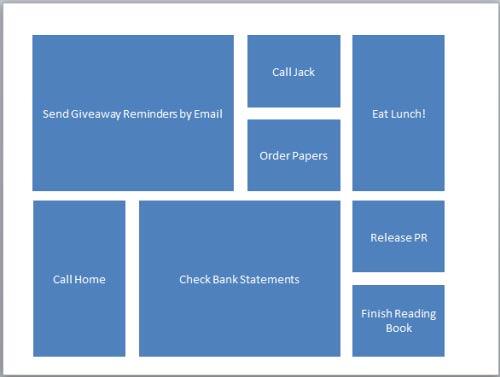
Slide populated with boxes containing text
Figure 1: Slide populated with boxes containing text

However, after a while these boxes start looking too geometric. We know we grew so tired of looking at all the straight lined shapes all the time that we had to do something to get over this monotony. How about creating boxes that look more hand drawn than the ones that look like they are straight from a geometry box? Do you like the look of the boxes in Figure 2, below?
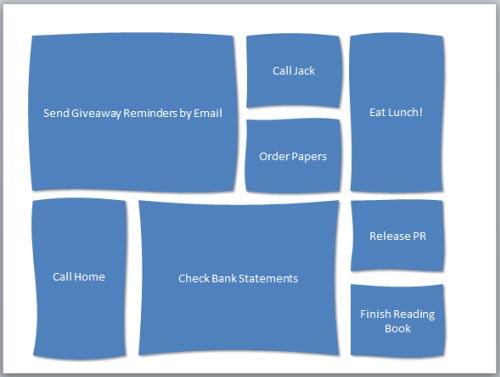
Slide populated with organic boxes containing text
Figure 2: Slide populated with organic boxes containing text

If creating these organic variations of geometric boxes sounds like a great idea, keep reading.
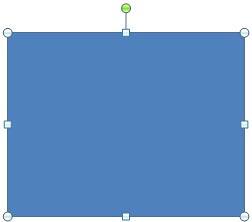
  1. Start by inserting a rectangle on your slide. Select your rectangle, as shown in Figure 3, below.
  2. Rectangle inserted and selected
    Figure 3: Rectangle inserted and selected
  3. With the rectangle still selected, right-click and choose the Edit Points option in the resultant shortcut menu.
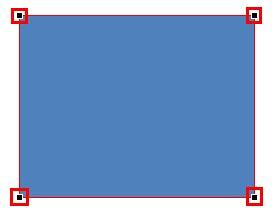
  4. This will get you into the Edit Points mode – note the four vertexes (points) shown highlighted in red within Figure 4, below – compare these vertexes with the selection handles you saw in Figure 3, earlier.
  5. Shape in Edit Points mode
    Figure 4: Shape in Edit Points mode
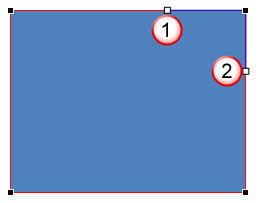
  6. Click on any vertex so that you can see the two blue handles for the point. In Figure 5 below you can see the blue handles appeared on the top-right corner point.
  7. Two blue handles appear when a corner point is selected
    Figure 5: Two blue handles appear when a corner point is selected
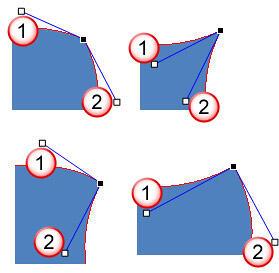
  8. Click and drag the white squares (marked as 1 and 2 within Figure 5, above) that are located towards the end of these blue handles. This repositions the blue handles, making the adjacent line segments look curvy.
  9. In Figure 6 you can see the four possibilities of providing organic look to the line segments by repositioning the blue handles.
  10. Blue handles repositioned to make the line segments curvy
    Figure 6: Blue handles repositioned to make the line segments curvy
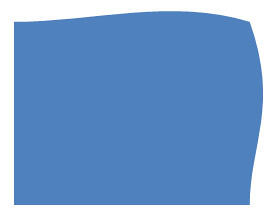
  11. Once you are done with editing the top-right corner point, your rectangle may look like what you see in Figure 7.
  12. Rectangle with one corner point edited
    Figure 7: Rectangle with one corner point edited
  13. Now, select the remaining three corner points one by one, and follow Step 5 to provide a curvy look to the line segments emerging from each of them. In Figure 8 below, you can see that we have edited all four corner points and provided the selected rectangle with an organic look. Also, we have added some text in it.
  14. Organic box with text added
    Figure 8: Organic box with text added
  15. Once you get the desired result, save your presentation.

You May Also Like: Essential PowerPoint Skills Everyone Needs, Especially Working from Home | Chad Flags and Maps PowerPoint Templates


Popular Posts

Copy and Remove Highlighting for Text in PowerPoint 2013
Learn how to copy and remove highlighting for text in PowerPoint 2013.

Add Headers and Footers to Slides in PowerPoint 2016 for Windows
Learn how to add Headers and Footers to slides in PowerPoint 2016 for Windows.

Text Box Autofit Options in PowerPoint 2016 for Windows
Learn about Text Box autofit options in PowerPoint 2016.

Paste in Place in PowerPoint
How can you place a copied or duplicated slide object right on top of the original object in PowerPoint?


Jigsaw Graphics for PowerPoint

Here are 10 jigsaw graphics containing different shapes. These graphics are available in both black and white and are contained within separate sample presentations that you download. Additionally, these jigsaw graphics are vector shapes, so you can easily edit them within your Microsoft Office program by changing fills, lines, and effects or even applying Shape Styles.

Download and use these Jigsaw Graphics in your slides for just $4.99+


Microsoft and the Office logo are trademarks or registered trademarks of Microsoft Corporation in the United States and/or other countries.

Home | PowerPoint | Photoshop | PowerPoint Templates | PowerPoint Tutorials | Blog | Notes | Ezine | Media Kit | Feedback | Site Map | About Us | Contact Us

Link to Us | Privacy | Testimonials

PowerPoint Backgrounds | Christian PowerPoint Backgrounds | Business PowerPoint Presentation Templates

Plagiarism will be detected by Copyscape

©2000-2023, . All rights reserved.