While it is a great option to
change bullet styles, sometimes you don't
want to really change just the bullet characters themselves. You might want to alter the size of the bullet character so that it
is somewhat smaller or larger than the text before which it is placed. Or maybe you need a particular color to be used? Most of
the time, the defaults actually work best. However, just in case you want to make these changes, this is how you will go about the
whole process in PowerPoint 2013:
Tip: Do you want the bullet color and size changed in all slides? The instructions on this page are for
working with individual slides in
Normal view. To
apply these changes to all slides, follow the same steps within the
Slide Master view.
- Open the presentation, navigate to the slide where you want to make these changes, and select the bulleted text. If you
want to make these changes to all the bullets in the text placeholder, you can select the entire placeholder by clicking on the edge of
the placeholder (see Figure 1).
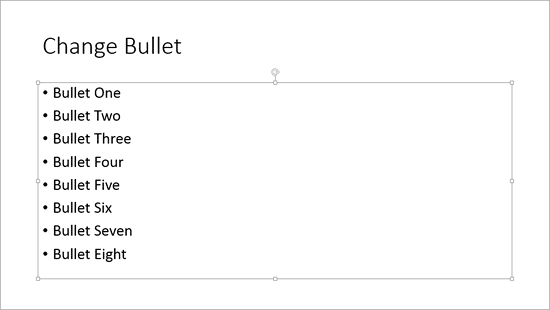
Figure 1: Slide with bulleted text
- Access the Home tab of the Ribbon
and click the down-arrow beside the Bullets button (highlighted in blue within
Figure 2). This brings up the Bullets drop-down gallery, as shown in Figure 2.
Within this drop-down gallery, choose the Bullets and Numbering option (highlighted in
red within Figure 2).
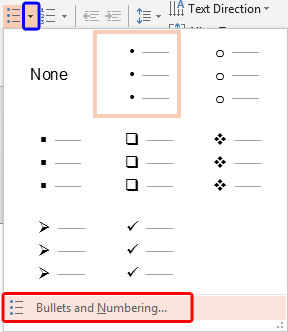
Figure 2: Bullets drop-down gallery
- This will open the Bullets and Numbering dialog box, as shown in Figure 3. Make sure that
the Bulleted tab of this dialog box is selected. The Size and the Color
options can be seen highlighted in red and blue respectively in
Figure 3.
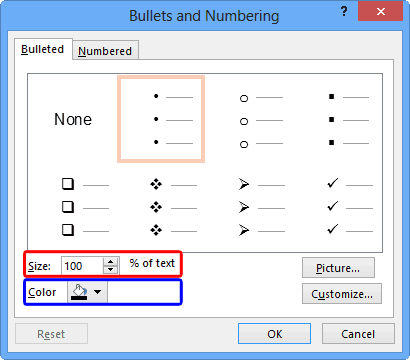
Figure 3: Bullet options within the Bullets and Numbering dialog box
- To change the size of the bullet in relation to the text, just type in the value in the size box, or use the up and down
arrows placed next to the size box to increase/decrease the size value. As you can see in Figure 4, the dialog box now shows
that the size value has been changed to 75 percent of text (highlighted in red).
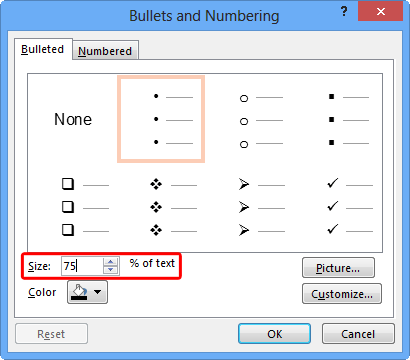
Figure 4: Size value is changed
- Click the Color button, which reveals the Color gallery, as shown in
Figure 5.
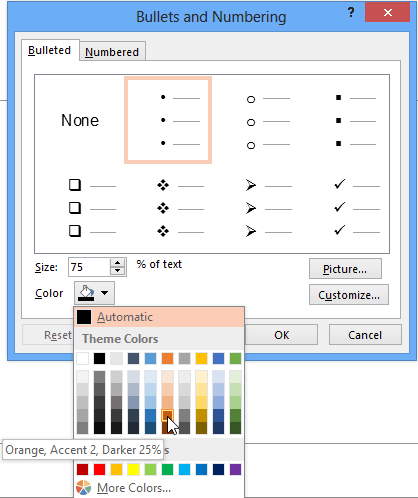
Figure 5: Color gallery
-
The choices within this Color gallery are:
Automatic
- This is the default color for the bullets, and uses the same color as the text color.
Theme Colors
- Choose any color from the active Theme
of the presentation. You can also choose from any of the 5 tints (lighter variations) or shades (darker variations) for any
Theme color. Do remember that these colors will change if you
apply a new Theme to your presentation.
Standard Colors
- Choose from any of the ten standard colors. These ten standard colors are just choices
of colors that PowerPoint believes to be widely used. These colors will not change if you apply a new Theme.
More Colors
- Works just like Standard Colors, and choices you make do not change if you apply a new
Theme. The More Colors option summons the Colors dialog box with two tabs:
- Standard tab provides 127 colors in a honeycomb style palette, 14 gray shades, black, and white.
- Custom tab enables you to chose any color from the spectrum and later adjust the selected color's luminosity
with the slider on the right. You can even enter specific values of RGB and HSL to create a specific color. All these
combinations provide 16 million color choices!
- Select any color you want. As soon as the color is selected, you can see that the bullet color changes in the Bullet style
previews (highlighted in red within Figure 6).
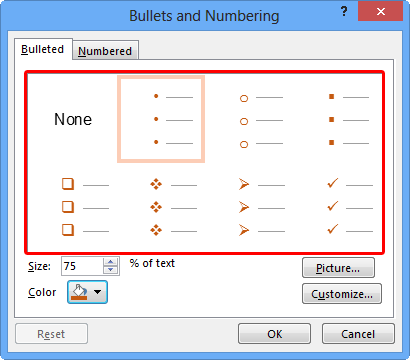
Figure 6: Color of the bullets changed within the Bullets and Numbering dialog box
- Now, click the OK button to apply the choices you have made to your selected bulleted text.
- Figure 7 shows the customized bullet size and color of the selected text (compare Figures 1
and 7).

Figure 7: Bullet color and size customized on the slide


