Once you insert a video in your PowerPoint slide, you can crop it in almost the same way you crop a picture. Before you crop though, you must ascertain whether PowerPoint's Crop option will help create a better result for your inserted video. The Crop option allows you to remove non-required areas of a video. For example, if the subject of your video is a speaker surrounded by a large, distracting background of other people or moving objects, you may want to crop the video so that the cropped video now focuses more on the speaker, and gets rid of all the extra distractions.
Note that cropping a video does not trim the timings of the video playback in any way. In fact, trimming is a completely different option that will be explored in another tutorial.
In the following steps, we will explore how you can crop a video clip in PowerPoint 2016 for Windows:
- Open your presentation, and navigate to the required slide where you have already inserted a video clip. Select or double-click the video clip to bring up the two Video Tools tabs in the Ribbon. These two tabs are Format and Playback. Click the Format tab to activate it, as shown highlighted in blue within Figure 1, below.
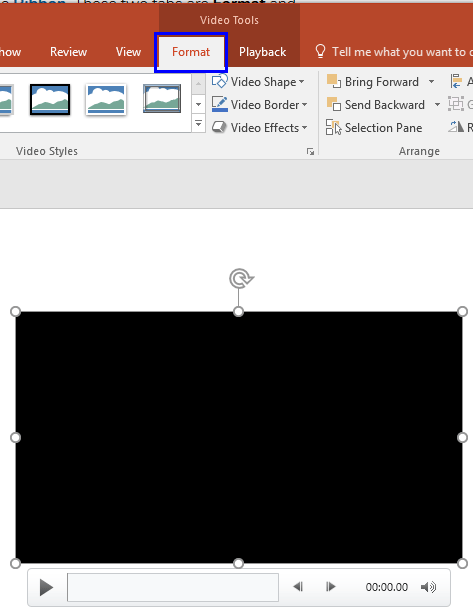
Figure 1: Video Tools Format tab of the Ribbon Contextual Tab
- The Video Tools Format tab is a Contextual tab. Contextual tabs are special tabs in the Ribbon that are not visible all the time. They only make an appearance when you are working with a particular slide object which can be edited using special options.
- When you insert a video on your slide, it may display a black rectangle on the slide, as shown in Figure 1, above. If your video clip does not show a black rectangle, then directly proceed to Step 3.
- If you see the black rectangle in place of the video clip, then you will have to add a Poster Frame to your video clip, as shown in Figure 2, below. This step is important because, when you crop the video, you need to see the actual video clip being cropped, rather than seeing a black rectangle.
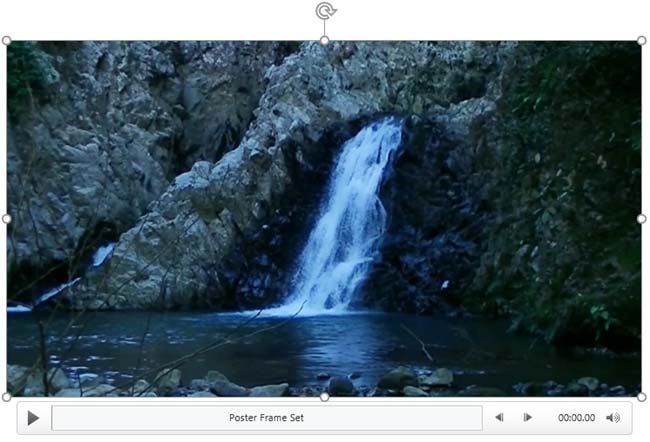
Figure 2: Video clip with a poster frame added - Now, within the Video Tools Format tab, click the Crop button, as shown highlighted in red within Figure 3, below.
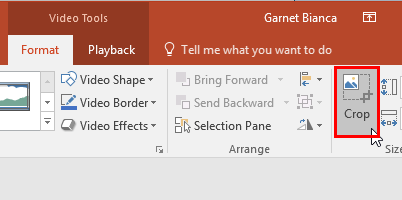
Figure 3: Crop button - Doing so brings up dark crop handles on the edges of the video clip, or on the edge of the shape if you have used the Video Shape option, as shown in Figure 4, below.

Figure 4: Result of selecting the Crop option on a video clip - Notice that there are eight handles. You will find four side cropping handles that look like straight lines, and also four corner cropping handles that look like slightly rotated Ls.
- You can alter how you crop by pressing the Ctrl key while you drag:
- To crop from one side of the video clip, drag the side cropping handle on that side inwards. For example, dragging the side cropping handle inwards from the left edge will crop out areas on the left part of the video clip.
- To crop from one corner of the video clip, drag the corner cropping handle on that corner inwards. For example, dragging the corner cropping handle inwards from the top-left will crop out areas on both the top and left parts of the video clip. You can alter how you crop by pressing the Ctrl key while you drag:
- Ctrl + dragging the side cropping handles will resize two opposite sides.
- Ctrl + dragging the corner cropping handles will resize all four sides.
- In addition, you can achieve different results by pressing the Shift key while you drag:
- Shift + dragging the side cropping handles will provide no extra benefits.
- Shift + dragging the corner cropping handles will resize the video clip proportionately, retaining its height:width ratio.
- You can also use both the Ctrl and Shift keys at the same time to combine both capabilities.
- To reposition the crop, move either the crop area (by dragging the edges of the crop rectangle), or the video itself. When you hover your cursor over the video in the Crop mode, you will see the cursor change to a four-sided arrow, as shown highlighted in red within Figure 5, below. This will allow you to reposition the actual video, as required. For this video clip, we have isolated the middle part of the video clip.
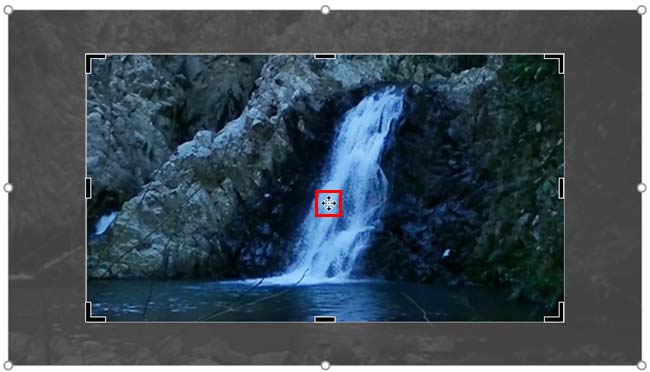
Figure 5: Video clip being cropped - Now, crop the non-required area by pressing the Enter key, or clicking on the Crop button, as shown within Figure 3, previously on this page. Aternatively, click on the Slide Area away from the video to apply the cropping. Figure 6, below, shows the cropped video clip. Compare Figures 5 and 6.
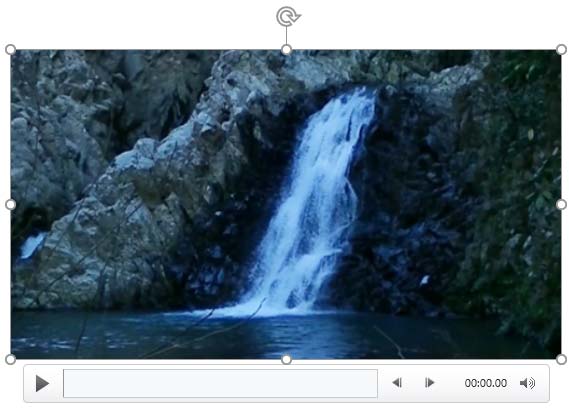
Figure 6: Video clip cropped - To access more crop options for your video clip, just right-click the video clip to bring up the contextual menu, as shown in Figure 7, below. Within this contextual menu, select the Format Video option, as shown in Figure 7.
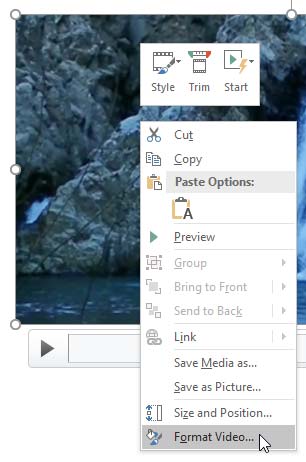
Figure 7: Format Video option to be selected - Doing so brings up the Format Video Task Pane, as shown in Figure 8, below. Make sure you select the Crop option within the Task Pane, as shown highlighted in red within Figure 8.
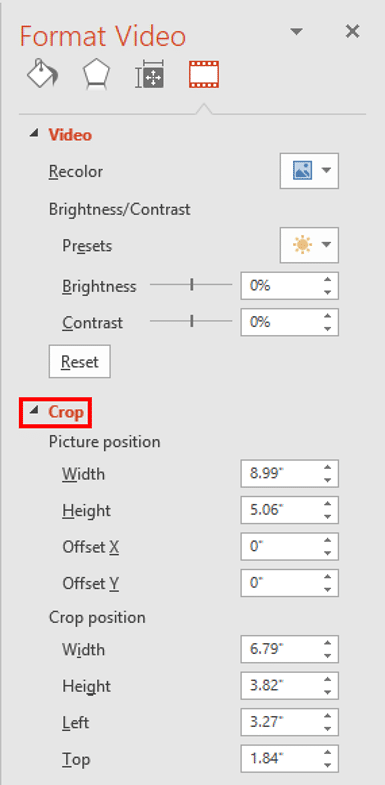
Figure 8: Crop option within the Format Video Task Pane - Here you crop portions of the video by simply specifying the Crop Position or Picture Position. Play around with other crop parameters like Width, Height, Offset X, Offset Y, Left, and Top. As you change values, you will see the Live Preview. Once you have set the parameters, close the Format Video task pane.
- Make sure to save your presentation.


