While making a visually strong PowerPoint presentation you can add shapes and pictures to it. You can also fill your shapes with pictures. However, you may end up with not so desirable results. Primarily, you'll find that PowerPoint insists on filling the entire picture within the shape. In the process, the picture itself may appear distorted.
In Figure 1, below we show an example. On the left is the actual picture we used to fill the shape. On the right, note that the woman's face is squeezed when used as a picture fill. This completely destroys the look we wanted to attain. Fortunately, regaining this lost proportion is an easy option, as you will learn in this tutorial.

Figure 1: Picture gets distorted when used as a fill for a shape
To set the proportions of a picture fill, you'll have to explore the Crop options. While you are using the Crop tool, you can also select a particular portion of the picture to fill the shape, or you can zoom to an area within the picture fill.
Follow these steps to learn more in PowerPoint 2013 for Windows:
- Before you start, we are assuming you have already inserted a shape on your slide that has a picture fill. Select the shape to bring up the Picture Tools Format tab (highlighted in red within Figure 2) of the Ribbon. Activate this contextual tab by clicking it, and click the down-arrow below the Crop button (highlighted in blue within Figure 2).
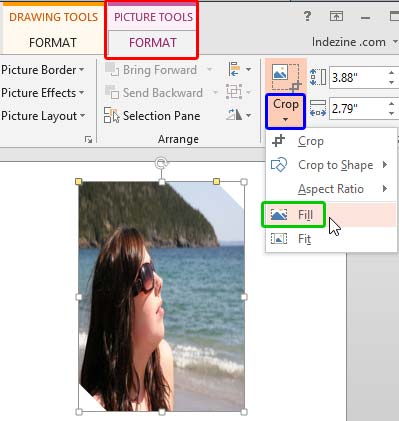
Figure 2: Fill option within the Crop drop-down gallery Note: The
Picture Tools Format tab is a
Contextual tab. These tabs are special tabs in the
Ribbon that are not visible all the time. They only make an appearance when you are working with a particular slide object which can be edited using special options.
- This opens the Crop drop-down gallery. Select the Fill option (highlighted in green within Figure 2, above).
Note: Make sure to select only the Picture Tools Format tab, not the Drawing Tool Format tab.
- As soon as you select this option, you can see that the picture fill is no more distorted, as shown in Figure 3. Also notice that dark crop handles appear on the edge of the container shape, and selection handles (white squares) appear on the edge of the picture used as fill.
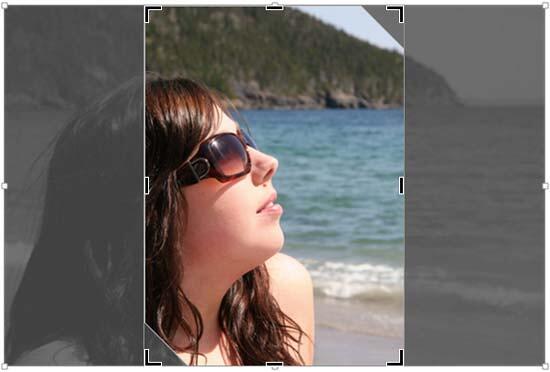
Figure 3: Fill crop option applied to a picture filled shape - Now, you can drag the dark crop handles to resize the container shape. Similarly, you can use the selection handles to resize and reposition the picture fill. However, we suggest that you do not just drag and resize the selection handles yet since there are more options available, and we discuss these options next.
- Reposition the picture within the shape: Do you want to show a particular portion of the picture fill that may not be visible clearly by default? Look again at Figure 3, above and you will notice that only part of the woman's face is visible within the shape. To counter this problem, place your cursor anywhere in the middle of the shape away from the edges so that your cursor changes to a four-headed arrow as shown in highlighted in red within Figure 4.
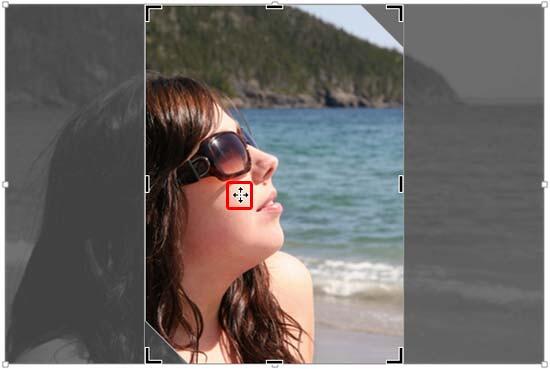
Figure 4: Cursor changes to four-headed arrow - Now, click and drag the picture within the shape to reposition it so that the area you want to show is visible within the shape. Note that all crop and selection handles will disappear when you start dragging, as shown in Figure 5. You can also press the Shift key on your keyboard as you are dragging so as to reposition the graphic at 90 degree increments up, down, left, or right.
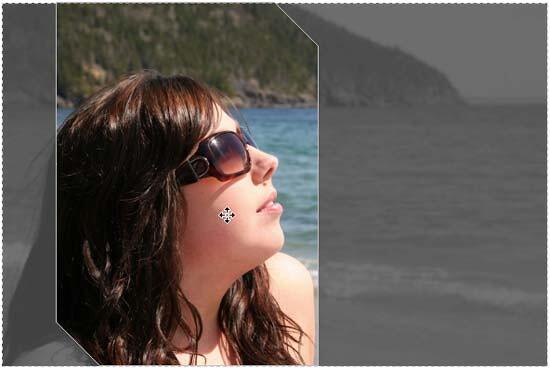
Figure 5: Drag to reposition your picture fill - When you achieve the desired result, just click on the slide area away from the shape to come out of the Crop mode. Everything except the selected area is subtracted from the shape fill, as shown in the sample towards the right in Figure 6 (see below). Compare Figures 1 and 6.

Figure 6: Effect of repositioning the picture fill - Resize the picture within the shape: In addition to repositioning the picture, you can also resize the picture fill itself so that you can show a zoomed-in area as the picture fill. To do that, place your cursor on any of the four corner selection handles (white squares on the four corners of the picture fill). When the cursor is placed on any of the handles the cursor changes to a two sided arrow, as shown highlighted in red within Figure 7. Click to select the handle.
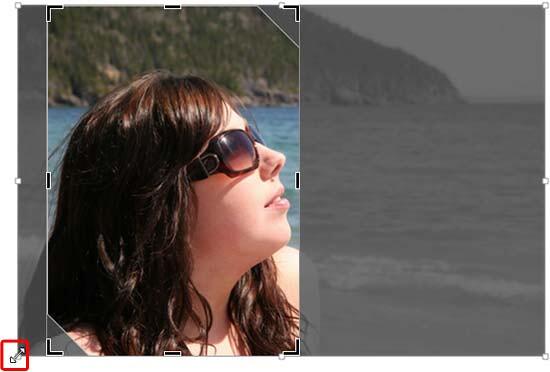
Figure 7: Cursor placed on the corner selection handle - Do not let go off your mouse button. Also hold down the Shift key on the keyboard and drag the corner handle to resize the picture fill, as shown in Figure 8. In addition, you can optionally hold down the Ctrl key (in addition to the Shift key) to resize from the center of the picture. Once you achieve the desired result, just click on the slide area away from the shape to come out of the Crop mode.
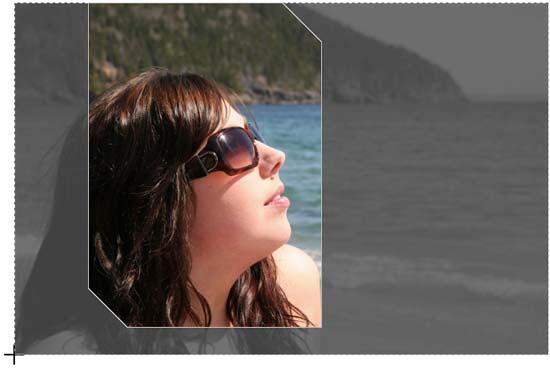
Figure 8: Picture fill being zoomed - Once you have resized the picture fill, you can also reposition it as explained in Step 3. Look at Figure 9, the container shape is filled with just the close-up view of the woman's face. Compare Figures 1, 6, and 9.

Figure 9: Effect of zooming and repositioning the picture fill - Save your presentation.


