You can crop a movie clip on your PowerPoint slide in almost the same way you crop a picture. Before you crop though, ascertain whether PowerPoint's Crop option will help enhance your inserted movie. Don't just do a crop if it adds no extra value to your movie clip. The Crop option allows you to remove non-required areas of a movie. For example, if the subject of your movie is a person speaking who is surrounded by a large, distracting background of other people or moving objects, you may want to crop the movie so that the cropped movie now focuses more on the speaker, and gets rid of all the extra distractions.
Note that cropping a movie does not affect the timings of the movie playback in any way.
Let us now explore how to crop a movie clip in PowerPoint 2011 for Mac:
- Open your presentation, and navigate to the required slide where you have already inserted a movie clip. Select or double-click the movie clip to bring up the Format Movie tab of the Ribbon, as shown highlighted in red within Figure 1, below.
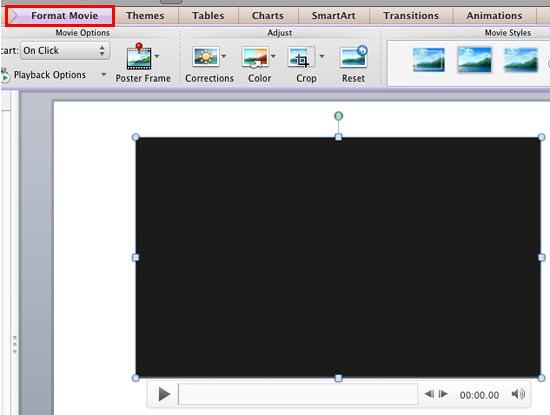
Figure 1: Format Movie tab of the Ribbon - When you insert a movie clip in your slide, it may display a black rectangle on the slide, as shown in Figure 1, above. If your movie clip does not show a black rectangle, directly proceed to Step 3.
- If you see the black rectangle in place of the movie clip, then you will not be able to view the portion of the movie clip being cropped out unless you play the movie clip. To make sure you see a movie frame while you crop your movie clip, consider adding an optional Poster Frame to your movie clip, so that way you will see a movie frame in the place of black rectangle, as shown in Figure 2, below.
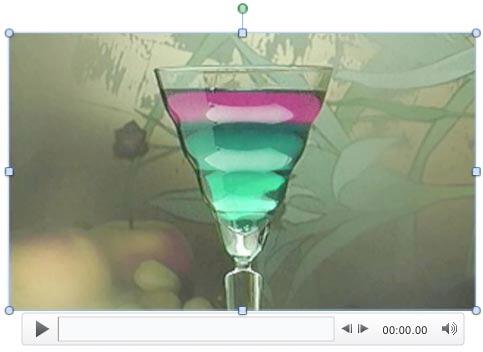
Figure 2: Poster Frame added to the movie - Now, within the Format Movie tab, click the Crop button, as shown highlighted in red within Figure 3, below.

Figure 3: Crop button within the Adjust group - Doing so brings up dark crop handles on the edges of the movie clip, or on the edge of the shape if you have used the Movie Shape option, as shown in Figure 4, below.

Figure 4: Result of selecting the Crop option on a movie clip - Notice that there are four side cropping handles that look like a straight line, and also four corner cropping handles that look like a slightly rotated "v".
- To crop from one side of the movie clip, drag the side cropping handle on that side inwards. For example, dragging the side cropping handle inwards from the left edge will crop out areas on the left part of the movie clip.
- To crop from one corner of the movie clip, drag the corner cropping handle on that corner inwards. For example, dragging the corner cropping handle inwards from the top-left will crop out areas on both the top and left parts of the movie clip. You can alter how you crop by pressing the Option (Alt) key while you drag:
- Option (Alt) + dragging the side cropping handles will resize two opposite sides.
- Option (Alt) + dragging the corner cropping handles will resize all four sides.
- You can also press both the Option (Alt) and Shift keys at the same time to get more control over the cropping process:
- Shift + Option (Alt) + dragging the side cropping handles will provide no extra benefits.
- Shift + Option (Alt) + dragging the corner cropping handles will resize the movie clip proportionately, retaining its height:width ratio.
- To reposition the crop, move either the crop area (by dragging the edges of the crop rectangle), or the movie itself. When you hover your cursor over the movie in the Crop mode, you will see the cursor change to a four-sided arrow, as shown highlighted in red within Figure 5, below. This will allow you to reposition the actual movie, as required. For this movie clip, we have isolated the middle part of the movie clip.
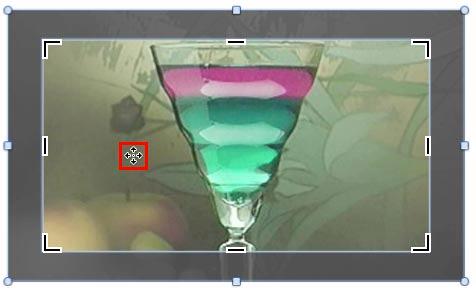
Figure 5: Movie clip being cropped - Now, crop the non-required area by pressing the Esc key, or clicking on the Crop button, as shown in Figure 3, previously on this page. Alternatively, click on the Slide Area away from the movie to apply the cropping. Figure 6, below, shows the cropped movie clip. Compare Figures 2 and 6.
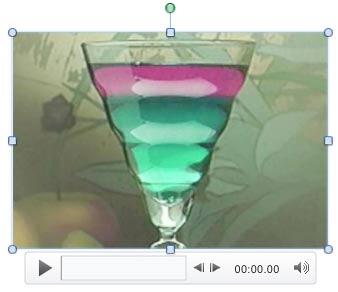
Figure 6: Movie clip cropped - To get more crop options for your movie clip, right-click, or Ctrl + click the movie clip to get the context menu, as shown in Figure 7, below. Within this menu, select the Format Movie option, as shown in Figure 7.
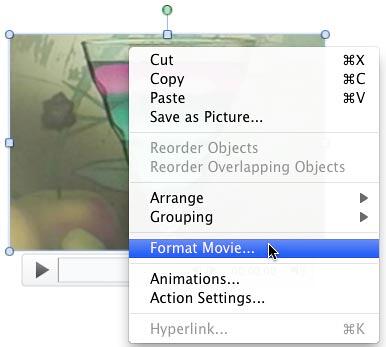
Figure 7: Format Movie option to be selected - Doing so brings up the Format Movie dialog box, as shown in Figure 8, below. Make sure you select the Crop pane in the sidebar of the dialog box.
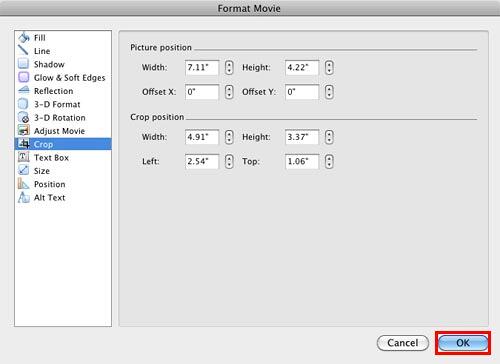
Figure 8: Crop options within the Format Movie dialog box - Here you crop portions of the movie by simply specifying the Picture position or Crop position. Play around with the crop parameters like Width, Height, Offset X, Offset Y, Left, and Top. As you change values, you will see the changes reflected on the selected movie on the slide.
- Once done with cropping the movie, click the OK button, as shown highlighted in red within Figure 8, above. Make sure to save your presentation.


